
© 2026 Pashant Khandelwal

© 2026 Pashant Khandelwal
was just looking for a way to get short URL’s for my blog, I used some extensions, some URLrewriter.NET but still not able to get this work. So I drop an e-mail to Scott Hanselman and was waiting for his response. If you look at Scott’s blog you will see that he has very simple URL for his blog posts which eventually get his posts higher ranks on search engine indexing. What I have found so far is that if you have a simple URL the search engine will crawl that page during indexing and your page is on the top of the search results or if it is not on the top then it must be at least on the first page. Remember search engine crawlers will avoid crawling pages that do not have a simple URL, like if your page has a query string it won’t be get crawled by the search engine crawler.
The URLRewriter module in BlogEngine didn’t seems to be working for Posts. I want to have simple SEO friendly URLs like http://www.midnightprogrammer.net/post/Windows-7-Logon-Screen-Changer.aspx and not http://www.midnightprogrammer.net/post/2010/05/30/Windows-7-Logon-Screen-Changer.aspx But there is no way to do this until I hook into BlogEngine.Core.dll.
Open the whole solution in Visual Studio and open Post.cs file and navigate to the RelativeLink property in Post.cs file and change with the below code:
public string RelativeLink
{
    get
    {
        string slug = Utils.RemoveIllegalCharacters(Slug) + BlogSettings.Instance.FileExtension;
        if (BlogSettings.Instance.TimeStampPostLinks)
            return Utils.RelativeWebRoot + "post/" + slug;
        return Utils.RelativeWebRoot + "post/" + slug;
    }
}
Recompile your DLL and place in bin directory in your blogengine root folder. Now you will have short URLs which do not have any date stamp. Having short URLs for all your posts doesn’t affect the posts with old URLs that most of the people have bookmarked on their blogs or on social bookmarking sites. Hope this helps.
![]()
Recently I was reading an article on some Windows 7 forums on how to change Windows Logon Background. There are manual steps which helps me to change the longon background, but its tedious if I have to do it manually everytime. So I decided to make a tool which can do it for me.
I start up a new project in Visual Studio 2010 and create a new windows application. I am not writing about how I did it, I am just giving away this tool for use. Just Browse and click Change Logon Screen and you are done.
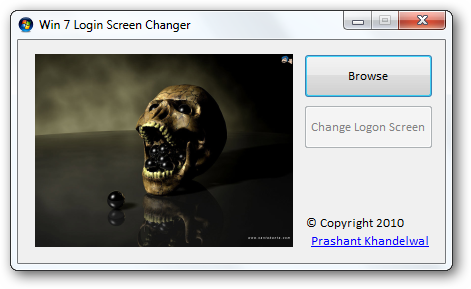
Press WIN+L to lock your computer and check your new logon screen. There is only one limitation, you cannot select an image which is larger than 256KB.
Download: Win7 LogonScreenChanger.zip (49.21 kb)
Source Code: Win7LogonScreenChanger.zip (139.44 kb)
We all know about a feature called User Account Control (UAC) which introduced with the launch of Windows Vista. By default, UAC is enabled and provides users a better and safer computing experience, but most of the users find it irritating when the UAC prompts everytime they try to run a program. Disabling UAC is not recommended at all.
With UAC enabled programmers find it difficult to access some of the locations on the local drive. Programatically you cannot write or create a file or directory in root partition, inside Program Files, System32 folder and some other locations. Recently I ran into a same problem where I have to access System32 folder, create new folders and copy files from one location on my system to this folder. With UAC disabled this is pretty easy, no security settings and no runtime errors or exceptions. Usually you cannot ask the users to disable UAC and then use the application, so therefore I made my application compatible with UAC and YES!!! you will be prompted with the confirmation box to run the application with administrator privileges. In Windows Vista and Windows 7, even if you are an administrator of your machine you do not have the complete access to resources even if you are an administrator. So in order to make your application run with full administrator rights follow the steps below. This will work the same if you run your application with “Run as Administrator” option which you see when you right-click the application.
Create a new application in Visual Studio. Right-click project and add a new item.
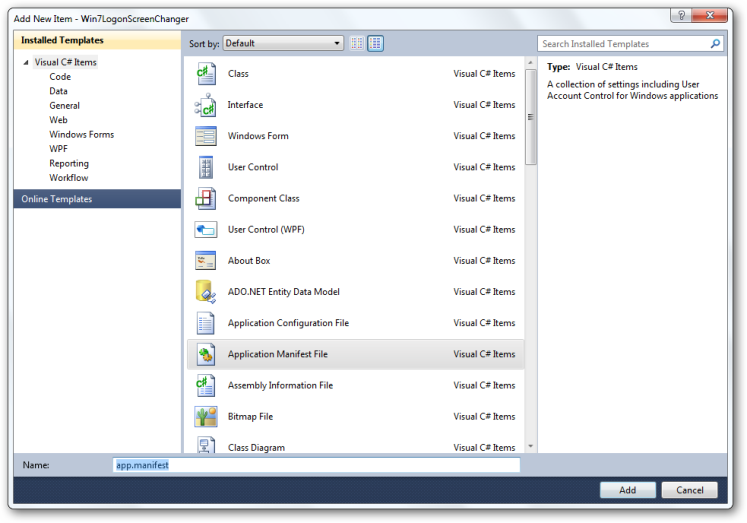
From the Add New Item box select Application Manifest File.
In the manifest file un-comment the following line:
<requestedExecutionLevel level="requireAdministrator" uiAccess="false" />

Build your applicaton….and when the build is complete you will see the security shield icon accompanying your application icon. A dialogue box appear in front of the user to run the application with full administrative privileges.
Since I have started using BlogEngine.NET I never thought of using any other open source blog engine. To me BlogEngine is the most extensible blogging platform availableat present. As a popular blogging, engine blog engine users faces a lot of spam comments. I was so totally annoyed and even after moderating comments I have to manually go and delete the comments. After some search I found an extesion from Joel Thoms. Simple and easy to use, dont even require moderation.This extension passes the commnets to Akismet spam database which then checks approves or disapprove commnets.
To get it working you need an API Key which you can get for free at http://akismet.com. Once you get an API key extract the files in App_Code/Extensions folder and jump to your Extension section under Settings.
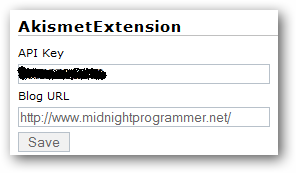
Once you save your settings you are done. NO MORE SPAM.
Download: AkismetExtension.zip (3.55 kb)
The easiest way to find out the processor architecture is to use the Environment class GetEnvironmentVariable method.
Console.WriteLine(Environment.GetEnvironmentVariable("PROCESSOR_ARCHITECTURE"));
This will print the processor architecture on the console window i.e. x86 and x64 for 32-bit and 64-bit respectively.