
© 2026 Pashant Khandelwal

© 2026 Pashant Khandelwal
Recently I was asked by one of my friend how to call a web service directly from a stored procedure. He needs to track IP addresses using a stored procedures so, I suggested him two ways to call a web service using the SQL Procedure.
I personally tried using the first way to call a web service but was not successful. Then I learnt about SQL CLR programming with Visual Studio and C# and get it done in a first go. As a good friend I create the whole project for my friend. And if your thinking that this is going to be a difficult, this is not so.
To start creating a project, open Visual Studio and create a new project.
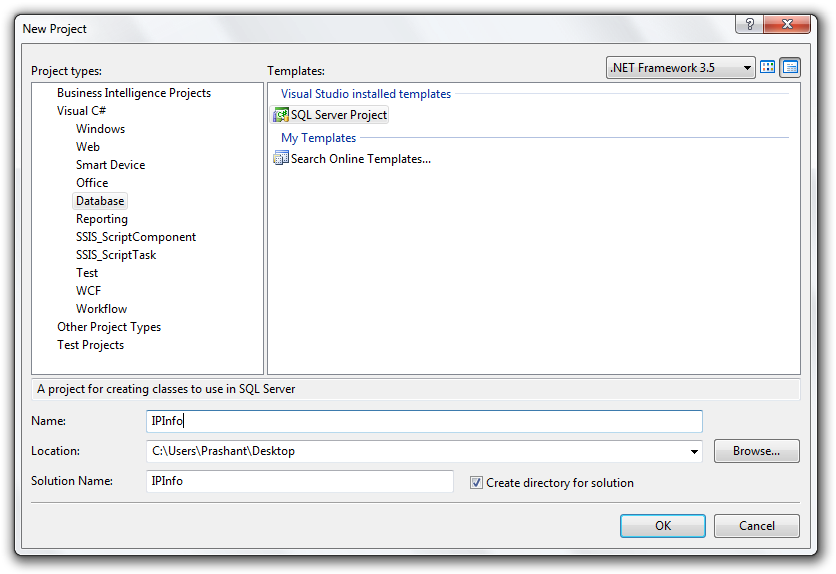
Before the project gets loaded completely, you will be asked to add database reference. Here select the database you want to build the assembly for. If you don’t want to add a database reference then just simply cancel. But if you choose the reference to add at this point then this would really be of help as this will allow you to deploy your assembly directly to the SQL Server database but if you have not then you need to write some SQL scripts.
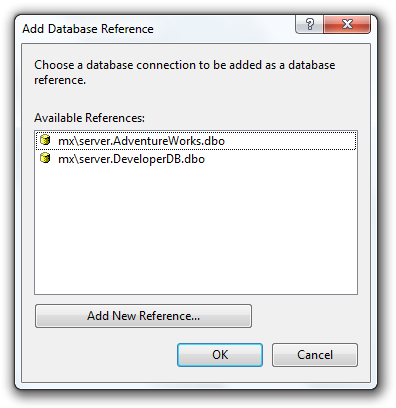
NOTE: If you have added a database reference then it doesn’t mean that your assembly is build specifically for that database you can still deploy your assembly in other database also.
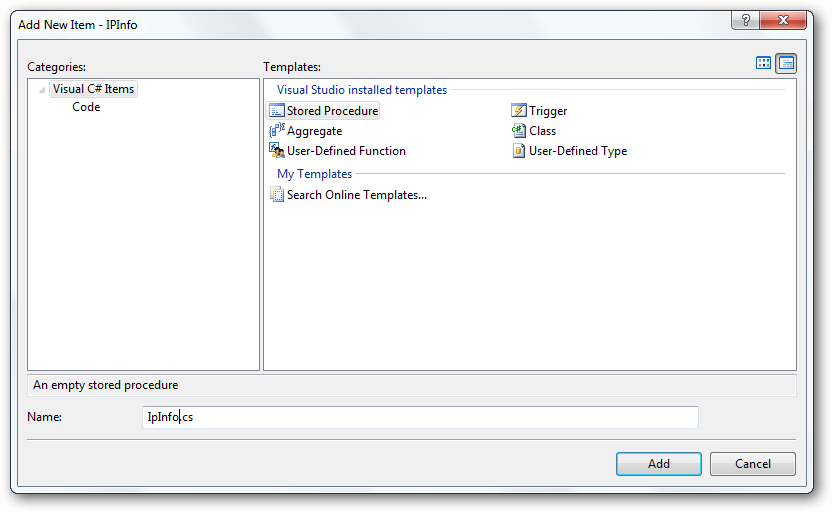
As I am creating a stored procedure, I then have to add a New Item to my project. Right-click project choose Add>Stored Procedure. Here give a name of your choice to stored procedure. In my case it is IPInfo.
Change the static method here to accept a parameter. Our parameter will be an IP address, which I have set as of string type.
public static void GetIPInfo(string IP)
{
//Do something here
}
Now the question here is from where we can the information of the IP Addresses? I do some search and found a website http://www.geobytes.com. It offers some rich information of the IP Address you want to track, so out of five sources I choose to go with geobytes.
Lets take a quick look at the code. This is not a web service as you can see from the code below, I am just making a http request and then get the response in an XML form so I can easily traverse the nodes and read/save the information I received.
string XMLResponse;
IPAddress = IP;
byte[] XMLResults;
string str = "http://www.geobytes.com/IpLocator.htm?GetLocation&template=xml.txt"
+ "&IpAddress=" + IP;
XMLResults = new WebClient().DownloadData(str.ToString());
XMLResponse = Encoding.UTF8.GetString(XMLResults);
Note the fourth line where I have built the URL. The parameter Template should always have a value to xml.txt. If you change the name, it won’t throw any error but the data received cannot be read and saved in a database table. Convert the response to string format and then read the nodes one by one using the below code.
try
        {
            XmlDocument document = new XmlDocument();
            document.LoadXml(XMLResponse);
            XmlNode documentElement = document.DocumentElement;
            if (documentElement.HasChildNodes)
            {
                for (int i = 0; i < documentElement.ChildNodes.Count; i++)
                {
                    if (documentElement.ChildNodes[i].NodeType == XmlNodeType.Element)
                    {
                        switch (documentElement.ChildNodes[i].Name)
                        {
                            case "locationcode":
                                LocationCode = documentElement.ChildNodes[i].InnerText;
                                break;

                            case "fips":
                                FIPS104 = documentElement.ChildNodes[i].InnerText;
                                break;

                            case "iso2":
                                ISO2 = documentElement.ChildNodes[i].InnerText;
                                break;

                            case "iso3":
                                ISO3 = documentElement.ChildNodes[i].InnerText;
                                break;

                            case "ison":
                                ISON = documentElement.ChildNodes[i].InnerText;
                                break;

                            case "internet":
                                Internet = documentElement.ChildNodes[i].InnerText;
                                break;

                            case "countryid":
                                CountryID = documentElement.ChildNodes[i].InnerText;
                                break;

                            case "country":
                                Country = documentElement.ChildNodes[i].InnerText;
                                break;

                            case "regionid":
                                RegionID = documentElement.ChildNodes[i].InnerText;
                                break;

                            case "region":
                                Region = documentElement.ChildNodes[i].InnerText;
                                break;

                            case "code":
                                RegionCode = documentElement.ChildNodes[i].InnerText;
                                break;

                            case "adm":
                                Admn1Code = documentElement.ChildNodes[i].InnerText;
                                break;

                            case "cityid":
                                CityID = documentElement.ChildNodes[i].InnerText;
                                break;

                            case "city":
                                City = documentElement.ChildNodes[i].InnerText;
                                break;

                            case "latitude":
                                Latitude = documentElement.ChildNodes[i].InnerText;
                                break;

                            case "longitude":
                                Longitude = documentElement.ChildNodes[i].InnerText;
                                break;

                            case "timezone":
                                TimeZone = documentElement.ChildNodes[i].InnerText;
                                break;

                            case "certainty":
                                Certainty = documentElement.ChildNodes[i].InnerText;
                                break;
                        }
                    }
                }
            }
        }
        catch (Exception) { }
Build you project and you will see a DLL file in your debug/release folder. But this will not work. You will still have to set some permission level to assembly and to SQL Server database.
Set Assembly Permissions
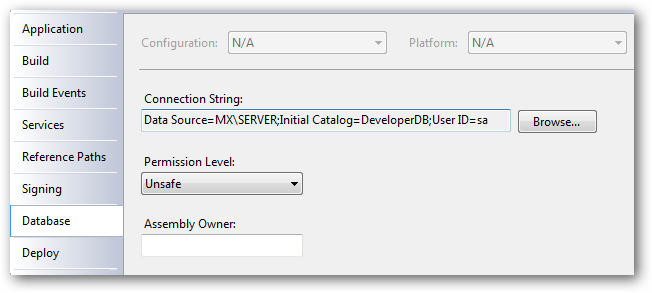
Before you build the final version of the assembly go the project properties and set the permissions as shown below.
Under Build select option for Generate Serialization Assembly to On.
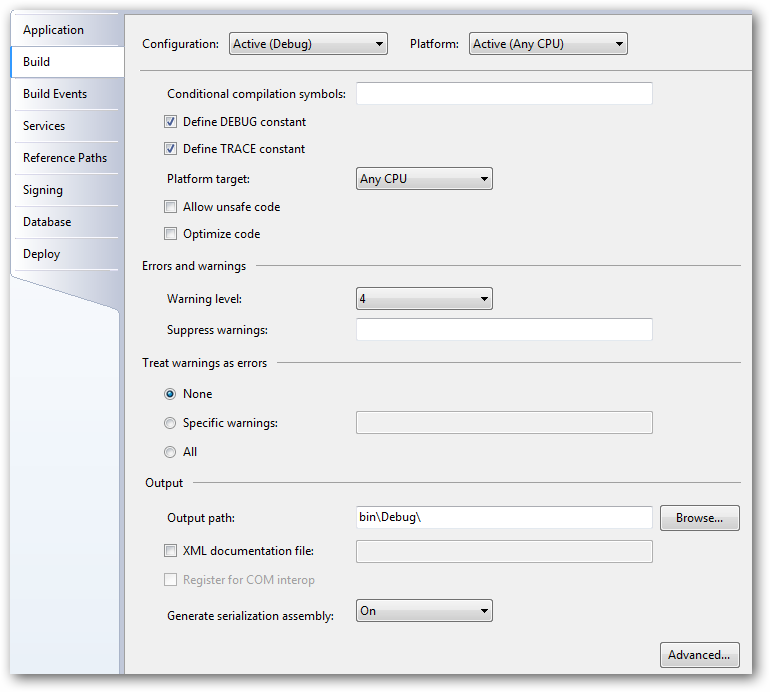
Under Database select Permission Level to Unsafe
SQL Server Permissions
If you find problems while deploying your assembly, then make sure you have CLR enabled and set the Trustworthy property for the database to ON.
You can find all the scripts in the attached solution below.
Deploying your assembly
To deploy your assembly use the below SQL command:
CREATE ASSEMBLY IPTracker from 'C:\IPInfo.dll' WITH PERMISSION_SET = EXTERNAL_ACCESS
GO
To create a stored procedure whcih in trun calls the SQL method from the deployed assembly:
CREATE PROC TrackIP(@IP as nvarchar(50))AS
-- [Assembly Name].[Class Name].[CLR function Name]
EXTERNAL NAME IPTracker.StoredProcedures.GetIPInfo
GO
And execute the procedure to get the IP information.

Download: IPInfo.zip (19.46 kb)
I am quite fascinated with Windows 7 before even I get it started using it. Actually I have just started on a fun project for my personal use which includes jump list. Why I am doing this? To navigate and get access to the application and internet addresses I need anytime. I am tired of typing addresses and navigating to the programs I frequently use. I have just started so I thought I must blog about my jump list experience with you all. You won’t believe but I am still using Visual Studio 2008 with .NETFX 3.5. Ok, Let’s talk about some Windows development. In my last post on Windows 7 development I explain how can you have Aero effects for your Windows applications. If you haven’t read my post on Aero effects in Windows Application then you should have a look at this.
Windows 7 API Code Pack comes packed up with some serious development stuff for Windows 7. If you don’t have it yet then check my post for Windows 7 Development resources.
We all know and view the new taskbar in Windows 7 and when your program got pinned in the taskbar you can simply left click to run your program or right-click to view more options associated with your program. To make it more clear I give you an example. I use Winsnap (a tool to take screenshots with dropshadows) to take screenshots and yes I use it quite frequently, so I pinned it to my taskbar.
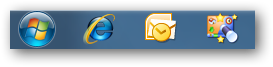
That’s the third icon from the Windows start button. When I click it normally it opens up the Winsnap application and show me the panel from where I can take and make settings for my next screenshot. but when I right-click the pinned Winsnap icon on my taskbar it show me the same basic settings which I will be using if I would have launched the application.
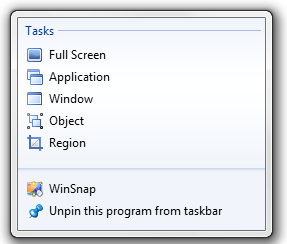
Now when I have to take screenshots with my utility I just right-click Winsnap icon pinned to my taskbar and I am done. The items that you see under the heading Tasks is having all your jump list items. It is indeed possible to have some common functions from your application to be included in the jump list or can have some external links for applications like calculator, notepad, paint etc. If you don’t know (just in case) if you can pin something on the taskbar then you can also unpin it.
I hope now I am quite clear with jump list in Windows 7. So lets gets our hands on developing an application with jump list.
Getting Started
Start it up creating a simple windows forms application with a name of your choice. As we are delaing with Windows 7 API we need to have it added in our project references. Files you need to add to references are:
You can have these API libraries once you donwlod the API code pack. After you are done adding the required references, you can switch to the code window and do the rest of the work.
Creating Jump List
Start up with adding the namespace:
using Microsoft.WindowsAPICodePack.Taskbar;
using Microsoft.WindowsAPICodePack.Shell;
Create a jump list by calling CreateJumpList method, which is a part of Microsoft.WindowsAPICodePack.Taskbar.JumpList namespace.
JumpList list = JumpList.CreateJumpList();
If you want to show the most recent files you have used, then you can do that by using this line of code:
list.KnownCategoryToDisplay = JumpListKnownCategoryType.Recent;
JumpListKnownCategoryType is an enumeration which will let you accomplish this. You can also have some other available options.
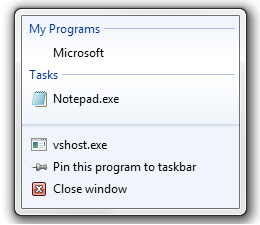
To add some commonly used applications to the jump list then you can have it with in less than a jiffy. Create a JumpListLink class object and associate it with the JumpList class object. I use notepad a lot to note down my work, now I want to add to the jump list and I code it this way:
JumpList list = JumpList.CreateJumpList();
string SysPath = System.IO.Path.Combine(Environment.GetFolderPath(Environment.SpecialFolder.System),
"notepad.exe");
JumpListLink JLink = new JumpListLink(SysPath,"Notepad.exe");
list.AddUserTasks(JLink);
list.Refresh();
One line of code can be used to include icon for your program. The IconReference property will let you add the icon the jump list item. Set the default value to ‘0’, if you want to use the default icon for the application.
JumpList list = JumpList.CreateJumpList();
string SysPath = System.IO.Path.Combine(Environment.GetFolderPath(Environment.SpecialFolder.System),
"notepad.exe");
JumpListLink JLink = new JumpListLink(SysPath,"Notepad.exe");
JLink.IconReference = new IconReference(SysPath, 0);
list.AddUserTasks(JLink);
Categorizing programs is bit easy this way. I can categorize web URLs, my favourites programs and some other places/links on my computer. There is lot more you can do with Jump Lists. I hope the explaination above can let you create your own applications with jump lists.
If you want your website or blog content to be noticed or searched by Microsoft Bing search engine, then you can do this to get your work noticed. But beofre you can do this you need a Live ID a.k.a. Hotmail ID.
Go to http://www.bing.com/webmaster/WebmasterAddSitesPage.aspx
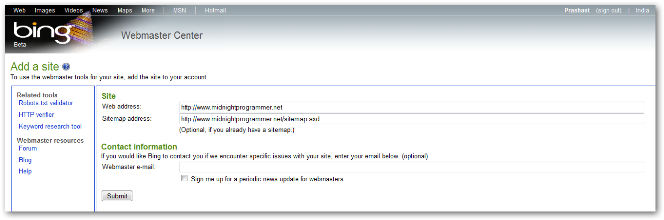
Fill up your web address and sitemap address. Though the sitemap address is optional, but I recommened to give a sitemap as it help the crawlers to crawl all the pages on your website. You can also sign up for a webmaster’s e-mail, just in case if Bing encouters somes issues with your website. When you are done click the submit button and you are prompted with a confirmation with an authentication code.
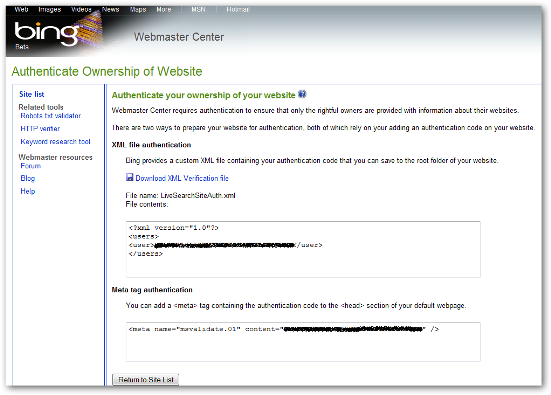
Now when you are done it is time for authentication. When you submit a website to Bing search it asks for an authentication, just to ensure that you are the owner and so provides you with an authentication key which is used to autheticate the ownership in two different ways.
And this is it, your website is submitted on the Bing. Now to check it back click the Return to Site List button to view the site you have submitted. And yes you get it right you can submit a number of sites to Bing. Below is what a Site List look like:
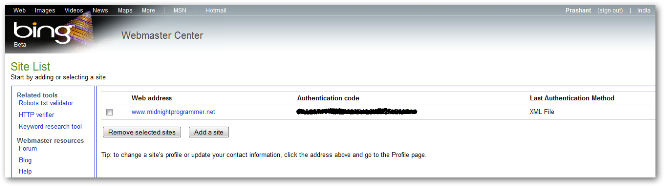
lick on the Web Address, and you will get a detailed list of your website, if Bing crawlers didn’t found any problems with your website.
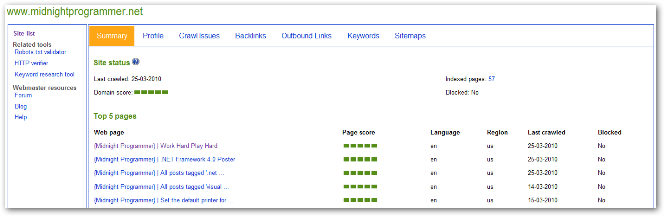
When you get the meta tag in your head section of your website default page or have placed the XML file in the root folder as metioned in the above step, you now need to take a nap for a while and give the search engine crawler a bit of time to crawl you webpage. I actually don’t know when to check the site list and other information and whether the crawlers have crawl my website or not, by the way I have checked my website status on Bing after 24 hrs. So after 24 hrs you can also check and this is what you will see. You can see the last crawl date and other information of your website.
So don’t wait….leave no opportunity to draw more traffic to your website or blog.
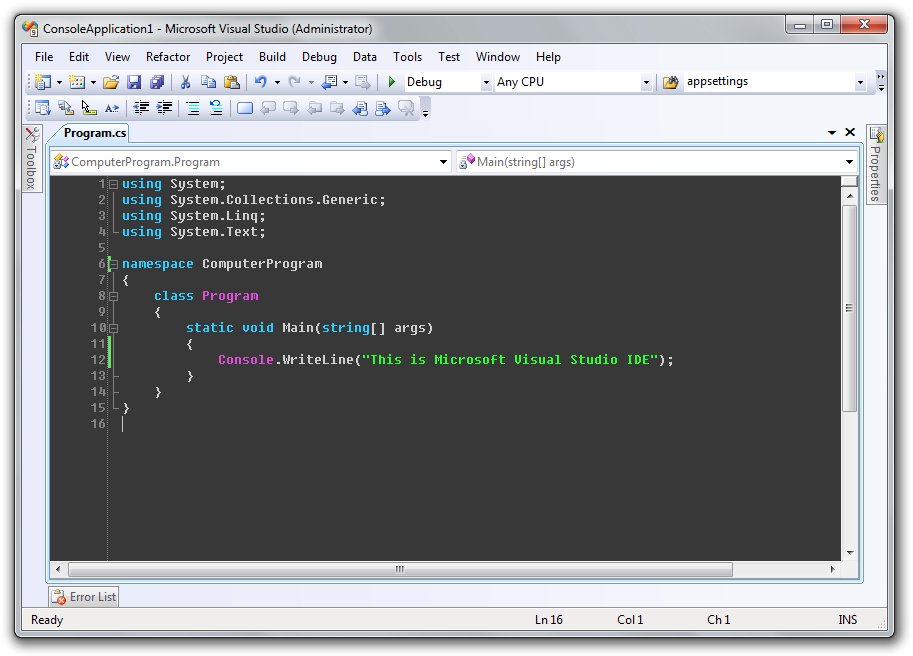
I just Got bored looking at the same code editor in Visual Studio. Same old white background and same syntax colour highlighting. So I give it a go and jump to Visual Studio options and start playing around with the option available to change the look and feel of the code editor. After trying for a while and working around with some customizations, I gave a second go and do a quick bing search in a hope that I will find some theme for my Visual Studio and Voila! I got one, not a theme but a tool indeed which allows me to customize theme as I want and the name is Visual Studio Theme Generator. It’s an online free tool with some simple controls on the page which helps you in customizing your code editor by changing the main colour, background colour, foreground colour and also set he contrast. The tool also gives you the option to choose from a variety of colours. You can see the screenshot of this online tool below.

Make some customizations and click the Refresh button on the top right corner of the page to reflect the changes. Once you are finish with the customizations you can then hit the Create button to save you Visual Studio theme settings, save it to your local disk and import it using Import/Export settings wizard in Visual Studio.
I have downloaded the default theme from the page and here is how my Visual Studio code editor looks like now:
NOTE: You can read the detailed step on the website to import the settings. But before you can import the settings it is recommended that you first take the backup of your current/original Visual Studio settings. This tool is a work of javascript so before you hit it make sure you have javascript enabled for you browser.
My previous two posts on using Jquery for calling ASP.NET web service takes you to the basics of calling a web service using Jquery AJAX. In this last post of the series I will show hot to fetch data from the SQL Server through a web service.
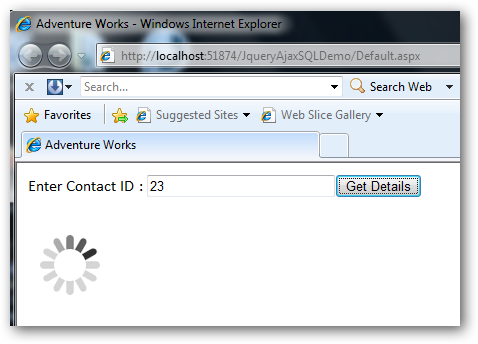
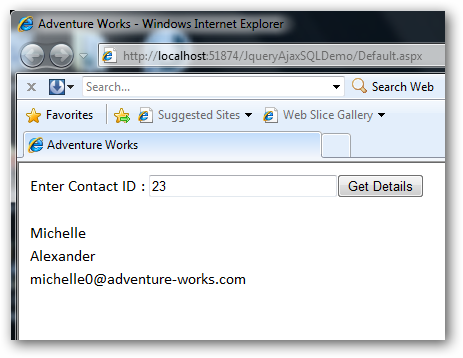
In this example I am going to show on how we can fetch data from SQL Server. I am using pretty well known Adventure Works database for this example. I am using Person.Contact table for this example. I will show on how to fetch data i.e. first name, last name and e-mail address on the basis of the ContactID. So first, as usual create a normal ASP.NET project and add the required files. Create a new web service, I have named my web service “AdvService.asmx”. You can name your web service as you like. This time we are fetching data from the SQL Server by passing a parameter to the web service method. I am using the very same, basic way of fetching record from the SQL Server. You can also use LINQ here to fetch data.
I have used a delay of few seconds to how the animation, rest in the code is self explanatory. Just passing a parameter and fetching the details of the person from the Adventure Works database.Below are the screenshots for the sample application.
Download: JqueryAjaxSQLDemo.zip (97.86 kb)