© 2026 Pashant Khandelwal

© 2026 Pashant Khandelwal
Working with Google Drive API is fun. The documentation is good and will let you get started with the API pretty quickly. I have my whole complete family album on OneDrive, but the API is still a bit hard to use as compared to Google Drive API or maybe it is just for me. But while playing around with Drive API I ended up creating a small razor based web page application which will allow you to show your folder as an online web album. I have the source code at Github.
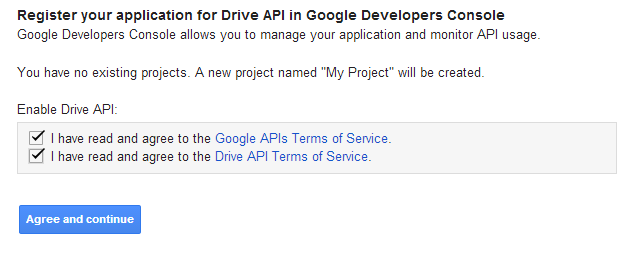
To get started register your application on the Google Developer Console. Here is a complete guide on how to use the Google APIs.
Copy the API keys and save it on the notepad. The basic usage example on the Google Drive API reference page uses a file called client_secrets.json which actually holds the API key. You can find this file in the bin folder.
{
  "installed": {
    "client_id": "524339914714.apps.googleusercontent.com",
    "client_secret": "_Lq8D_Ai-T2IbhU8m2zXlQa"
  }
}
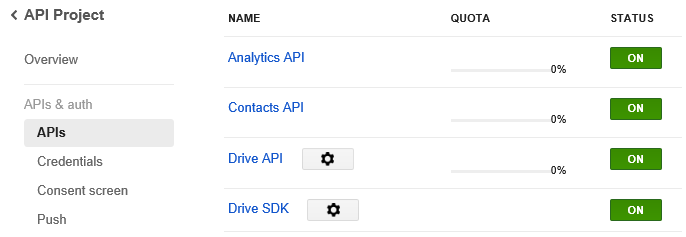
You also have to enable the Drive API before you start using it.
I created a wrapper around the Google Drive API so I can use it in my other projects. Here is the complete code of my GoogleDrive class.
using System;
using System.Collections.Generic;
using System.Web;
using Google;
using Google.Apis.Auth.OAuth2;
using Google.Apis.Download;
using Google.Apis.Drive.v2;
using Google.Apis.Drive.v2.Data;
using Google.Apis.Logging;
using Google.Apis.Services;
using System.Threading.Tasks;
using System.Threading;
//using Google.Apis.Upload;

public class GoogleDrive
{
    DriveService service = null;
    public GoogleDrive()
    {
        Run().Wait();
    }


    private File GetFileByID(string fileID, DriveService service)
    {
        File file = service.Files.Get(fileID).Execute();
        if (file.ExplicitlyTrashed == null)
            return file;
        return null;
    }

    public string GetFolderID(string FolderName)
    {
        FilesResource.ListRequest request = service.Files.List();
        request.Q = "title = '" + FolderName + "'";
        FileList files = request.Execute();
        return files.Items[0].Id;
    }
    public List<File> ListFolderContent(string FolderID)
    {
        ChildrenResource.ListRequest request = service.Children.List(FolderID);
        List<File> files = new List<File>();
        //request.Q = "mimeType = 'image/jpeg'";

        request.Q = "'" + FolderID + "' in parents";

        do
        {
            try
            {
                ChildList children = request.Execute();

                foreach (ChildReference child in children.Items)
                {
                    files.Add(GetFileByID(child.Id, service));
                }

                request.PageToken = children.NextPageToken;

            }
            catch (Exception e)
            {
                request.PageToken = null;
            }
        } while (!String.IsNullOrEmpty(request.PageToken));
        return files;
    }

    public List<File> ListRootFileFolders()
    {
        List<File> result = new List<File>();
        FilesResource.ListRequest request = service.Files.List();
        do
        {
            try
            {
                FileList files = request.Execute();

                result.AddRange(files.Items);
                request.PageToken = files.NextPageToken;
            }
            catch (Exception e)
            {
                request.PageToken = null;
            }
        } while (!String.IsNullOrEmpty(request.PageToken));
        return result;
    }

    public byte[] DownloadFile(string fileID)
    {
        File file = service.Files.Get(fileID).Execute();
        var bytes = service.HttpClient.GetByteArrayAsync(file.DownloadUrl);
        return  bytes.Result;
    }


    private async Task Run()
    {
        try
        {
            GoogleWebAuthorizationBroker.Folder = "Files";
            UserCredential credential;
            using (var stream = new System.IO.FileStream("client_secrets.json",
                System.IO.FileMode.Open, System.IO.FileAccess.Read))
            {
                credential = await GoogleWebAuthorizationBroker.AuthorizeAsync(
                    GoogleClientSecrets.Load(stream).Secrets, DriveConstants.Scopes, "user", CancellationToken.None);
            }

            var drvService = new DriveService(new BaseClientService.Initializer()
            {
                HttpClientInitializer = credential,
                ApplicationName = "Drive API Sample",

            });

            if (drvService != null)
            {
                service = drvService;
            }
        }
        catch { }
    }
}
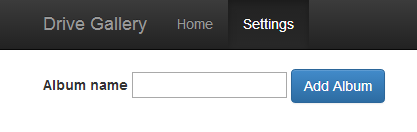
The Storage class uses Biggy for the document storage. You have to manually add the names of the folder (considered as albums) on settings page. This will get added/appended in settings.json file in the Data folder which is in the web root of DriveGallery. Here is my settings file.
{"AlbumName":"Atlassian"}
{"AlbumName":"DivX"}
{"AlbumName":"Envato"}
{"AlbumName":"Disqus"}
Settings page from where I can add the names of folders/albums. No view and delete options as of now, but I will soon add it.
The added albums will be listed on the main/default page. The user will then have to click the name of the album to view the contents which should only images. At the moment there is no check which prevents it to show other files rather than only image files.
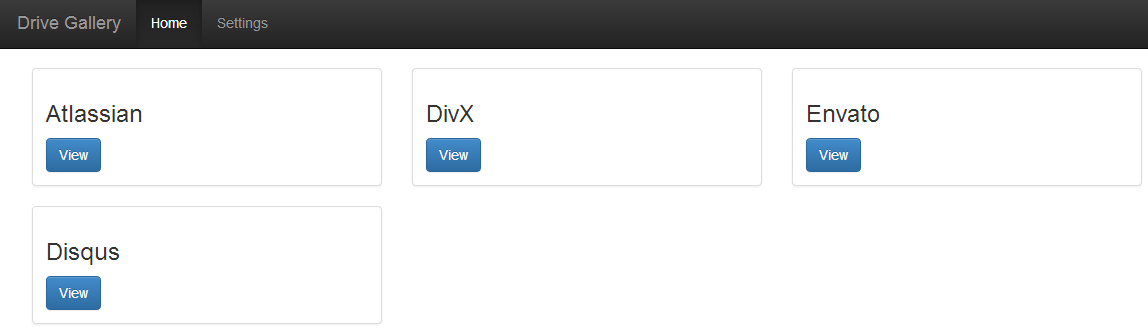
Google Drive is slow when it comes to handle high amount of data. Google Drive storage is not like Azure or Amazon storage. It’s different and will not get you large results in appropriate time. If you want to use Drive Gallery make sure that you don’t use more than 25-50 images in a folder. Querying 25-50 files in a single go will be long but not more than if you have more than 50. Better option is to break your folder in parts like volume I & II or Part 1 or 2.
I will try to make it look more attractive but for the moment it solves the purpose for me. Click on the View button to view the album. The View page accepts a query string name, which has the name of the folder/album. Google Drive API does not understand the name of the folder, so I have to get the folder id from the name. I will use the GetFolderID method of the GoogleDrive class which gives me the folder id. The received folder id is then passed to ListFolderContent method which will list all the files in the folder.
Please note that, for the moment there is no check to retrieve only images from the folder. GoogleDrive.cs class is a generic version of the class I am using in my other projects. You just need to be sure that you have only images in the folder and not any other file.
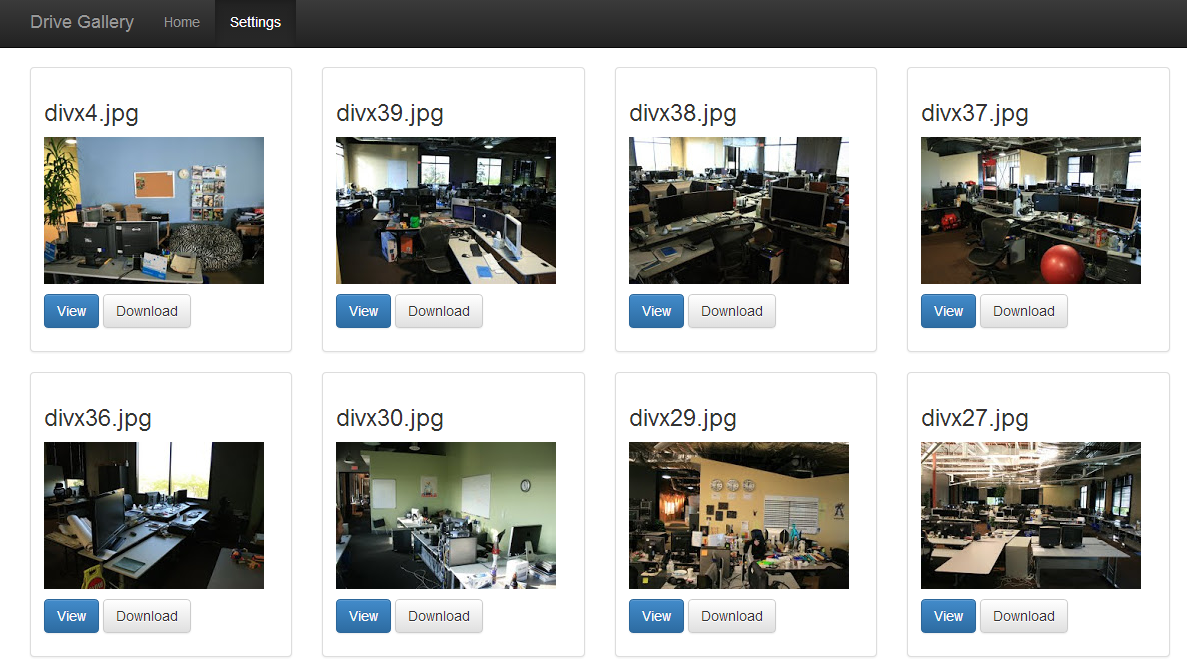
Click the View button to view the full size image in the browser else click the Download button to download it directly. Basically Drive API does not have any property which holds the value of the URL to view the image online. So I tweaked the thumbnail URL in the ViewURL property so I can view the images online without having to download it.
public class Albums
{
    public string Id { get; set; }
    public string Title { get; set; }
    public string AlbumName { get; set; }
    public string DownloadURL { get; set; }
    public string ViewURL
    {
        get
        {
            return ThumbnailLink.Replace("=s220", "=s4000");
        }
    }
    public string ThumbnailLink { get; set; }
}
Taking the ThumbnailLink property and replace the =s220 to =s4000 does the trick.
Note: The URLs are not permanent, it will change when the request expires.
Properties of the Album class:
Id: File/Image id.Tilte: Title of the image/file.AlbumName: Name of the album/folder.DownloadURL: Download URL of the image/file. Original Drive API property name: DownloadUrl.ViewURL: URL which allows user to view the image in the browser.ThumbnailLink: URL of the thumbnail image. Original Drive API property name: ThumbnailLink.The duration of the operation depends on the amount of images you have in your folder. The lesser the number of images the fast the query will get executed. Here just for fun I have used Biggy JSON store to save the content details of the folder. If you want to remove it from your implementation, please do so. You may have to change some functions in order to get all other things working fine.
You can download the complete source code from Github. I am still working on it to make it more flexible and good looking. As I am not a designer and I seriously lack when it comes to web designs. Thanks to Twitter bootstrap to make it look a bit good.
While working with a small web based project many developers will take advantage of web.config and XML files to read settings for the application. Using web.config is a good way but you cannot change the settings from within the application and when done manually it causes the website to restart. XML is good but many of us has a problem when it comes to update the details in XML. Biggy is an awesome library developed by Rob Conery to work with document storage. It does a lot well more than you can think of if you are not following the project closely on Github. For now I am just going to show you how you can use Biggy to save your application data in JSON based document storage.
The library is not available on NuGet, so you have to download or fork the whole solution from Github and then build it. Create a new MVC application and add the reference of the Biggy assemblies you just build.
Remove Newtonsoft.Json assembly that is added in your project by default when it is created by Visual Studio. The version of assembly seems to be incompatible with Biggy. Instead use the one which accompanies Biggy.
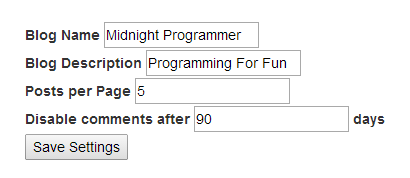
Add a new model in your application and name it settings. The settings may depend on your application, as I am using it for my blog I have settings like blog name, blog description, posts per page and disable comments after ‘x’ days.
public class Settings
{
    public string BlogName { get; set; }
    public string BlogDescription { get; set; }
    public string PostsPerPage { get; set; }
    public string CommentDays { get; set; }
}
I am manually building my view but you can use scaffolding if you wish to save your time. On submit of the form, the details will be sent to the server where my controller method will save the settings in the JSON file. Here is my view and controller code.
@model BiggyJSONDataStore.Models.Settings
@{
    ViewBag.Title = "Settings Page";
   }

<div class="row">
    @using (Html.BeginForm("Settings", "Home", FormMethod.Post))
    {
        <label>Blog Name</label>
        @Html.TextBoxFor(m => m.BlogName, new { @id = "blogname" })
        <br />
        <label>Blog Description</label>
        @Html.TextBoxFor(m => m.BlogDescription, new { @id = "blogdesc" })
        <br />
        <label>Posts per Page</label>
        @Html.TextBoxFor(m => m.PostsPerPage, new { @id = "postsperpage" })
        <br />
        <label>Disable comments after</label>
        @Html.TextBoxFor(m => m.CommentDays, new { @id = "commentdays" })
        <label>days</label><br />
        <input id="btnSave" type="submit" value="Save Settings" />
    }
</div>
When the first time the page is loaded I want to check if there are settings in the file or not. If settings are there then render my view with settings. So the default GET view will look like this.
IBiggyStore<Settings> settingStore = new JsonStore<Settings>(dbPath: HttpRuntime.AppDomainAppPath);
try
{
    var data = settingStore.Load().Single();
    return View(data);
}
catch { }

return View();
The settingStore object is being created and creates a new file in the Data folder in the application root. the dbPath parameter specifies where the file (JSON file in this case) is saved, which is the web root. The Load() method of the settingStore will load all the data in the JSON file. In this case I have only single set of setting so I will use the Single() method to get the single setting record and not IEnumerable<Settings>.
IBiggyStore<Settings> settingStore = new JsonStore<Settings>(dbPath: HttpRuntime.AppDomainAppPath);

var store = new BiggyList<Settings>(settingStore);

var newSettings = new Settings();

newSettings.BlogName = setting.BlogName;
newSettings.BlogDescription = setting.BlogDescription;
newSettings.PostsPerPage = setting.PostsPerPage;
newSettings.CommentDays = setting.CommentDays;

store.Add(newSettings);
store.Update(setting);

return View();
The above code will add a new settings to the JSON file.
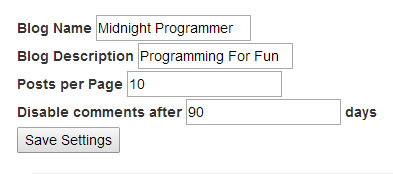
{"BlogName":"Midnight Programmer","BlogDescription":"Programming For Fun","PostsPerPage":"10","CommentDays":"90"}
At this point if you keep pressing save button by entering different values a new entry will be added to the JSON file. To avoid this you have to update the details instead of adding it over and over again in the JSON file.
IBiggyStore<Settings> settingStore = new JsonStore<Settings>(dbPath: HttpRuntime.AppDomainAppPath);

var store = new BiggyList<Settings>(settingStore);

var newSettings = new Settings();

Settings data = null;
try
{
    data = settingStore.Load().Single();
}
catch { }


if (data != null)
{
    data.BlogName = setting.BlogName;
    data.BlogDescription = setting.BlogDescription;
    data.PostsPerPage = setting.PostsPerPage;
    data.CommentDays = setting.CommentDays;
    store.Update(data);
}
else
{
    newSettings.BlogName = setting.BlogName;
    newSettings.BlogDescription = setting.BlogDescription;
    newSettings.PostsPerPage = setting.PostsPerPage;
    newSettings.CommentDays = setting.CommentDays;
    store.Add(newSettings);
    store.Update(setting);
}

return View();
As you can see that the store object Add method is not called but only the Update method is called in case if the data object is not null.
If you plan to save multiple records in the file, then make sure you use identifier in order to get the required details.
I like Wordpress but not as much as I like BlogEngine.NET. I have to move to Wordpress because of a very serious issue in BlogEngine.NET. I am on a shared hosting and they are very peculiar about the memory/CPU usage of a site. So, The problem I faced was that if I use SQL Server CE as your data store than it will increase the disk usage time which in turn shuts down my site application pool and cause 503 service unavailable error. This was very annoying and to keep up my blog up and running I have to suddenly switch to Wordpress before I can figure out the exact cause of this problem.
I still have no issue with Wordpress, but I can’t enhance it the way I can do it with BlogEngine.NET because it’s in PHP. I decided to switch to BlogEngine once but then I thought it would be good to write a simple blog engine from scratch. So I fired up Visual Studio and start a new MVC web project. I worked on previous versions of MVC and I was aware of things which can be done more quickly than the traditional way. Writing a blog engine from scratch was a great way of learning a new technology. I am very much familiar with MVC so I opted to try some new stuff this time.
There is a lot of work pending but user facing part of my blog is completely ready by the end of this week or may be earlier than that. I want to thank K. Scott Allen for his valuable tips for creating a custom blog engine.
If you are using Google chat on your browser you can see a notification pop-up when a new chat message arrives. I don’t use Google chat or GTalk a lot for communication so I am not very well versed about its over all functionality and coolness. But one thing that always got my attention in the past was the notification that I get on my desktop from Google. This is a very cool feature and my colleagues find it a very important feature of chat as it get their attention immediately.
HTML5 now gives us the ability to the developers to show Google like desktop notifications with a very little effort. Here is how you can accomplish this for one of your web applications. I am going to use Notifications API to show desktop notifications.
<!DOCTYPE html>
<html xmlns="http://www.w3.org/1999/xhtml">
<head>
    <title>HTML5 Notifications</title>
</head>
<body>
    <input type="text" id="txt" />
    <input type="button"  value="Show as Notification"/>
    <input type="button" value="Show Random Notification"/>
    <input type="button" value="Show Random Notification (with icons)"/>
</body>
</html>
This is the plain HTML with controls in place. I have a text box and three buttons which will call a JavaScript function to show the notification on the desktop. The first button will show the text entered by the user as a notification. The second button will show a random message as a notification and a third button will show the same random message but this time with an icon. To see it in action lets add the JavaScript code.
<script>
function ShowTextAsNotification() {
    ShowNotification("Custom Notification", document.getElementById("txt").value);
}

function GetRandomText(ico) {
    var Quotes = ["Any fool can write code that a computer can understand. Good programmers write code that humans can understand.",
                  "Copy and paste is a design error.",
                  "I had a life once. Now I have a computer.",
                  "Before software can be reusable it first has to be usable.",
                  "Software sucks because users demand it to."];

    if (ico == false) {
        ShowNotification("Famous Quotes", Quotes[Math.floor(Math.random() * (1 - 5 + 1) + 5)]);
    }
    else {
        ShowNotificationsWithIcons("Famous Quotes", Quotes[Math.floor(Math.random() * (1 - 5 + 1) + 5)]);
    }
}
function ShowNotification(title, body) {
    Notification.requestPermission(function (perm) {
        if (perm == "granted") {
            var notification = new Notification(title, { body: body });
            //Un-comment the below line if you want to close the notification after a certain period
            //It not working on Chrome...I don't know why!!
            //notification.onshow = function () {
            //    setTimeout(notification.close, 5000)
            //}
        }
    });
}
function ShowNotificationsWithIcons(title, body) {
    Notification.requestPermission(function (perm) {
        if (perm == "granted") {
            var notification = new Notification(title, { icon: "Bomber.ico", body: body });
        }
    });
}
</script>
The is pretty self-explanatory. The Notification API uses the Notification.requestPermission function to get the user consent before showing the notification on the desktop. The API documentation states that there are 3 permissions:
On line 22 in the above code, you can see that the API checks for the request permission from the user. When it does that the user is prompted to either allow or deny the access of the API. You will be only asked once for this permission.

The perm object is then checked for the permission, if “granted” then show the desktop notification to the user else there will be no notifications for the user. After the permission is granted from the user, initializes an instance of a Notification with title and body. You can say that title is the heading of the desktop notification and body is the text of the notification. You can also have an icon for the notification by setting the icon property.
Run the sample and enter a text in the text box and click on the button labeled “Show as Notification”. As soon as you click the button, if you are running it for the very first time then you will be prompted by the browser to allow or deny the access or it will show the notification at the bottom right corner of your desktop.
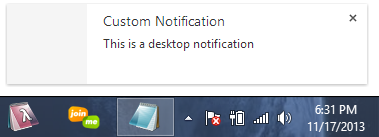
In the above notification, Custom Notification is the title and “This is a desktop notification“ is the body.
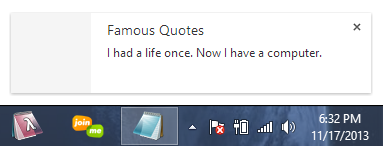
Click the second button labeled “Show Random Notification”. Clicking this button will generate the same desktop notification but every time you click it it will generate a random message from an array and show it as a notification.
If you click the second button multiple times you will 3 notification at a time. The new notifications will be shown at the top of the current notification like this.
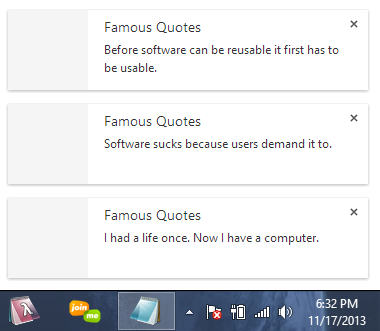
In case you click the button more than 3 times, you still be able to see these notifications until you close the one which are already visible. Once you close any of the notification the one in the queue will become visible.
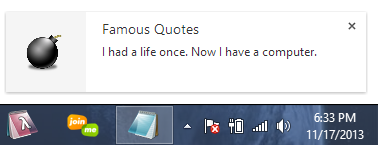
The icon can be displayed in the left portion of these notifications. Click the third button to see it in action. It will display the same random quotes but this time with an icon.
The only problem I am facing implementing the Notifications API is that I cannot close these notifications automatically after the set time. You can try using it on your browser by un-commenting the lines in the ShowNotification() function.