

Visual Studio has made integrating of Azure Active Directory authentication in web applications very simple. If you are creating the application and want to integrate the AD authentication then it is a pretty easy task given that you have an Active Directory in Azure. But what if you have an application and it is out there running and now you want to change the authentication medium of your application so you can have better control and security of your web application. I already have an application and I want to integrate Azure AD authentication, hence I will not be able to change the authentication just like that. I have to manually make the changes to do so. So here it is what I have done to integrate Azure Active Directory in my ASP.NET Core web application.
Step 1: Create Azure Active Directory
When provisioning a new Azure Active Directory you have to go to the old portal manage.windowsazure.com. At the time of writing this blog post, the product team is still in a process of migrating the complete AD feature sets from the old portal to the new portal. Therefore, to create a new AD in Azure, click the Active Directory in the left pane and you will be able to see all the active directories. In the below screen shot you can see that I am a part of Microsoft Active Directory as a User.
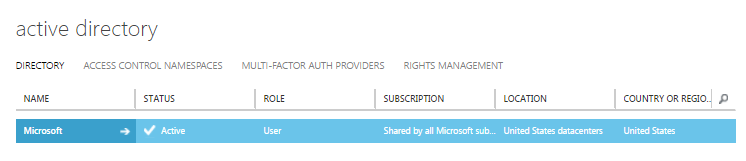
If you are planning to use any of the current Active Directory out of the one listed, you can click on it and register your application and users. Note that you have to be a Global Administrator to do that. If you want to create a new Active Directory, then click the NEW button at the bottom left corner to create a new Active Directory.
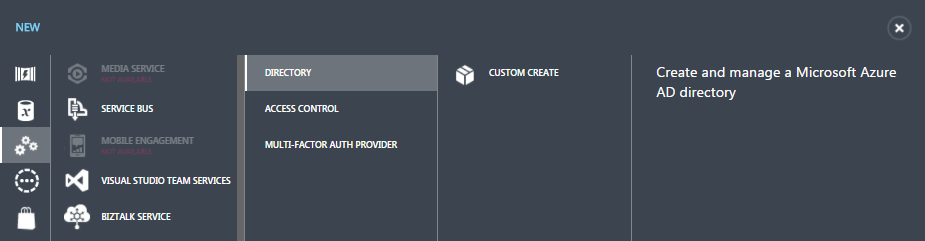
Click on CUSTOM CREATE and a new dialog box will appear in front of you to enter the name of your Active Directory.
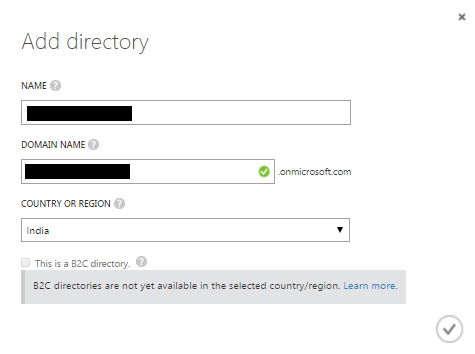
The green check box in the DOMAIN NAME denotes that the name you have chosen for your active directory is available. When done click the tick button or icon at the bottom right corner of the dialog box to create a new active directory.
Step 2: Add a user
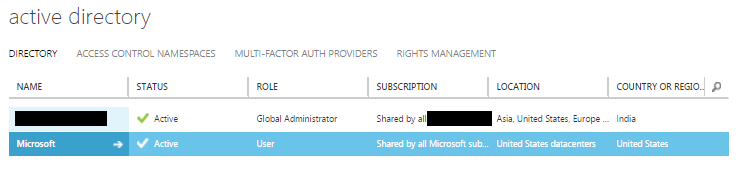
After the creation of active directory is successfully completed, you can see the new created active directory in the list. Notice the ROLE as Global Administrator. Click on the active directory name to view the details. First, I am going to add a new user to the directory. When inside the active directory, click the USERS which in the top of the page.

I can see a default user added to my new created active directory here which is my official Microsoft user. I cannot delete this user neither I can change much of the roles and other information of this user because it something which is being managed by Microsoft. So to add a new user, click the ADD USER button at the bottom of the page. This will open up a dialog box which allows you to add or create a new user to the active directory. In my case I am going to add a normal user not an administrator, I will keep the the default prompts. The whole process of adding a new user will take 3 steps to complete.
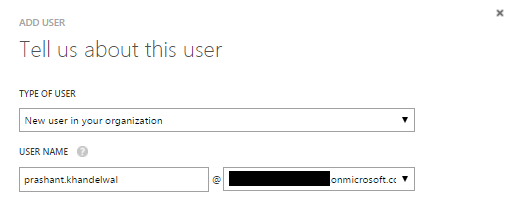
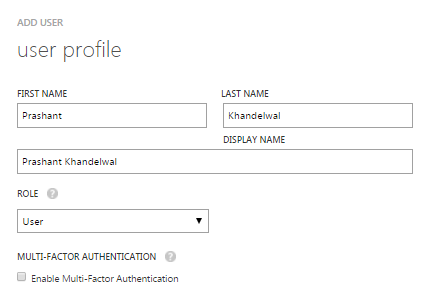
In the next screen enter the details about the user. I want to add this user as a normal user hence I am selecting User as a ROLE.
In the last step, click the create button to add a new user and generate a temporary password for the new user.
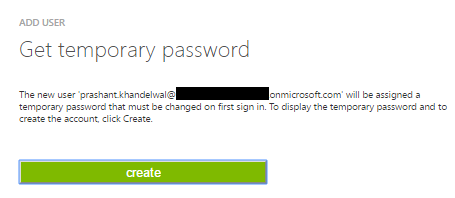
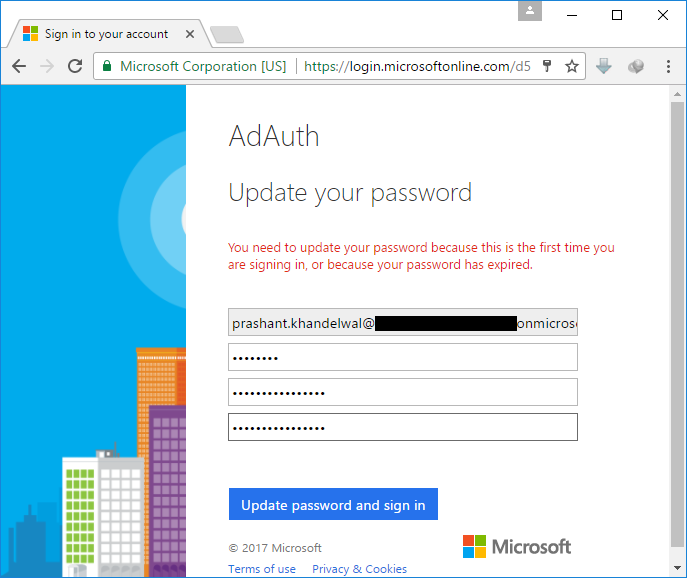
Make a note of this password somewhere as you will need it to log in to the account. After the first login, user is prompt to change the password.
Step 3: Add an application to the Active Directory
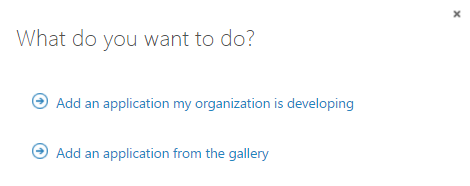
To add a new application, click on the APPLICATION link. Click the ADD button at the bottom of the page to add a new application and then click Add an application my organization is developing.
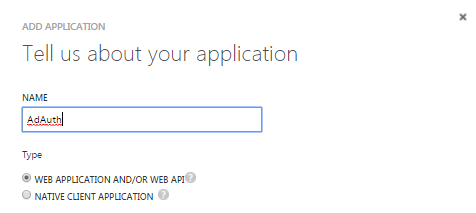
In the next step enter the name of the application and select the type of application you are building. In my case, it is a web application.
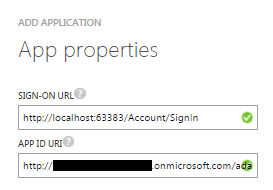
In the next step, you add a sign-in URL and app ID URI. The app ID URI I have added is in this format: http://<directoryname>.onmicrosoft.com/adauth. Replace the directoryname with your directory name. The adauth is the name of my application.
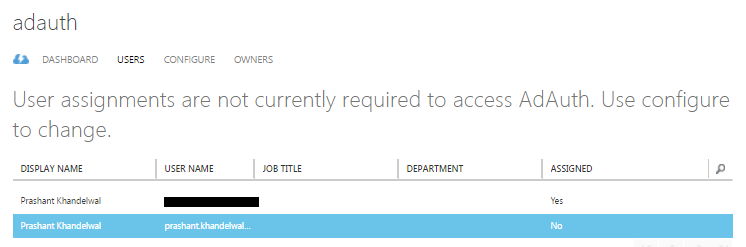
Once the adding of application is successful, click the USERS link. I can see the new user I have created in the user lists but it is not being assigned to the application yet. To do that, click the ASSIGN button at the bottom of the page and click YES. The ASSIGNED status will be changed from No to Yes.
Step 4: Setting up the web application
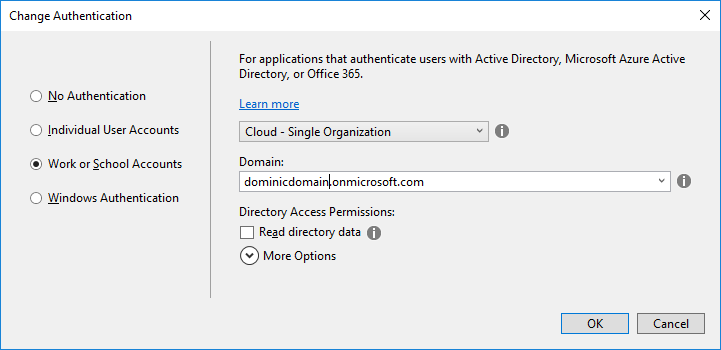
The easy way to set the application up for AD authentication is to create a new “demo” application and select Change Authentication from the new project dialog box. Select Work or School Accounts and enter the domain name. This will create a new application with all the things set up for your domain. The reason I said “demo” application because I want to just get the changes that Visual Studio does it for me when I select the AD authentication. This application will now act like a sample application from where I can take the implementation and add it to my existing application.
Here are the changes I have made to my existing application. As of now my existing application does not have user authentication and now as I want to implement, I will add the account controller and two views which will handle the authentication. In my case this is the account controller, you can name the controller as per your choice. Add two new views in the Views directory for your controller. Call them AccessDenied.cshtml and SignedOut.cshtml respectively.
Note that all the changes I am making to my existing application are exactly the same as the sample application.
Code for AccessDenied.cshtml view.
@{
   ViewData["Title"] = "Access Denied";
}

<header>
    <h1 class="text-danger">Access Denied.</h1>
    <p class="text-danger">You do not have access to this resource.</p>
</header>
Code for SignedOut.cshtml view.
@{
   ViewData["Title"] = "Sign Out";
}
<h2>@ViewData["Title"].</h2>
<p class="text-success">You have successfully signed out.</p>
Add below NuGet packages for AD authentication support in the application.
Install-Package Microsoft.AspNetCore.Authentication
Install-Package Microsoft.AspNetCore.Authentication.Cookies
Install-Package Microsoft.AspNetCore.Authentication.OpenIdConnect
In the .NET Core project, you will also see a new file called appsettings.json. Add the below configuration to it. Your configuration will than mine.
"Authentication": {
  "AzureAd": {
    "ClientId": "0d9h56ba-ccfd-42f2-9a75-64d8e96756e6",
    "AadInstance": "https://login.microsoftonline.com/",
    "CallbackPath": "/signin-oidc",
    "Domain": "dominicdomain.onmicrosoft.com",
    "TenantId": "d58e5363-f09c-4d65-9808-cd88396529f0"
  }
}
In the Startup.cs file, configure the request pipeline by adding the below code in the Configure method. I have added this code just after the UseStaticFiles() functions. This enables the application to use the cookie authentication and OpenId authentication.
app.UseCookieAuthentication();

app.UseOpenIdConnectAuthentication(new OpenIdConnectOptions
{
    ClientId = Configuration["Authentication:AzureAd:ClientId"],
    Authority = Configuration["Authentication:AzureAd:AADInstance"] + Configuration["Authentication:AzureAd:TenantId"],
    CallbackPath = Configuration["Authentication:AzureAd:CallbackPath"]
});
In the ConfigureServices method, add the below code.
services.AddAuthentication(options => options.SignInScheme = CookieAuthenticationDefaults.AuthenticationScheme);
In the AccountController.cs, add the below code.
[HttpGet]
public IActionResult SignIn()
{
    return Challenge(
        new AuthenticationProperties { RedirectUri = "/" }, OpenIdConnectDefaults.AuthenticationScheme);
}

[HttpGet]
public IActionResult SignOut()
{
    var callbackUrl = Url.Action(nameof(SignedOut), "Account", values: null, protocol: Request.Scheme);
    return SignOut(new AuthenticationProperties { RedirectUri = callbackUrl },
        CookieAuthenticationDefaults.AuthenticationScheme, OpenIdConnectDefaults.AuthenticationScheme);
}

[HttpGet]
public IActionResult SignedOut()
{
    if (HttpContext.User.Identity.IsAuthenticated)
    {
        return RedirectToAction(nameof(HomeController.Index), "Home");
    }

    return View();
}

[HttpGet]
public IActionResult AccessDenied()
{
    return View();
}
Add a new partial view in the Shared folder and name it _LoginPartial.cshtml just like we have in new default scaffold project.
@using System.Security.Principal
@using System.Security.Claims

@if (User.Identity.IsAuthenticated)
{
    var claims = ((ClaimsIdentity)User.Identity).Claims;
    var username = claims.FirstOrDefault(c => c.Type == "name")?.Value;

    //Uncomment the below code to see the complete email address of the user.
    @*<li class="navbar-text">Hello @User.Identity.Name!</li>*@
    <ul class="nav navbar-nav navbar-right">
        <li class="navbar-text">Hello @username!</li>
        <li><a asp-area="" asp-controller="Account" asp-action="SignOut">Sign Out</a></li>
    </ul>
}
else
{
    <ul class="nav navbar-nav navbar-right">
        <li><a asp-area="" asp-controller="Account" asp-action="Signin">Sign in</a></li>
    </ul>
}
Open _Layout.cshtml page, add the below line of code to render this partial view so users can sign in and sign out.
@await Html.PartialAsync("_LoginPartial")
And we are done! This is a minimalistic implementation that you can get start with. Azure Active Directory also provides groups and roles which you need to work with if you are working with the enterprise scale application where security is a major concern. You also have to tweak the code for that. Let’s try executing the application and see what happens when I try to authenticate the user for the first time.
When you land on the home page you can see the Sign in link at the top right of the web page.

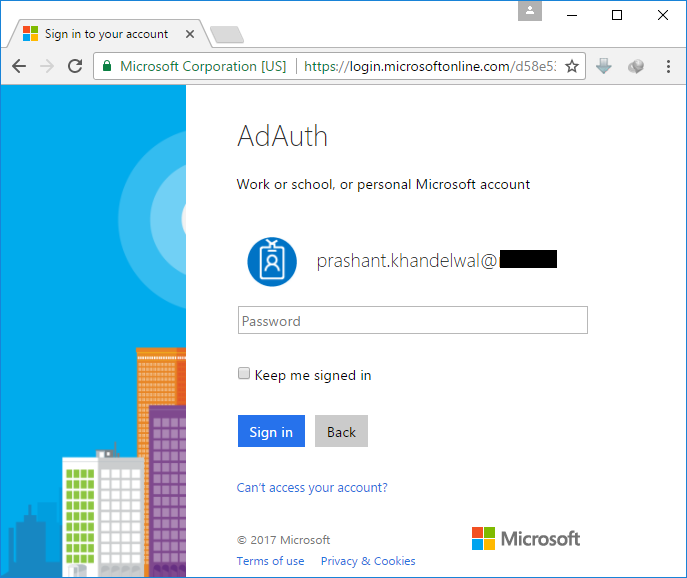
When you click on the sign in link, you will be redirected to the login.microsoftonline.com where you will be prompted for the user name and password. After the first successful login, you will be prompted to change the current password.
After the successful change of the password, you will be re-directed to the application with your user name as displayed at the top right corner.
