

Ollama is a lightweight and user-friendly way to run LLMs locally. No need for complex setups and it makes it super easy to explore AI chat models from the comfort of your own device.
This tutorial is a small part of a broader project I’m working on, which involves using local LLMs and vision models to analyze data directly on-device. This approach helps reduce costs and addresses some of the privacy concerns raised by our customers.
Installation and Setup
Download and install Ollama from here.
Once the setup is complete, simply launch the Ollama application—it will open a ChatGPT-like interface that lets you interact with local LLMs.
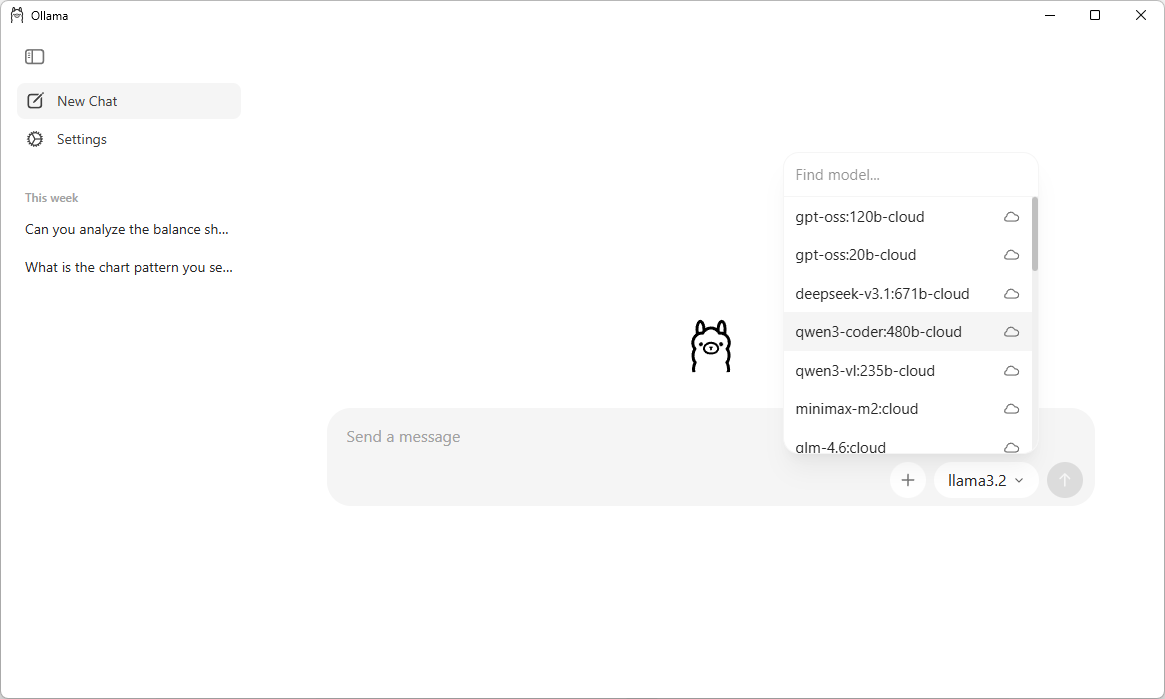
This UI makes it very easy for searching, downloading and communicating with different LLMs. You can also chat with the models which are in the cloud without downloading them. Note that you require a Ollama account in order to communicate with a cloud model.
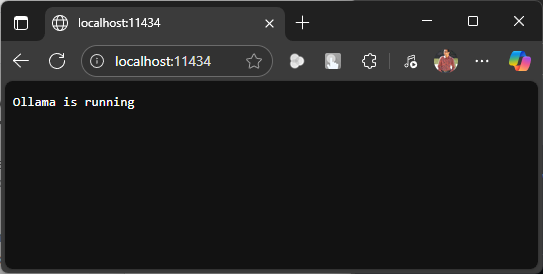
But we need to build a web based chat application and that means that we have to interact with Ollama API which is running at https://localhost:11434
Everyting seems to be set up properly. Let’s create a Python FastAPI endpoint which allows us to communicate with Ollama API. You can also use NodeJS, Go or .NET WebAPI to create a service endpoint.
Create a Python virtual environment and install the below dependencies.
pip install fastapi uvicorn requests httpx
The API uses a POST request and accepts three parameters: prompt, model, and stream.
prompt– The input message or query from the user.model– Specifies which model to run the prompt against. If not provided, it defaults to llama3.2:latest.stream– Optional setting that defaults tofalse. Set it totrueif you want the response to appear in a typing animation, similar to ChatGPT.
Note: enabling streaming requires additional changes to the code below. For below version of code, requests and httpx packages are not required.
from fastapi import FastAPI
from pydantic import BaseModel
import requests

app = FastAPI()

class PromptRequest(BaseModel):
    prompt: str
    model: str = "llama3.2:latest"  # Default model, can be overridden in the request

@app.post("/generate")
async def generate_text(request: PromptRequest):
    ollama_api_url = "http://localhost:11434/api/generate"

    payload = {
        "model": request.model,
        "prompt": request.prompt,
        "stream": False # True for streaming responses
    }

    try:
        response = requests.post(ollama_api_url, json=payload)
        response.raise_for_status()  # Raise an exception for bad status codes

        # Extract the generated text from Ollama's response
        generated_text = response.json()["response"]
        return {"response": generated_text}

    except requests.exceptions.RequestException as e:
        return {"error": f"Error communicating with Ollama: {e}"}
Run this API using uvicorn.
uvicorn main:app
The API server will start on default 8000 port. If you wish to change the port then start the API using the below command.
uvicorn main:app --port 8080
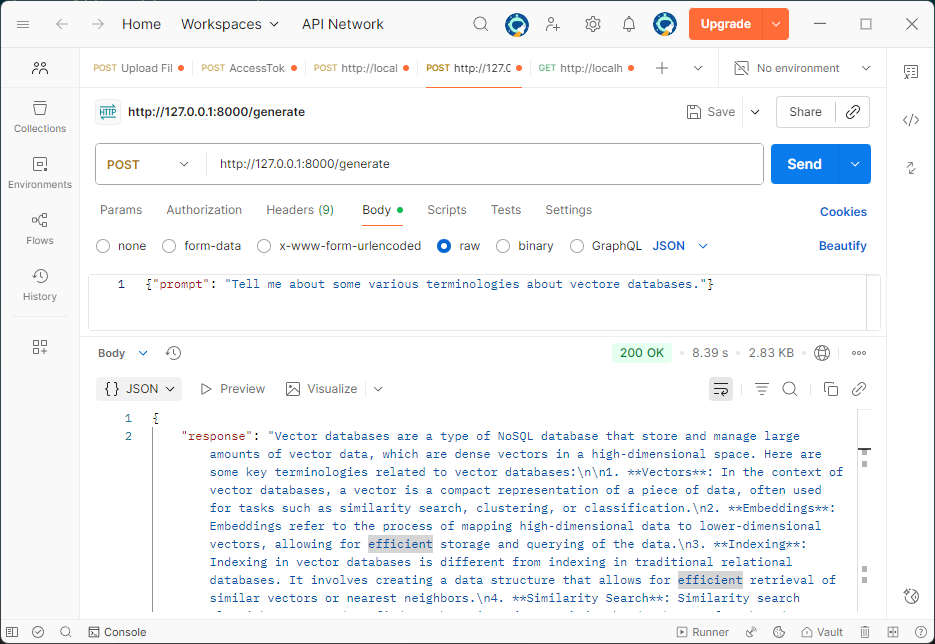
Let’s check the API response using Postman.
It’s quite helpful to see the response streamed in real time, just like how ChatGPT displays it. So let’s change the stream parameter to true and update our API code.
from fastapi import FastAPI
from fastapi.responses import StreamingResponse, HTMLResponse
from fastapi.staticfiles import StaticFiles
from pydantic import BaseModel
import httpx
import json
import os

app = FastAPI()

class PromptRequest(BaseModel):
    prompt: str
    model: str = "llama3.2:latest"

@app.post("/generate")
async def generate_text(request: PromptRequest):
    ollama_api_url = "http://localhost:11434/api/generate"
    payload = {
        "model": request.model,
        "prompt": request.prompt,
        "stream": True
    }

    async def stream_text():
        async with httpx.AsyncClient(timeout=None) as client:
            async with client.stream("POST", ollama_api_url, json=payload) as response:
                async for line in response.aiter_lines():
                    if line.strip():
                        try:
                            data = json.loads(line)
                            chunk = data.get("response", "")
                            if chunk:
                                yield chunk
                        except json.JSONDecodeError:
                            continue

    return StreamingResponse(stream_text(), media_type="text/plain")
Now we have a streaming response, let’s make a UI, I am using Svelte. Start by creating a new project.
npm create vite@latest ollama-chat -- --template svelte-ts
Update the vite.config.ts file to include a custom proxy setting for the development server. This setup ensures that any requests made to /generate are forwarded to http://localhost:8000, allowing the frontend to communicate seamlessly with a backend API like FastAPI. It also helps prevent CORS-related issues during development.
export default defineConfig({
  plugins: [svelte()],
   server: {
    proxy: {
      '/generate': 'http://localhost:8000'
    }
  }
})
The response is formatted in Markdown, so to render it correctly, you’ll need an additional npm package called marked. You can install it using the command below.
npm install marked
Remember to change the port if your have setup the custom port for your API via uvicorn.
Replace the code in App.svelte with the below code.
Ollama Chat
{#if loading}Loading...
{:else if chatHtml}{@html chatHtml}{:else}No response yet.
{/if}Ollama Chat
{chat}
Start the UI using this command.
npm run dev
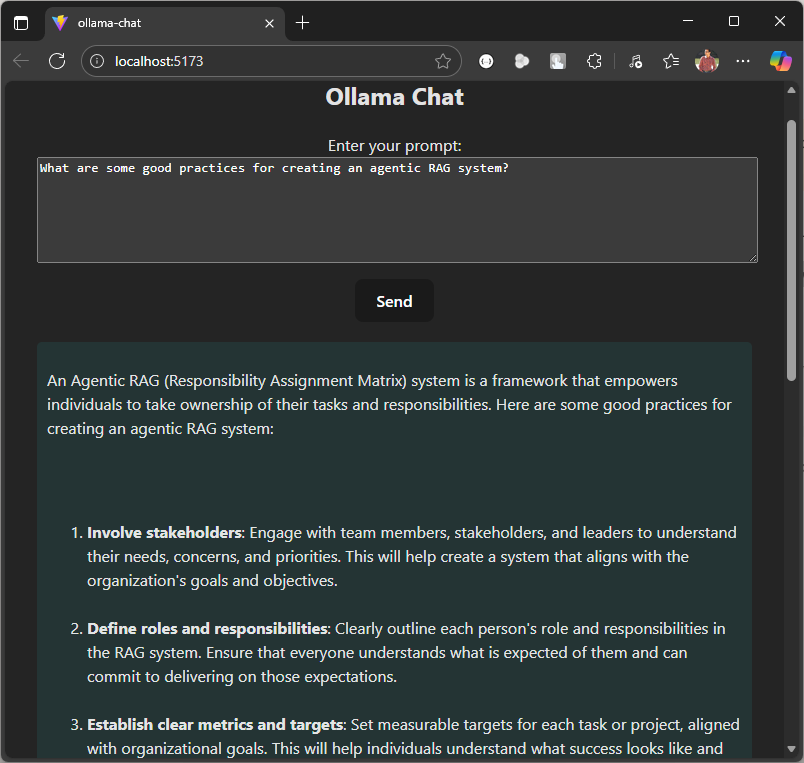
We are now all set to run our local LLM based chat agent. Let’s start by asking a question.
This code serves as a starting point. You can extend it by adding image or file upload functionality, allowing users to summarize content or ask questions based on the data within the uploaded document or image.
Here is the Github repo where you can find the entire code.