

I was exploring Github for some image effects/filters and I found some but still keep exploring and found an interesting plugin called face-detection. This plugin uses HTML5 getUserMedia to use your web camera only if your browser supports it. Unfortunately, IE10 still doesn’t support it. This seems cool to me, so I created a sample application to test it. This sample application will let you preview the video using your web camera and allows you to capture the image from your web camera and upload it to the Azure storage. The javascript code for the HTML5 video I am using is from David Walsh’s post. Not every browser supports getUserMedia, so if the user is not using the browser which supports getUserMedia then you can show an alert message to the user notifying about the browser incompatibility. Here is the function which will check your browser compatibility for getUserMedia.
function hasGetUserMedia() {
 // Note: Opera is unprefixed.
 return !!(navigator.getUserMedia || navigator.webkitGetUserMedia ||
 navigator.mozGetUserMedia || navigator.msGetUserMedia);
}

if (hasGetUserMedia()) {
 // Good to go!
} else {
 alert('getUserMedia() is not supported in your browser');
}
To know more and explore more what you can do with getUserMedia visit HTML5Rocks. Moving further, I have a normal HTML page where initially I am placing 3 elements on the page. One is a video tag which will show the stream from the web camera attached to your machine or your laptop camera. Second, is the canvas tag which is used to show the image captured from the web camera and the third one is the normal button which will let me capture the image at my will on its click.
Notice the autoplay property in the video tag. I have set it because I don’t want the video to be frozen as soon as it started. To make the video work I am using David Walsh’s code as it is without any changes.
window.addEventListener("DOMContentLoaded", function () {
    // Grab elements, create settings, etc.
    var canvas = document.getElementById("canvas"),
        context = canvas.getContext("2d"),
        video = document.getElementById("video"),
        videoObj = { "video": true },
        errBack = function (error) {
            console.log("Video capture error: ", error.code);
        };

    if (navigator.getUserMedia) { // Standard
        navigator.getUserMedia(videoObj, function (stream) {
            video.src = stream;
            video.play();
        }, errBack);
    } else if (navigator.webkitGetUserMedia) { // WebKit-prefixed
        navigator.webkitGetUserMedia(videoObj, function (stream) {
            video.src = window.webkitURL.createObjectURL(stream);
            video.play();
        }, errBack);
    }

    // Trigger photo take
    document.getElementById("snap").addEventListener("click", function () {
        context.drawImage(video, 0, 0, 640, 480);
    });
}, false);
In the above script, you can see that it first checks if the browser or navigator has the getUserMedia support. if you see there are two conditions one for the standard and other one with the webkit prefix. In the end, the click event on the button which will let me capture the image.
When you view the application in the browser, the browser will prompt you whether you want to allow or deny the application to use the web camera.

You cannot run this just by double-clicking the file due to security reasons. You must access the web page from the server itself, either from within the Visual Studio development server, from IIS or by publishing the file on your production server. It can be annoying for many users to grant the access to the camera every time they access the page. You can save the user consent if you are using https. If you plan to stick with http, you will not be able to do this.
Looking in the address bar again, you will notice that the fav icon of the web application, changed to an animated icon. It is a little red dot which keeps on flashing notifying the user that the camera is in use. If you plan to block the access to the camera permanently or temporarily, you can then click the camera icon which is on the right hand side of the address bar.
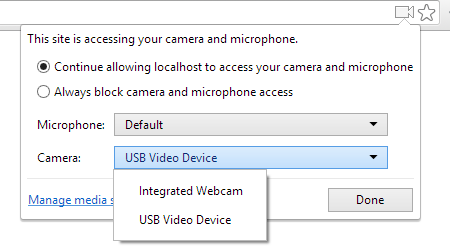
When you click the icon you will be prompted with options to continue allow the access to the camera or always block the camera. Also if you notice the camera option, you will see that it is showing me two devices or camera attached to the machine. I build this application on my laptop so I am able to the integrated camera which is the front facing camera of my laptop and the second one is the USB camera I have plugged on my laptop’s USB port. I can choose to use any one of these. If you make any changes to these settings and click on done, you will be asked to reload the page.
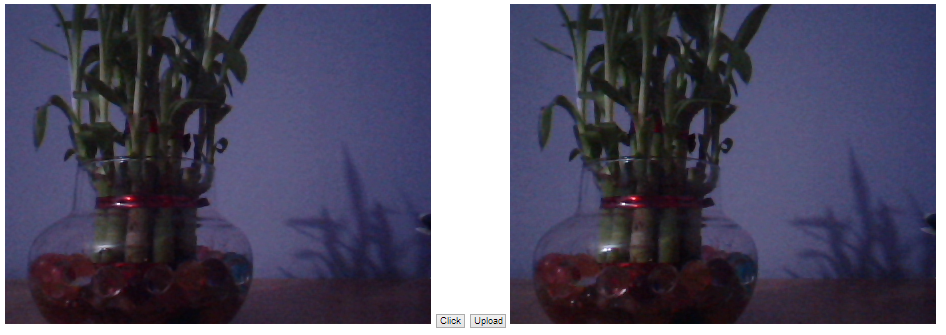
This is how my web page looks.
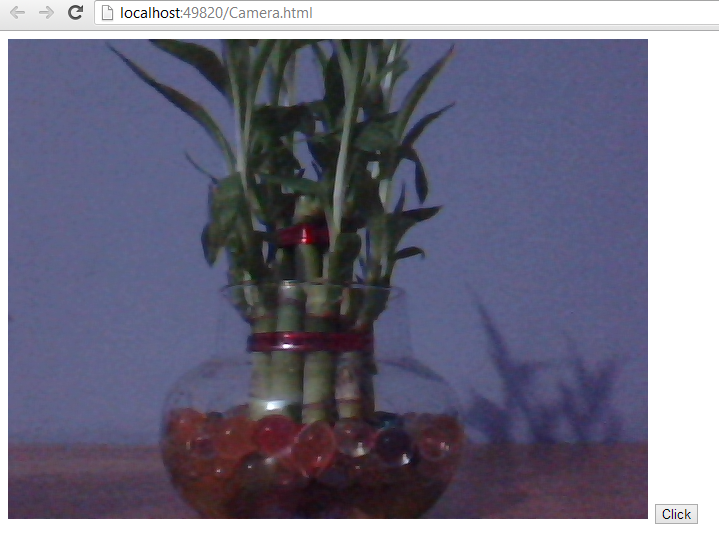
The click button is at the bottom right hand side will let me take a snap of the feed coming from my camera. When I click the Click button, the image is captured and show on the canvas we have added on the page. This is my web page after I took the snap from my web camera.
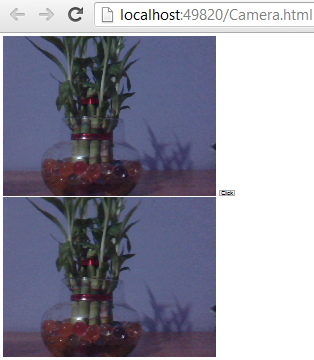
The second image (at the bottom) is the image on the canvas that is snapped from the camera. Now I want to upload the image to my Azure cloud storage. If you look at the address bar, you’ll notice that I have used normal HTML page. It’s you wish if you want to use a simple HTML page or a web form. Both works good. The problem I am going to face with web forms is if I am going to upload the snapped image to my cloud storage or to my server repository, the page will post-back which is not cool at all. So I am going to accomplish it by making an AJAX call. Add a HTML button to your page and on its click event upload the file to the cloud.
I have the image on my canvas, therefore you just cannot retrieve the image Base64 string just like that. I am going to extract the Base64 string of the image from the canvas and pass it as a parameter. The server method will then convert the Base64 string to stream and upload it to the cloud storage. Here is the jQuery AJAX call.
function UploadToCloud() {
    $("#upload").attr('disabled', 'disabled');
    $("#upload").attr("value", "Uploading...");
    var img = canvas.toDataURL('image/jpeg', 0.9).split(',')[1];
    $.ajax({
        url: "Camera.aspx/Upload",
        type: "POST",
        data: "{ 'image': '" + img + "' }",
        contentType: "application/json; charset=utf-8",
        dataType: "json",
        success: function () {
            alert('Image Uploaded!!');
            $("#upload").removeAttr('disabled');
            $("#upload").attr("value", "Upload");
        },
        error: function () {
            alert("There was some error while uploading Image");
            $("#upload").removeAttr('disabled');
            $("#upload").attr("value", "Upload");
        }
    });
}
The line 4 in the above script is the one which will get the Base64 string of the image from the canvas. The string is now in the variable named img which I am passing as a parameter to the Upload web method in my code-behind page. You can use web service or handler or maybe a WCF service to handle the request but I am sticking with page methods. Before you can actually make use of the Azure storage, you have to add reference of the Azure Storage library from NuGet. Fire the below NuGet command to add the Azure Storage reference to your application.
PM> Install-Package WindowsAzure.Storage
After the package/assemblies are referenced in your code, add the below namespaces.
using Microsoft.WindowsAzure.Storage;
using Microsoft.WindowsAzure.Storage.Blob;
using Microsoft.WindowsAzure.Storage.Auth;
using System.IO; //For MemoryStream
using System.Web.Services; //For WebMethod attribute
These all the namespace will help me to connect to my local cloud storage emulator or to my live cloud storage. This is my upload method which will upload the file to my live cloud storage.
[WebMethod]
public static string Upload(string image)
{
    string APIKey = "LFuAPbLLyUtFTNIWwR9Tju/v7AApFGDFwSbodLB4xlQ5tBq3Bvq9ToFDrmsZxt3u1/qlAbu0B/RF4eJhpQUchA==";
    string AzureString = "DefaultEndpointsProtocol=https;AccountName=[AccountName];AccountKey=" + APIKey;

    byte[] bytes = Convert.FromBase64String(image);

    CloudStorageAccount storageAccount = CloudStorageAccount.Parse(AzureString);

    CloudBlobClient blobClient = storageAccount.CreateCloudBlobClient();

    CloudBlobContainer container = blobClient.GetContainerReference("img");

    string ImageFileName = RandomString(5) + ".jpg";

    CloudBlockBlob imgBlockBlob = container.GetBlockBlobReference(ImageFileName);

    using (MemoryStream ms = new MemoryStream(bytes))
    {
        imgBlockBlob.UploadFromStream(ms);
    }

    return "uploaded";
}
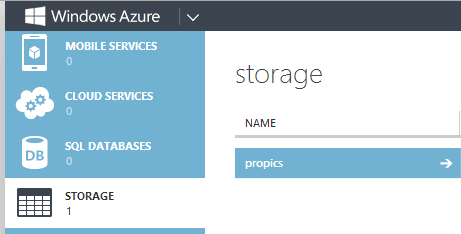
I have decorated this method with WebMethod attribute. This is necessary as I have to call this method from jQuery/javascript. Also the method should be public static. The AzureString serves as the connection string for the cloud storage. You have to change the [AccountName] in the connection string to the storage account name. In my case it is propics. The method accepts the Base64 string as a parameter.
Storage is something different than that of the container and therefore I have to create a container which actually holds my images which I upload to the cloud storage. I am not explaining the code completely but it is not that complicate. To upload the file to the storage I must have a file name. The image I get from the canvas is just a Base64 string and does not have a name, so I have to give it a name. I have a random function which will generate the random string which I will be using as a file name for my image file.
//stole from http://stackoverflow.com/questions/1122483/c-sharp-random-string-generator
private static string RandomString(int size)
{
    Random _rng = new Random();
    string _chars = "ABCDEFGHIJKLMNOPQRSTUVWXYZ";

    char[] buffer = new char[size];

    for (int i = 0; i < size; i++)
    {
        buffer[i] = _chars[_rng.Next(_chars.Length)];
    }

    return new string(buffer);
}
This is a small function which I stole from Stackoverflow to generate random name for my image file. So this is it and when I click the upload button on my page.
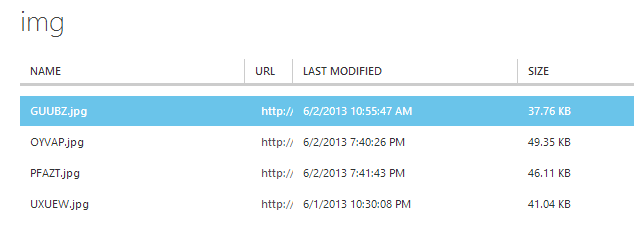
Now if I check my cloud storage I have can see the uploaded files.
This is just a simple example to get you started. You can give some cool effects before you can actually upload the files. If you do a quick search you’ll find plenty of links which will let you give some cool effects to your pictures. I came across a brilliant plugin called filtrr. You should try it and come up with something which is awesome or may be something like Instagram. Hope this help some folks out there.