This is great stuff. If you own a website or a blog you should use this excellent feature of pinning fav links of your site on user’s Windows 7 taskbar. Though this feature of IE9 was on hype since it’s beta realease. Now it’s time to use this feature for my blog. But before you start grab the latest stable version of the Pinify (formerly know as IE9ify) from Codeplex.
About Pinify
This plugin is written in jQuery and is hosted on Codeplex. I highly recommend you to follow this project on Codeplex. This plugin is not just about pinning, but also allows the user to customize the skin of the browser, adds a jumplist of your favourite links to the taskbar, overlay icons, tasks and thumbbar buttons. This is a total different user experience for the users /readers of your blog or site.
Preparing your site for the new experience
By now you have downloaded the latest release of the pinify from Codeplex. Open your site in Visual Studio and get to the head section. Fire the below NuGet command to install the Pinify plugin.

For the simplest implementation of this plugin, use the below script in the head section of your page.
<script src="Scripts/jquery-1.5.2.js" type="text/javascript"></script>
<script src="Scripts/jquery.pinify.js" type="text/javascript"></script>

<script type="text/javascript">
$().ready(function () {
     $('head').pinify();
});
</script>
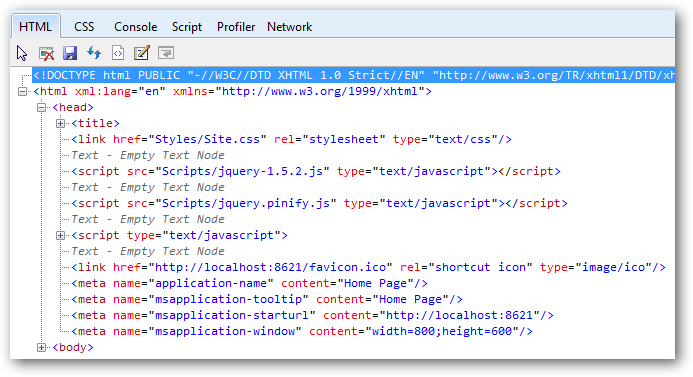
Hit F5 and make sure you have selected IE9 as your default browser. After you see your site home page in the browser hit F12 to get the IE9 developer window. Under HTML tab expand the Head tree and you will come to see few meta tags.

Drag and drop the tab to your task bar. This time a new IE window will open but with a difference. Check out below, the navigation buttons has a different color, the site has an icon also.

In the above screenshot you can see the default IE icon because I have not set the favicon for my site. Once I set the fav icon in the head section of my page, I will then have a new favicon to show off. Same is with the navigation buttons, here what you are seeing is the default color, you can set your own like yellow or red or some other different color which matches the theme of your site.
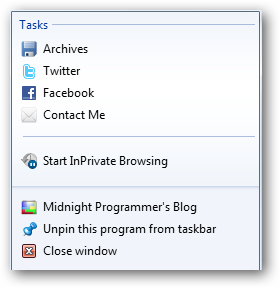
Let’s take a bit more complicate example. Now I want to do the same for my blog. For the moment I will have the following in the jumplist.
- Archives - Link to my blog archive.
- Facebook and
- Contact Me
The icon will be the same as my current favicon. To implement pinify for my blog I do all the work in master page which is site.master in my case. Copy and paste the below script in the head section of your page. Change the text and links accordingly.
<script src="Scripts/jquery-1.5.2.js" type="text/javascript"></script>
<script src="Scripts/jquery.pinify.js" type="text/javascript"></script>
<script type="text/javascript">
        $().ready(function () {
            $('head').pinify({
                applicationName: 'Midnight Programmer',
                tooltip: 'Programming For Fun',
                tasks: [{
                    'name': 'Archive',
                    'action': 'http://midnightprogrammer.net/archive.aspx',
                    'icon': 'favicon.ico'
                },
                {
                    'name': 'Twitter',
                    'action': 'http://twitter.com/prashantmx',
                    'icon': 'twitter.ico'
                },
                {
                    'name': 'Facebook',
                    'action': 'http://facebook.com/khandelwal.p',
                    'icon': 'facebook.ico'
                },
                {
                    'name': 'Contact Me',
                    'action': 'http://www.midnightprogrammer.net/contact.aspx',
                    'icon': 'favicon.ico'
                }]
            });
        });
</script>
After adding the script drag the tab to the taskbar and right-click it to view the task list.


There are many other things which you can do with this plugin. I have just showed a simplest way to get you jump started with pinify. As you are reading this post try dragging the tab on your windows taskbar and right-click to see the task list as shown above.
There are many things which can be done with pinify. To know more read the below links.

