

By converting images into vector embeddings and storing them in a specialized database, we can build systems that understand visual similarity at scale. This approach opens doors to applications in e-commerce, media management, and even creative tools where images drive discovery.
So today we will see how to build your own image search engine using Python FASTAPI and Qdrant, which is a high-performance open-source vector similarity search database. But what exactly a vector is?
If we do quick web search, we can Simply put, vector is a numerical representation of data as an arrays of numbers i.e. You can take any image, file, text and convert it to a vector.
Anyone who’s used vector databases like Milvus, Pinecone, or ChromaDB has probably come across cosine similarity, it’s one of the go-to metrics for comparing vectors in similarity search.
We will be looking at the cosine similarity metric in this demo but there are others which you can also explore like:
- Dot Product
- Euclidean distance
- Manhattan distance
In Qdrant, the default metric used is Dot Product if not specified.
In vector database searches, the values of 1, 0, and -1 are highly significant when using cosine similarity, one of the most common metrics for determining how alike two vectors are. Cosine similarity measures the angle between two vectors and, in the context of embeddings, provides a score that indicates the degree of similarity in their meaning or content.
Here is what each value signifies:
1: Identical or maximum similarity
- A cosine similarity score of 1 means that the two vectors are perfectly aligned and point in the exact same direction.
- In the context of a vector database, this means the items represented by these vectors (e.g., text, images) have the highest possible semantic similarity. They represent the same or nearly identical concepts.
0: Orthogonal or no similarity
- A cosine similarity score of 0 means the two vectors are orthogonal, or perpendicular, to each other.
- This indicates that there is no relationship or correlation between the items represented by the vectors. In a search, this result would represent a complete lack of semantic similarity.
-1: Diametrically opposed or maximum dissimilarity
- A cosine similarity score of -1 means that the two vectors are pointing in perfectly opposite directions.
- This signifies that the items represented by these vectors are diametrically opposed in meaning or concept. For instance, a query for hot might return a result for cold with a score close to -1.
I will be using an CLIP model from HuggingFace called openai/clip-vit-base-patch32 to extract image embeddings , essentially turning an image into a numerical vector that capture its semantic content. The openai/clip-vit-base-patch32 model is a vision transformer trained jointly on images and text. This is the model I am using but you can choose some other model which provides the same functionality. Hence we come to the term Vector Search which is a search technique used to find similar items or data points.
So now let’s get started by setting up the Qdrant!
I am using Podman to run Qdrant on my machine. You can also use Docker if you want to, as the commands for these 2 are same.
$ podman run -d -p 6333:6333 -p 6334:6334 -v E:\qdrant\:/qdrant/storage:z qdrant/qdrant
I am using the Podman desktop for ease of use. But you can also use this command to start Qdrant if you do not have Podman desktop installed.
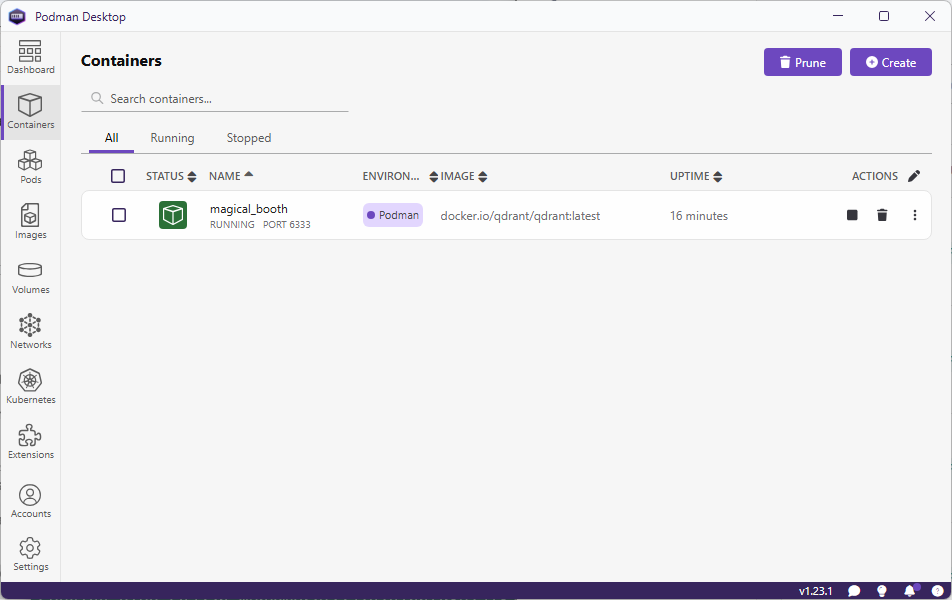
Go to URL , http://localhost:6333/dashboard to view Qdrant WebUI.
Let’s start by setting up Python virtual environment, installing dependencies and activating it.
$ python -m venv env
$ env\Scripts\activate
Next, we will install the dependencies:
The model we are utilizing uses transformers and we will need Pytorch for it to work properly. So head to the Pytorch website and install it by selecting the right options based on the environment you are using.
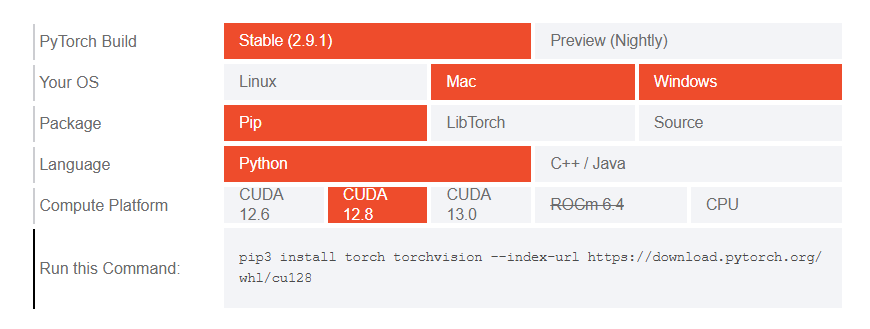
Copy and run the generated command in your terminal window to install Pytorch.
There are few other dependencies which we will need.
$ pip install qdrant-client transformers pillow
I have downloaded around 4000+ random images from Instagram (for personal use) which I will use in this demo. But before I can feed it to my uploading program I will batch them and put them in separate folders. I am using a PowerShell script which will create batches.
param (
    [int]$FilesPerFolder = 10  # Default count per folder
)

# Get all files in the current directory (excluding folders)
$files = Get-ChildItem -File

# Total number of files
$totalFiles = $files.Count

# Calculate number of folders needed
$folderCount = [math]::Ceiling($totalFiles / $FilesPerFolder)

# Loop through and create folders + move files
for ($i = 0; $i -lt $folderCount; $i++) {
    $folderName = "Batch_$($i + 1)"
    New-Item -ItemType Directory -Path $folderName -Force | Out-Null

    $startIndex = $i * $FilesPerFolder
    $endIndex = [math]::Min($startIndex + $FilesPerFolder, $totalFiles)

    $filesToMove = $files[$startIndex..($endIndex - 1)]

    foreach ($file in $filesToMove) {
        Move-Item -Path $file.FullName -Destination $folderName
    }
}

Write-Host "✅ Done! Split $totalFiles files into $folderCount folders with $FilesPerFolder files each."
You might need to elevate the privileges before on your Windows machine.
-- Elevate privileges for current session.
> Set-ExecutionPolicy -Scope Process -ExecutionPolicy Bypass

-- Elevate privileges permanently
> Set-ExecutionPolicy -Scope CurrentUser -ExecutionPolicy RemoteSigned
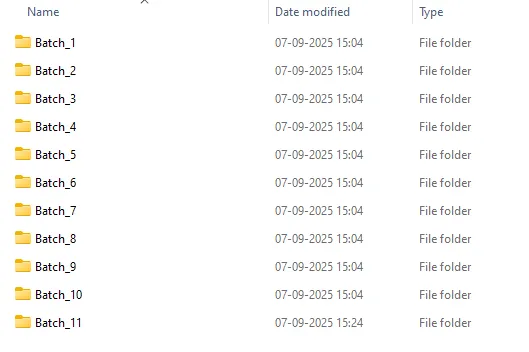
Run the script to create the batches.
> .\batches.ps1 -FilesPerFolder 500
Here is how my folder structure looks after batching files in folders.
Next, we set up a python script to create vector data from the images and upload them to a collection we will call instaimages. I have Python script that does everything for me. It creates and setup the Qdrant collection, create vector of the images using AI model and upload them in batches to Qdrant.
My Python script does the work but there were few parts which I wanted to refactor and hence I asked ChatGPT to refactor it. It does more than that and it is good.
import os
from PIL import Image
from transformers import AutoProcessor, AutoModelForZeroShotImageClassification
from qdrant_client import QdrantClient
from qdrant_client.http import models
from tqdm import tqdm
import numpy as np

client = QdrantClient("localhost", port=6333)
print("[INFO] Client created...")

################### Dataset Loading ###################
image_dataset = []
COLLECTION_NAME = 'instaimages'
root_dir = "insta"   # parent folder containing Batches

# Traverse all Batch_* folders
# CHANGE THIS RANGE.
for batch_num in range(1, 12):  # Batch_1 to Batch_11
    batch_dir = os.path.join(root_dir, f"Batch_{batch_num}")
    print(f"[INFO] Traversing {batch_dir}...")

    for subdir, dirs, files in os.walk(batch_dir):
        for file in files:
            if file.lower().endswith((".jpeg", ".jpg", ".png")):
                image_path = os.path.join(subdir, file)
                try:
                    image = Image.open(image_path)
                    image_dataset.append((image, batch_dir, image_path))  # keep folder info
                except Exception as e:
                    print(f"Error loading image {image_path}: {e}")

################### Loading the CLIP model ###################
print("[INFO] Loading the model...")
model_name = "openai/clip-vit-base-patch32"
processor = AutoProcessor.from_pretrained(model_name)
model = AutoModelForZeroShotImageClassification.from_pretrained(model_name)

###################----Creating a qdrant collection----######################
if not client.collection_exists(COLLECTION_NAME):
    print("[INFO] Creating qdrant data collection...")
    client.create_collection(
        collection_name=COLLECTION_NAME,
        vectors_config={
            "image": models.VectorParams(size=512, distance=models.Distance.COSINE),
        }
    )

###################----creating records/vectors ----######################
print("[INFO] Creating a data collection...")
records = []
for idx, (sample, batch_dir, image_path) in tqdm(enumerate(image_dataset), total=len(image_dataset)):
    processed_img = processor(text=None, images=sample, return_tensors="pt")['pixel_values']
    img_embds = model.get_image_features(processed_img).detach().numpy().tolist()[0]

    payload = {"path": image_path, "batch": batch_dir}
    records.append(models.PointStruct(id=idx, vector={"image": img_embds}, payload=payload))

###################----uploading records----######################
print("[INFO] Uploading data records to data collection...")
for i in range(0, len(records), 10):
    print(f"finished {i}")
    client.upload_points(
        collection_name=COLLECTION_NAME,
        points=records[i:i + 10],
    )

print("[INFO] Successfully uploaded data records to data collection!")
Now comes the part where I explain why I created these batches or folders. When I was trying to import lots and lots of files without batching it takes a lot of time to import. The recommended approach is to create batches and upload. This is the way I am doing batching but there are other approaches to batch and upload which you can also try.
In case you are not working with lot of files and not want to get into the hassle of creating folders, then you can use the strip down version of the same script.
import uuid
from PIL import Image
from qdrant_client import QdrantClient, models
import os
from transformers import AutoProcessor, AutoModelForZeroShotImageClassification

ROOT_DIR = 'insta-images'
COLLECTION = 'instaimages'
BATCH_SIZE = 50

client = QdrantClient(url="http://localhost:6333")

print("[INFO] Loading the model...")
model_name = "openai/clip-vit-base-patch32"
processor = AutoProcessor.from_pretrained(model_name)
model = AutoModelForZeroShotImageClassification.from_pretrained(model_name)


if not client.collection_exists(COLLECTION):
    print("[INFO] Creating qdrant data collection...")
    client.create_collection(
        collection_name=COLLECTION,
        vectors_config= {
            "image": models.VectorParams(size=512, distance=models.Distance.COSINE),
        }
    )

#####################BATCH UPLOAD######################

records = []
for sample in os.listdir(ROOT_DIR + '\\' + ROOT_DIR):
    idx = uuid.uuid4().int>>64
    path = os.path.join(ROOT_DIR + '\\' + ROOT_DIR, sample)
    payload = {"path": path}
    sampleImage = Image.open(path)
    processed_img = processor(text=None, images = sampleImage, return_tensors="pt")['pixel_values']
    img_embds = model.get_image_features(processed_img).detach().numpy().tolist()[0]
    records.append(models.PointStruct(id=idx, vector={"image": img_embds}, payload=payload))
    print(idx)

# Upload in batch
for i in range(0,len(records), BATCH_SIZE):
   print(f"finished {i}")
   client.upload_points(
       collection_name=COLLECTION,
       points=records[i:i + BATCH_SIZE],
   )
As I am using OpenAI’s openai/clip-vit-base-patch32 model from HuggingFace. This model will produce embeddings of length 512 for both images and text. Different models produce different embeddings and you should use the right embeddings when you create a collection in Qdrant to match the size.
In the create_collection method vectors_config parameter defines the structure of the vector(s) stores in the collection ,
size, which holds the length of each vector.distance metric, how similarity is measure.
I am also adding a small payload with the embeddings to store the path of the image(s). This will come handy when we integrate it with API and frontend application.
sampleImage = Image.open(path), opens the image file located at path using PIL (Python Imaging Library).
processed_img = processor(text=None, images=sampleImage, return_tensors="pt")['pixel_values'], uses the CLIP processor to preprocess the image.
text=None, only encode the image, not text.images=sampleImage, the PIL image is passed in.return_tensors="pt", output is a PyTorch tensor.['pixel_values']→ extracts the actual tensor representation of the image (normalized, resized, etc.) ready for the CLIP model.
img_embds = model.get_image_features(processed_img).detach().numpy().tolist()[0], Passes the processed image tensor into the CLIP model.
get_image_features(...), generates the image embedding vector (length 512 for ViT-B/32)..detach(), removes it from the PyTorch computation graph (no gradients)..numpy(), converts the tensor to a NumPy array..tolist(), converts the NumPy array to a Python list (so it can be serialized).[0], takes the first element (batch dimension), leaving just the embedding vector.
This results in img_embds as a plain Python list of 512 floats representing the image embedding.
records.append(models.PointStruct(id=idx, vector={"image": img_embds}, payload=payload)), Creates a Qdrant point (a record to insert into the vector database).
id=idx, unique identifier for this point.vector={"image": img_embds}, stores the embedding under the name"image". This matches yourvectors_configwhere you defined a named vector “image”payload=payload, attaches metadata (like labels, file path, tags, etc.).records.append(...), adds this point to a list of records that you’ll later upload to Qdrant.
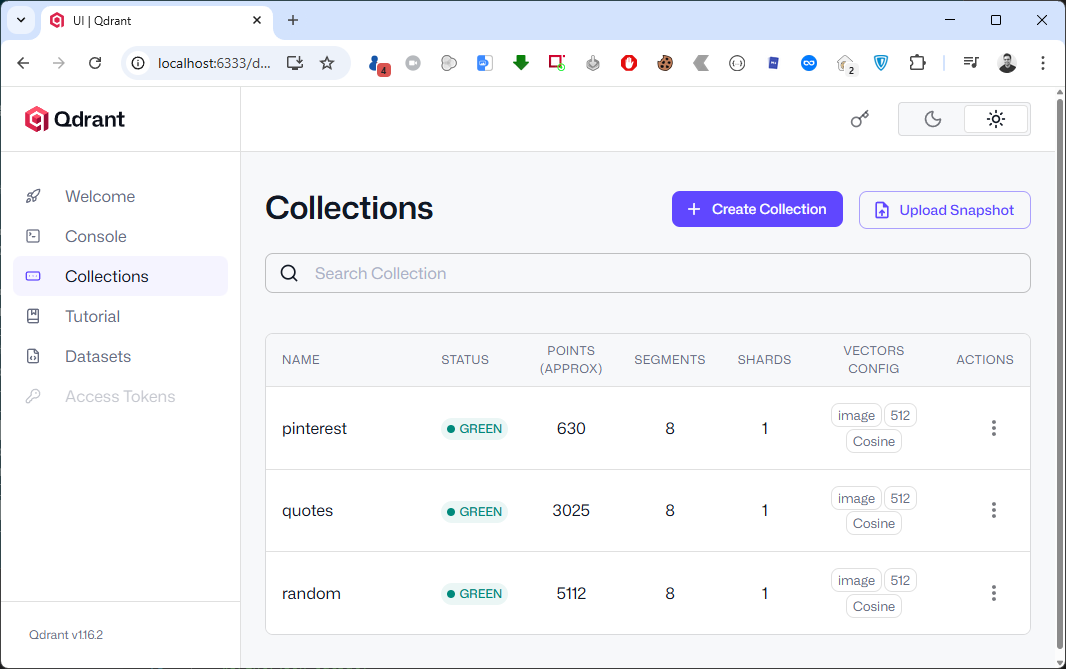
In the end I am calling upload_points method and upload these records in batches. If all goes well, you should see a new collection in Qdrant’s WebUI.
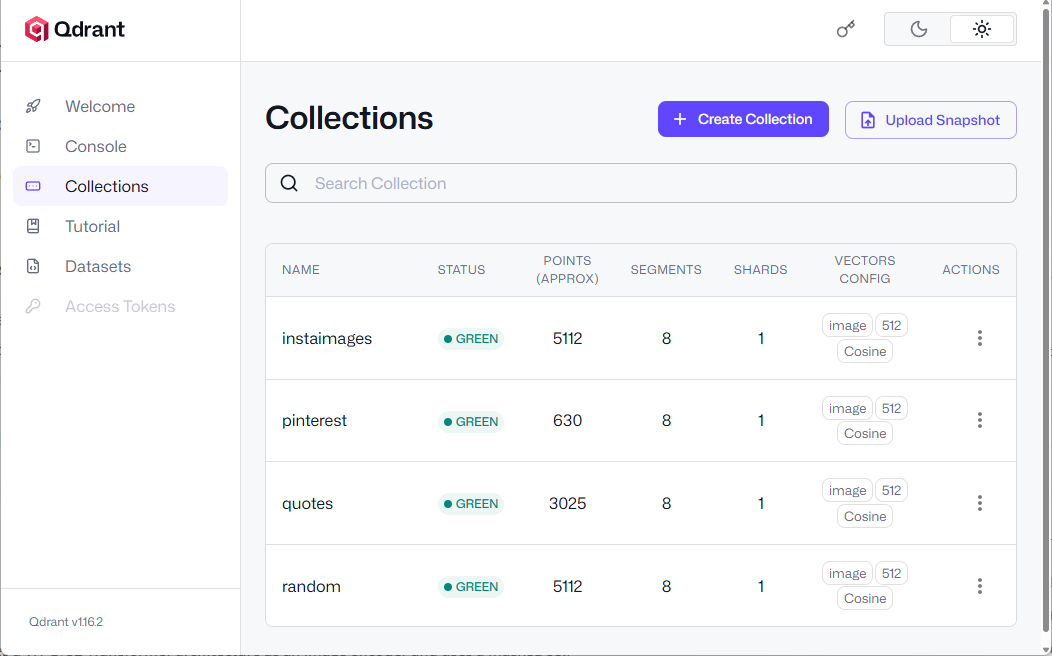
You can see a newly added collection named instaimages
You can also explore the HSNW graph where you can see the all the dependencies for the selected point. It is an internal data structure Qdrant uses for approximate nearest neighbor (ANN) search.
 Click Open Graph in one of the points in the collection.
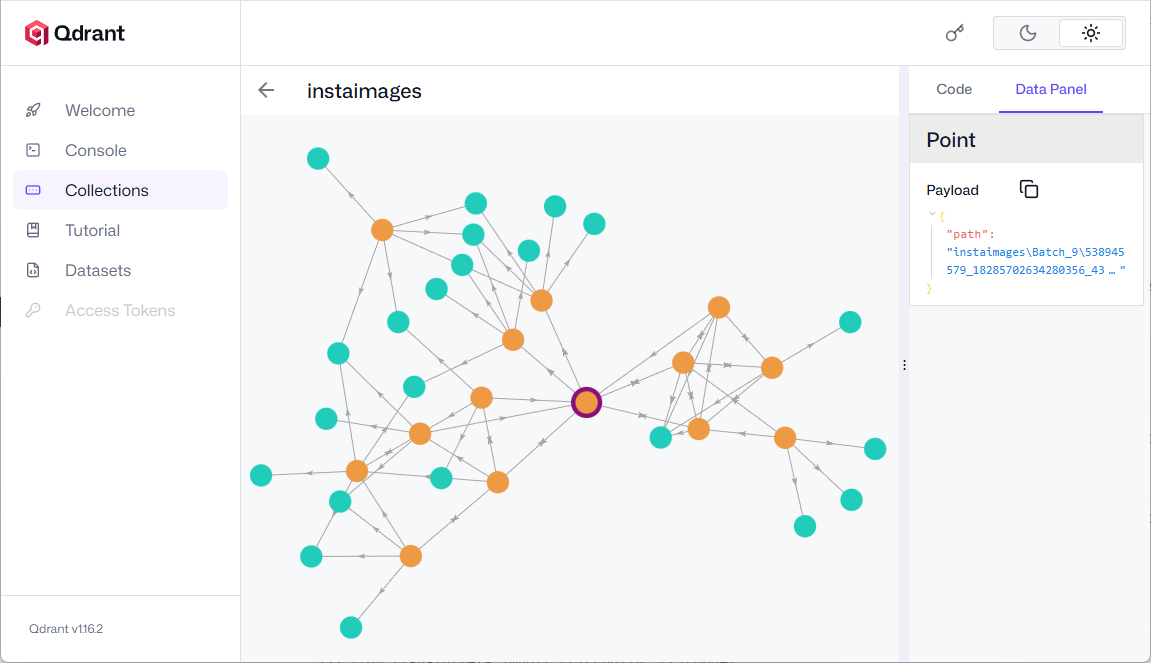 Click on any node to view the nearest neighbor(s).
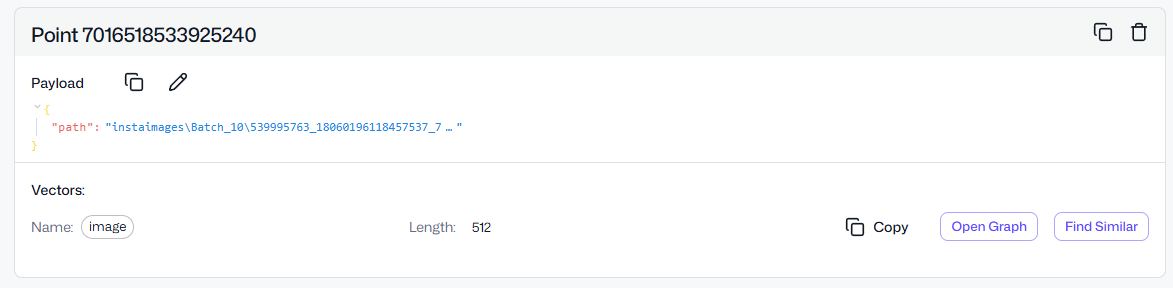
You can also click on Find Similar button which will return the similar looking image(s) or point(s).
API , Setting up FASTAPI
The database is ready and now I want to write a very simple and not so scalable FastAPI API. Start by installing dependencies
$ pip install "fastapi[standard]" uvicorn
I am also using uvicorn which will provide us with the web server implementation for our API.
Here is the complete code for our simple API.
from fastapi import FastAPI, File, UploadFile
from fastapi.responses import JSONResponse
from fastapi.staticfiles import StaticFiles
from fastapi.middleware.cors import CORSMiddleware
from pathlib import Path
import shutil
import uuid
import json

from PIL import Image
from qdrant_client import QdrantClient, models
import os
from transformers import  AutoProcessor, AutoModelForZeroShotImageClassification

app = FastAPI()

app.add_middleware(
    CORSMiddleware,
    allow_origins=["http://localhost:5173"],  # Replace with your frontend URL
    allow_credentials=True,
    allow_methods=["*"],  # Allow all HTTP methods (GET, POST, etc.)
    allow_headers=["*"],  # Allow all headers
)

app.mount("/pin", StaticFiles(directory="pin"), name="pin")


UPLOAD_DIR = Path("uploads")
UPLOAD_DIR.mkdir(exist_ok=True)

@app.post("/upload-image/")
async def upload_image(file: UploadFile = File(...)):
    # Generate a unique filename
    file_ext = Path(file.filename).suffix
    unique_name = f"{uuid.uuid4()}{file_ext}"
    file_path = UPLOAD_DIR / unique_name

    # Save the uploaded file
    with file_path.open("wb") as buffer:
        shutil.copyfileobj(file.file, buffer)

    client = QdrantClient(url="http://localhost:6333")

    model_name = "openai/clip-vit-base-patch32"
    processor = AutoProcessor.from_pretrained(model_name)
    model = AutoModelForZeroShotImageClassification.from_pretrained(model_name)

    processed_img = processor(text=None, images=Image.open(file_path), return_tensors="pt")['pixel_values']

    im =  model.get_image_features(processed_img).detach().numpy().tolist()[0]

    search_result = client.query_points(
        collection_name="random",
        query=im,
        using="image",
        query_filter=None,
        # query_filter=Filter(
        #     must=[FieldCondition(key="title", match=MatchValue(value="paris.jpg"))]
        # ),
        with_payload=True,
        limit=20,
    ).points

    json_result = [
    {
        "id": str(point.id),
        "score": point.score,
        "payload": point.payload  # This might include fields like "image", "name", etc.
    }
    for point in search_result
]
    # Optional: Convert to JSON string if needed
    #json_output = json.dumps(json_result, indent=2)
    #print(json_output)

    return JSONResponse(content=json_result)
We start with initializing FastAPI and then add CORS middleware so our web interface can call our API without any CORS errors. When using CORS settings with APIs ensure that you allow right endpoints and methods for proper security and give least privileges to any application.
I am setting up the upload directory where uploaded images will be stored till the operation is completed. We will have an upload-image POST endpoint which will be responsible for handling image upload operation. I extended the function to also perform the reverse search operation. This allows me to get the search results as soon as the image upload is completed.
NOTE: Copy the entire folder which contains all the images which you have imported while setting up Qdrant in the directory where the applicaiton resides. This step is necessary as the database contains the path of the similar images and to display these images in the UI.
After the image is uploaded, we will get the qdrantclient object which will let us query the database. We set the model name as openai/clip-vit-base-patch32. The Autoprocessor handles both image and text preprocessing which is tokenization, resizing, normalization. AutoModelForZeroShotImageClassification loads the CLIP model capable of comparing image and text embeddings. We then process the image and then get the vectors.
Processed_img, opens the image from file_path. Passes it through the processor to:
- Resize and normalize it.
- Convert it to a PyTorch tensor (return_tensors=”pt”).
- Extracts the
pixel_valuestensor, which is what the model expects as input.
The im variable
get_image_features(…), runs the image through the CLIP model to get its feature vector (embedding)..detach(), detaches the tensor from the computation graph (no gradients needed)..numpy().tolist()[0], Converts the tensor to a Python list (1D vector).
The vector representation of the image (im) can be used for:
- Similarity search, as in this example application.
- Zero-shot classification.
- Image clustering or tagging.
In the last step, we will perform the search on the database using the quadrant client object and calling the query_points function which takes some other parameters.
Client.query_points, is calling the Qdrant client to search for similar vectors in a collection in this case out collection name will be instaimages and this is where our image embeddings are stored.
Query = im, is the image embedding vector we extracted earlier using CLIP. This is the query vector Qdrant will compare against stored vectors.
using="image", indicates the vector space or field to use for similarity search. The image is the name of the vector field in our collection.
No filter is applied, so it searches across all points in the collection. If enabled, this would filter results to only those where the title field matches paris.jpg. Useful for narrowing down search results based on metadata.
with_payload=True, tells quadrant to return the payload (metadata) along with each result. This payload might include things like image title, tags, URLs. etc.
Limit=20, limits the number of results to 20 most similar points.
.points, extracts the actual list of matching points (each with vector similarity score and payload).
UI , Setting up Svelte app
Run the command below to initialize a new Svelte project use --template svelte-ts for TypeScript and --template svelte for JavaScript, then follow the setup prompts to name it Qimg or any other name you like.
$ npm create vite@latest Qimg -- --template svelte-ts
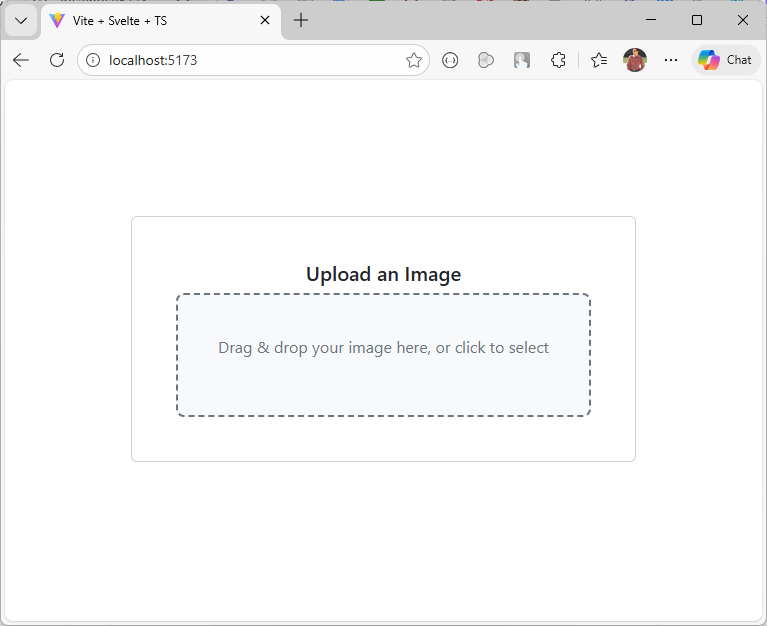
We will create a new component which contains a control allowing us to select or drag and drop the image to perform similarity search.
{#if loading}Upload an Image
Drag & drop your image here, or click to select
{/if}Loading...{#each uploadedImages as data} {#each data as img}{/each} {/each}
{img.id}
Score: {img.score}
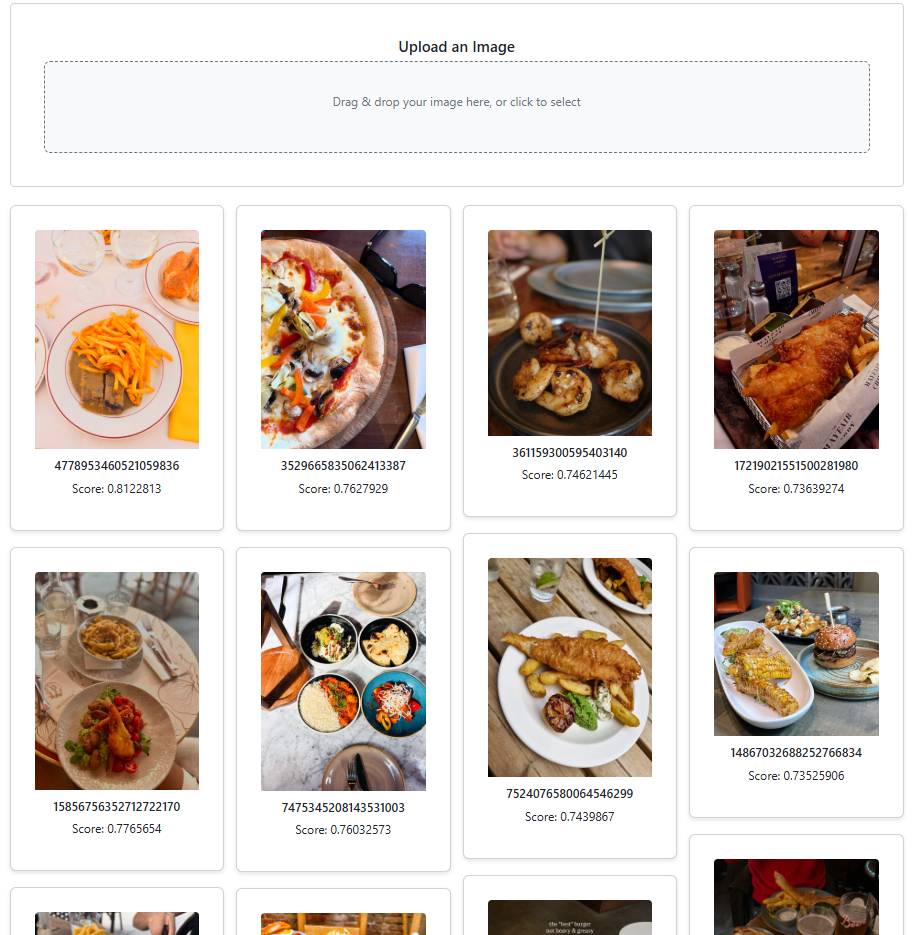
This code lets users upload images either by file picker or drag‑and‑drop, sends them to a backend server, and stores the returned metadata in uploadedImages while showing a loading state during the process. The Gallery Section renders a masonry grid of image cards. It’s a dynamic gallery that displays similar images along with their metadata, arranged in a masonry-style layout.
Observe that the img element’s src attribute points to the actual image file on disk. In this example, the images folder resides in the api folder, but you can place it anywhere within your web server, just be sure to update the path accordingly.
The component is now ready, so let’s proceed to update the App.svelte file.
Running API + Svelte Application
Run the Svelte application using the npm command.
$ npm run dev
Start the API on the default port 8000 with the following command.
$ uvicorn main:app
If you wish to use another port then append the above command with --port 9999
$ uvicorn main:app --port 9999

Download a bunch of random images from the web and see the results with similar images. You can also view the similarity score at the bottom of each image.
The complete source code is available on GitHub.
What’s Next?
The next thing I want to try is to use Binary Quantization which can make the search 40x faster. Here is a great article on it from Qdrant blog.
I also encourage you to follow Qdrant on LinkedIn as they post and share some great content.