Here in this tutorial I have used a word document template and mail merge option of the Word to automate the word document creation.
I have use mail merge option to set the fields and make the document fill through my application. We can also set the location of the text that we want to display in the word document programmatically.
So to get started we have to first make a template which is a word document template file (.dot file).
Open a new word document. Design the template as you like and once you are done then save the document in a word 97-2009 template.
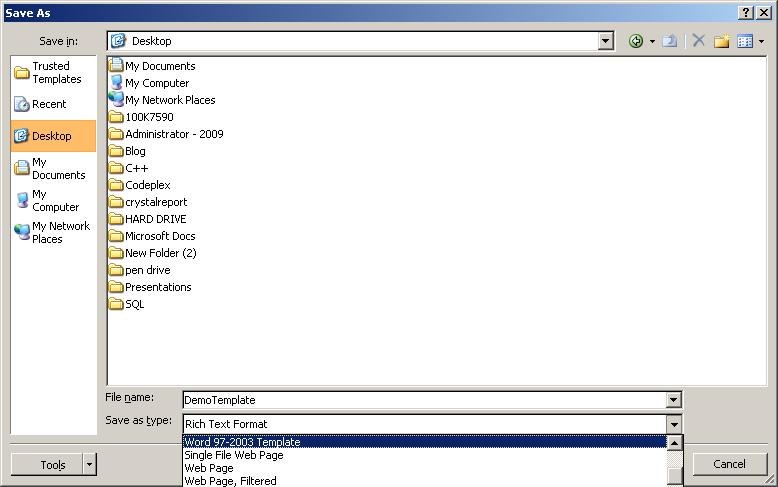
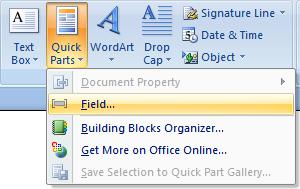
Once the document is designed, it’s now time to set the merge fields. To set the mail merge fields in word 2007, navigate to Insert>Quick Parts>Fields.
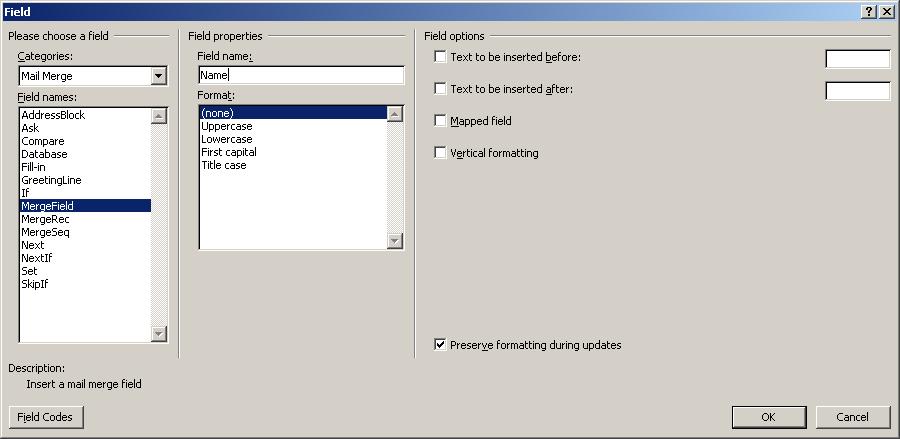
Select Merge Field from the Field names: and give a Field Name: a name which we will need in our code.
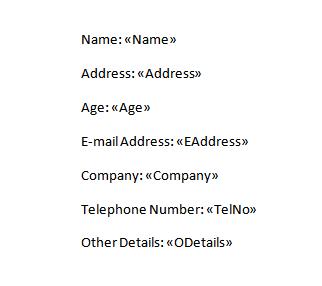
Likewise, we need to set all the fields in the document and in the end the document looks like this:
Create a new windows application in Visual Studio.
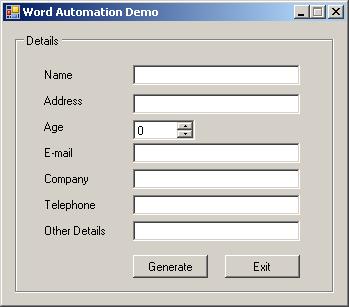
Design application so that you have all the text fields. I have created small and very simple interface to demonstrate this automation.
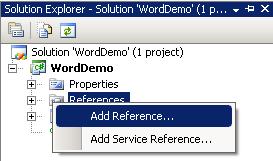
As we are performing office automation we first need to add requisite libraries. Library name can be different as it depends on the office version installed on your machine. To add reference in your application, right-click References in solution explorer.
You will be prompted with Add Reference box.
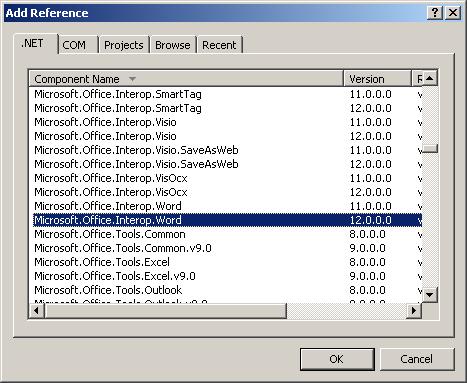
Here under .NET tab choose Microsoft.Office.Interop.Word. You need to check the version as office 2003 and office 2007 will get different version installed on the system. Select the appropriate version and click OK.
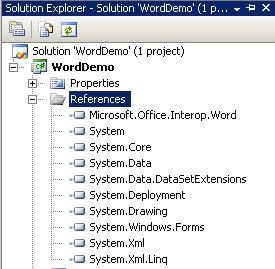
When you add the reference, you will see the following reference added under reference which you can see under solution explorer.
To get the word document reference in the code we need to use the below references (namespaces).
using Microsoft.Office;
using Word = Microsoft.Office.Interop.Word;
Initialize the word application with word document
Object oMissing = System.Reflection.Missing.Value;
Object oTrue = true;
Object oFalse = false;
Word.Application oWord = new Word.Application();
Word.Document oWordDoc = new Word.Document();
To make sure that the application preview the word document, set the Visible property to true of word application.
oWord.Visible = true;
Set the template path This is the same word template file which you have created.
Object oTemplatePath = System.Windows.Forms.Application.StartupPath+"\\Report.dot";
Then pass the template object path to the word document object.
oWordDoc = oWord.Documents.Add(ref oTemplatePath, ref oMissing, ref oMissing, ref oMissing);
Now count all merge fields in the document so we can have the field name through which we can access their location in the document. We are not, in actual accessing the location but want their reference so we can set their text and auto fill the document. I have used foreach loop to traverse all the merge fields.
foreach (Word.Field myMergeField in oWordDoc.Fields)
{
    iTotalFields++;
    Word.Range rngFieldCode = myMergeField.Code;
    String fieldText = rngFieldCode.Text;

    if (fieldText.StartsWith(" MERGEFIELD"))
    {
        Int32 endMerge = fieldText.IndexOf("\\");
        Int32 fieldNameLength = fieldText.Length - endMerge;
        String fieldName = fieldText.Substring(11, endMerge - 11);
        fieldName = fieldName.Trim();
        if (fieldName == "Name")
        {
            myMergeField.Select();
            oWord.Selection.TypeText(txt_name.Text);
        }
        }
}
One thing that you should notice that the merge field starts with MERGEFIELD MERGEFIELD\\NAME, MERGEFIELD\\ADDRESS, and likewise for every mergefield. And in the end a simple if condition which check the name of the field and update the field text.
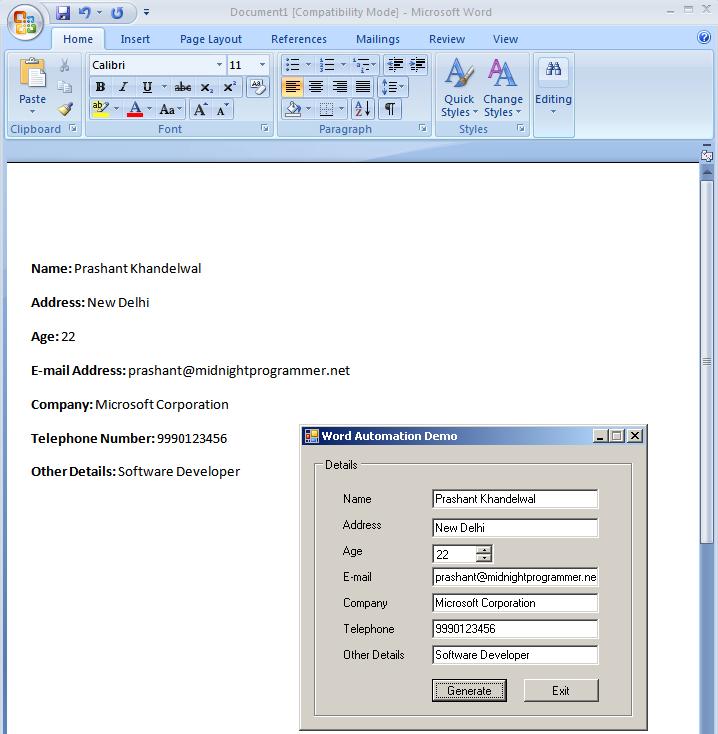
Execute you application and fill in all the text boxes in the application and hit Generate button, after which you will see the document completed.
Download: WordDemo.zip (51.65 kb)

