

I run this blog on Azure as a Web App. I was planning to host it using a VM just for fun but I dropped the idea and choose Web Apps for my blog as a simple medium with less deployment effort and no server management at all. This blog post is mostly me documenting the steps to deploy or host the application on an Azure Linux Virtual Machine.
Choosing/creating/setting up the Linux VM on Azure
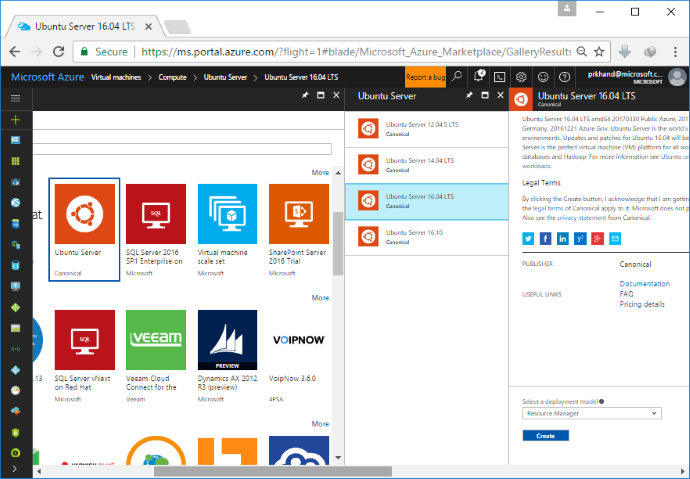
As this is just a demo, I will provisioned a small VM. You can use Azure-CLI to do that or you can just do it from the Azure Portal. I am using Azure Portal to do that. My choice of selection is an Ubuntu 16.04 LTS machine where LTS stands for Long Term Support which means that I am going to get the support for this version for a long time. To Create a new VM in Azure, click the Virtual Machines icon on the left hand side navigation pane and then click Create Virtual machines link in the center of the page. It will open up another pane where you can select the type of OS or type of select a VM from predefined VM templates. In my case I am selecting Ubuntu Server and then the version as 16.04 LTS. To create a VM click Create button as shown in the screen shot below.
In the next pane, provide some basic details to create a VM. You can choose whatever you want as per your business needs. This is what my basic details looks like.
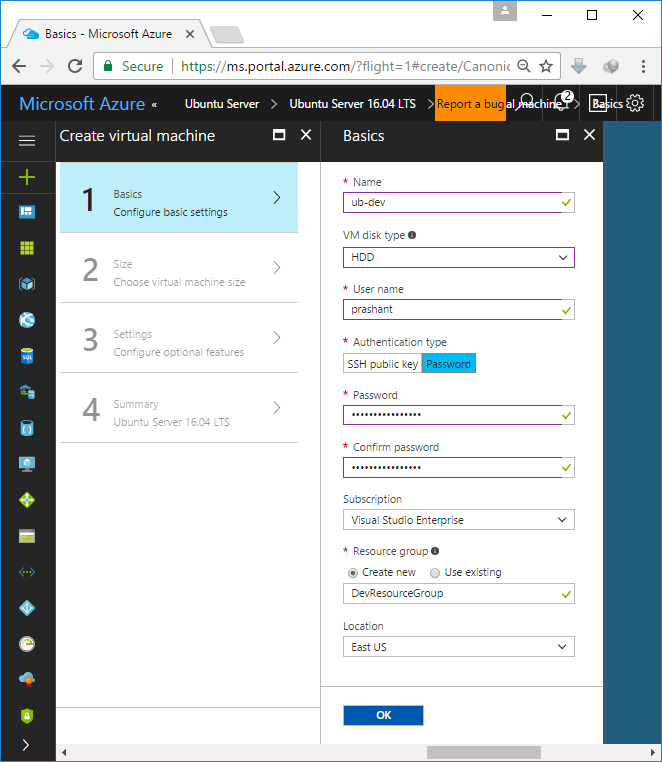
Please note that by default Super User or SU is disabled in Azure linux VM. If I want to execute any command as a root, all I have to do is to add
sudoand use the same password for my user name on that VM.
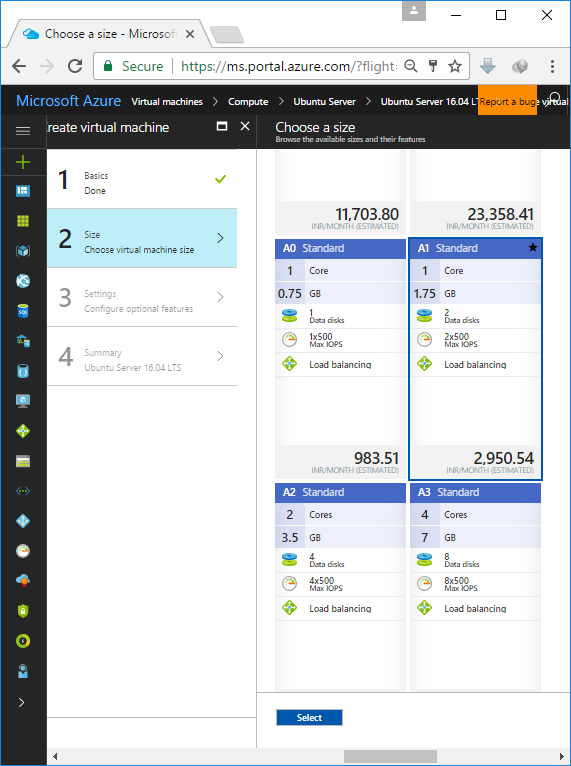
Click OK and proceed to select the VM size. By default, it will present you with some recommendations from the Azure itself. Click on View All to view all VM size offerings available. I am selecting A1 for this example. When in production, you should choose very wisely based on your requirements.
I will leave the Settings as it is.

Hit OK to run the final validation. In the final pane, click OK again to submit the deployment request to Azure to provision a new VM. It will take a while to create a VM and once it is done it will open up a VM home page where you can see the stats for the VM and do other administrative tasks on your newly created VM. It is a server distribution of Ubuntu and hence there will be no GUI for us to work with. SSH will be our only way in to the VM here. In the VM home page click the Connect button and it will prompt you with the SSH command which you will be using to connect to this VM. Here is what I get after executing the VM command for the first time.
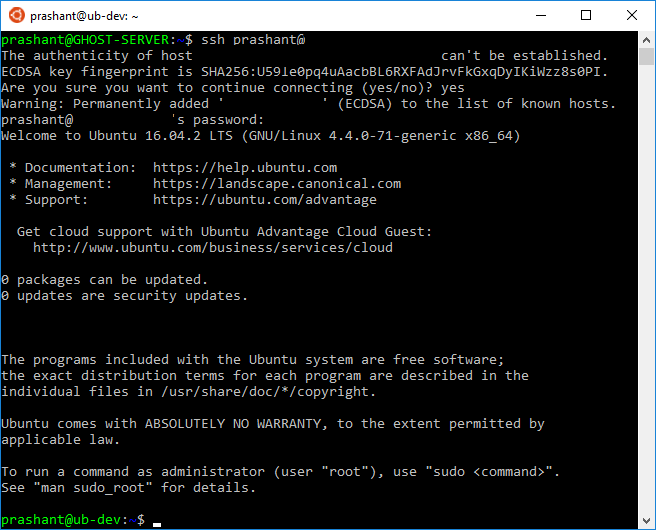
And this is it, we have an Ubuntu Server 16.04 LTS running the cloud. The next step is to install .NET Core on this VM.
Installing .NET Core
Install .NET Core on Ubuntu or on any other Linux distribution is dead easy. The documentation itself is enough to get you started. Head over to this link where you can find the latest release of .NET Core for all Linux distributions. Select the right version of Ubuntu from the documentation before running the command. i have installed Ubuntu Server 16.04 and so the commands I will be executing are:
$ sudo sh -c 'echo "deb [arch=amd64] https://apt-mo.trafficmanager.net/repos/dotnet-release/ xenial main" > /etc/apt/sources.list.d/dotnetdev.list'
$ sudo apt-key adv --keyserver hkp://keyserver.ubuntu.com:80 --recv-keys 417A0893
$ sudo apt-get update
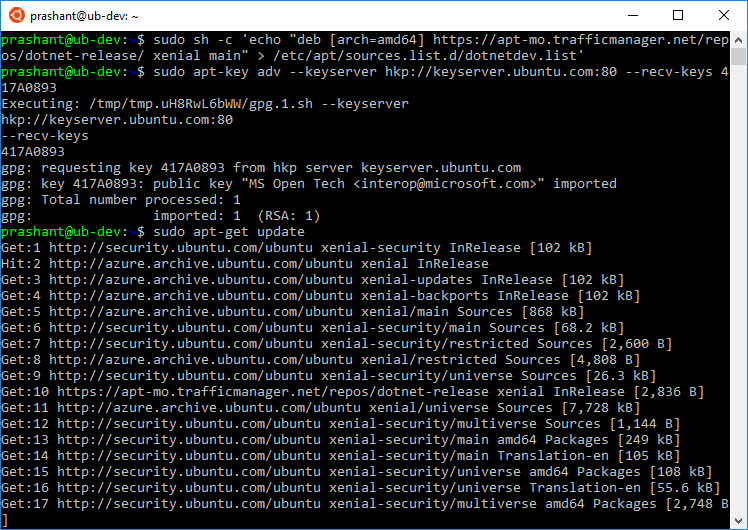
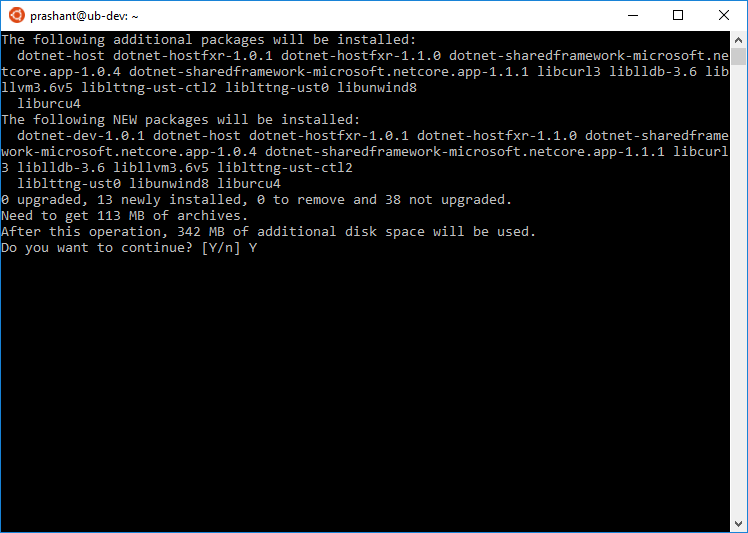
After the update is completed, you are good to install the latest version of .NET with this simple command.
$ sudo apt-get install dotnet-dev-1.0.1
Once the installation is completed, create a new directory with any name of your choice. I give it a name testApp and cd into the new directory like so.
$ mkdir testApp && cd testApp
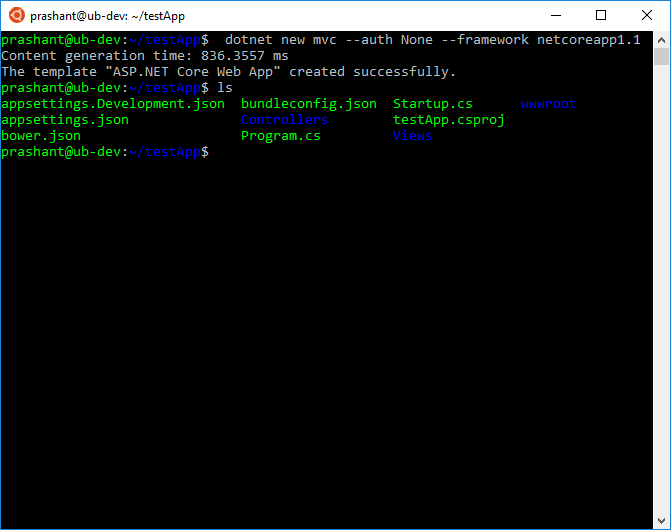
Because I am going to execute the dotnet command for the first time, dotnet CLI utility will populate the local package cache to improve restore speed of the packages and to enable offline access. Inside the testApp directory create a new web app by executing the below command.
$ dotnet new mvc --auth None --framework netcoreapp1.1
Here I am telling the dotnet command utility to create a new application by using the mvc as a template with no authentication of any kind and targeted framework version is 1.1. Now if I do ls in the directory I will see the following contents.
Next thing to do is to restore the packages with restore command.
$ dotnet restore
After the restore is complete, let’s run the application and check if it runs properly or not. To check this we can run the command
$ dotnet run
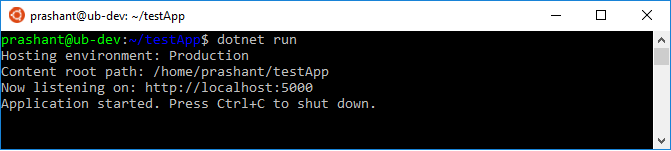
Our web application is now running on the VM. Now let’s try to access it from the local browser with the web address like this.
http://<ip-address-of-the-vm>:5000
You will notice that you cannot reach the site you have it running on the VM. This is because of many reasons when working with VM. First the port 5000 is not accessible from outside. I have to create a firewall exception to make it accessible from outside. Even if I want to do that, it still not a good idea to have your site visitors to use 5000 as a port address along with the domain name. To overcome this issue and to have a more control over the web server, I now need to install a web server which acts as a reverse proxy for my .NET core application running on VM. One more thing I would like to highlight here is that when I execute the above command you can notice that the terminal window is now hanged up with the dotnet server running. If I terminate the command, it will also terminate my application. I will show you how to overcome this issue in the section where I am going to configure the Nginx server to serve as a reverse proxy for my application.
Install Nginx Web Server
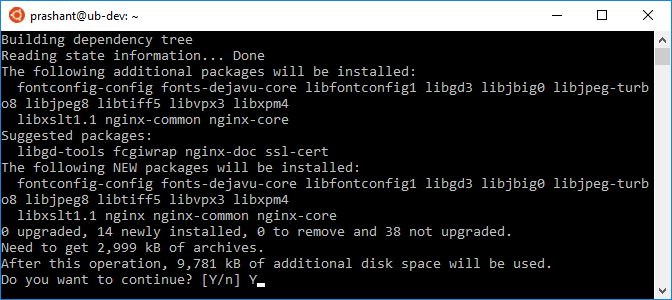
Internally .NET Core used Kestrel Server and is installed by default with the project. I cannot use it as a production ready server to host my application and therefore I am going to install Nginx web server and then configure it as a reverse proxy. To install Nginx I am just going to use a simple apt-get command to install it and then start the service.
$ sudo apt-get install nginx
$ sudo service nginx start
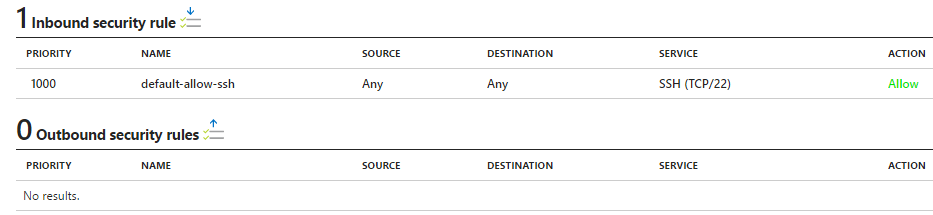
After the installation is done, I should be able to access the default web page delivered by Nginx server by typing the IP address of the VM. If you try this now, it will not work because of the VM Network Security Group in Azure will not let you access it. By default only SSH connections are allowed to the VM. I want to have the HTTP as web applications work on HTTP. Under Network Interfaces of the VM, click on Network Security Groups. Here you can see the Inbound and Outbound security rules. Under Inbound Security Rules, you can see that there is only one rule which is allowing you to have a SSH connection with the VM.
Under Settings, click Inbound security rules and then click Add to add a new inbound rule.
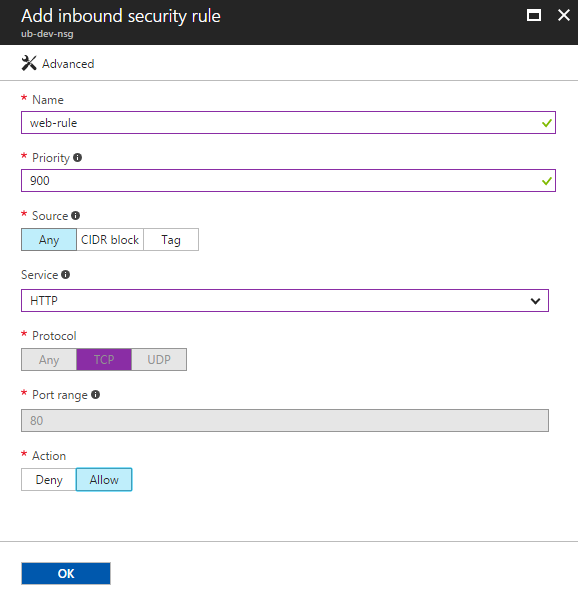
I have selected the HTTP from the Service dropdown. This will automatically set the Protocol, Port range and Action. Click OK to set the rule.

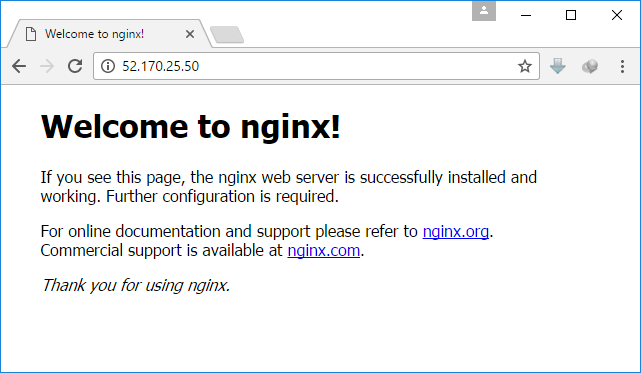
Let’s try accessing the web page again and this time I should be able to see the default Nginx web page.
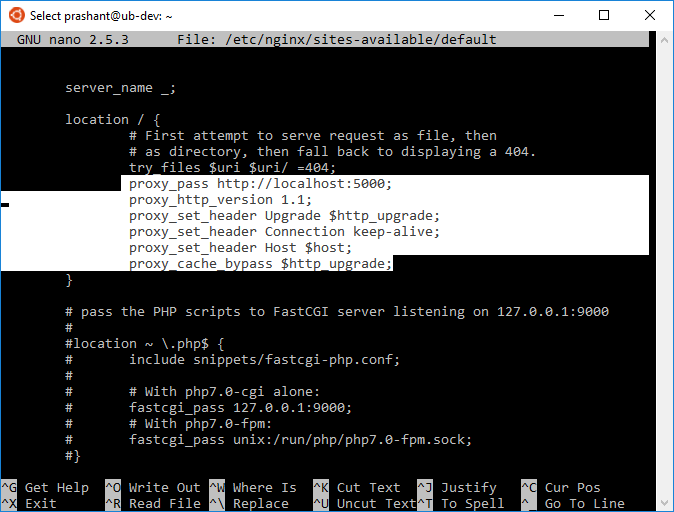
Time to configure the web server as a reverse proxy for my web application. Open the config file from the below location.
$ sudo nano /etc/nginx/sites-available/default
Add the below lines in the config file. The configurations I added are pretty self-explanatory. I recommend reading the complete configuration of Nginx here.
If you made the changes when the server was running then either restart the server to reload the settings or execute the below command to reload the settings without restarting the server.
$ sudo nginx -s reload
To publish the website, you also have to publish it with release configuration. With .NET Core, there are 2 ways of doing it. The .NET Core Guide states 2 methods of deploying the web application.
- Framework-Dependent Deployment (FDD)
- Self-Contained Deployment (SCD)
As per the documentation FDD and SCD are described as follows:
For an FDD, you deploy only your app and any third-party dependencies. You don’t have to deploy .NET Core, since your app will use the version of .NET Core that’s present on the target system. This is the default deployment model for .NET Core apps.
For a self-contained deployment, you deploy your app and any required third-party dependencies along with the version of .NET Core that you used to build the app. Creating an SCD doesn’t include the native dependencies of .NET Core on various platforms (for example, OpenSSL on macOS), so these must be present before the app runs.
Based on the documentation and as I have already installed .NET Core on the VM, I am going with FDD approach. As said, this is the default deployment model and therefore, I am going to zip the publish content and FTP to the VM.
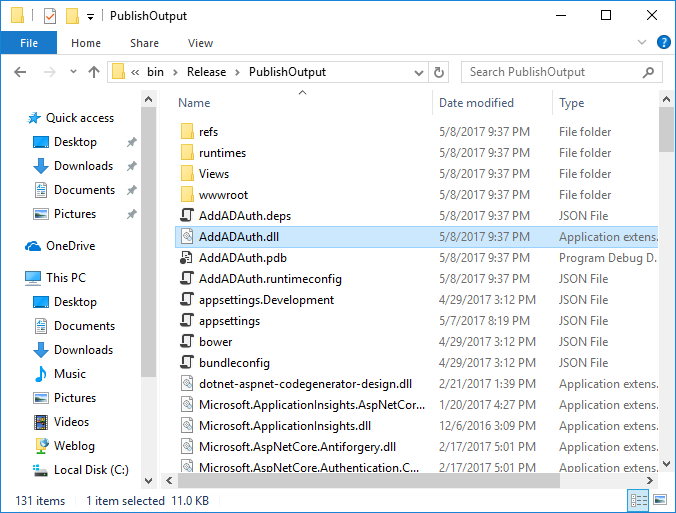
In my last post, I have build the application where I have integrated the Azure AD authentication in .NET Core web application. I will use the same application and publish it with Release configuration on my Windows machine and zip it. Here are the content of the release publish folder.
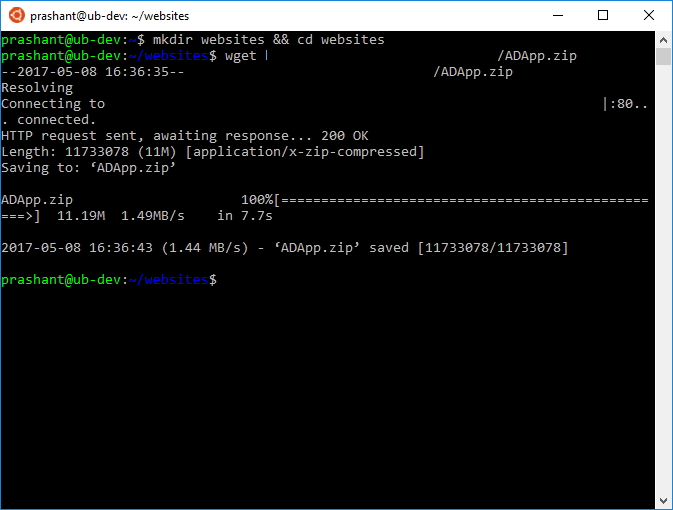
Now I can upload this to the VM. I have FTP already with me and therefore I am not configuring it on the VM. If you want to have a FTP server look no further than FileZilla Server. Execute the wget command to download the zip file.
$ wget/ADApp.zip
By default, unzip command is not installed on the VM, install it by using the below command.
$ sudo apt-get install unzip
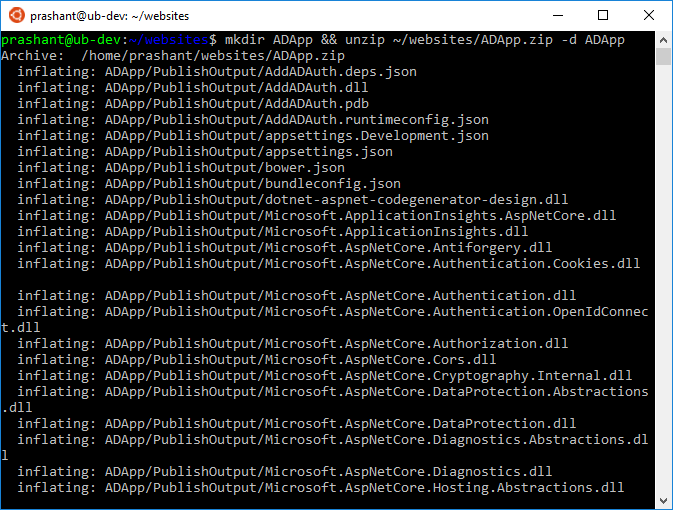
Extract the zip file in a directory name ADApp by executing the below command.
$ mkdir ADApp && unzip ~/websites/ADApp.zip -d ADApp
Change the working directory and try to run the application so ensure that the publish was successful.
$ cd ADApp && dotnet AddADAuth.dll
Note that the directory structure is bit different in the screen shot and the below screen shot. This is because I have copied all the files and folders from the PublishOuput folder into the ADApp folder root.
When you run the application for the first time, you will notice the application will not start just like that. .NET Core CLI utility will first configure the environment and then the application is being executed.
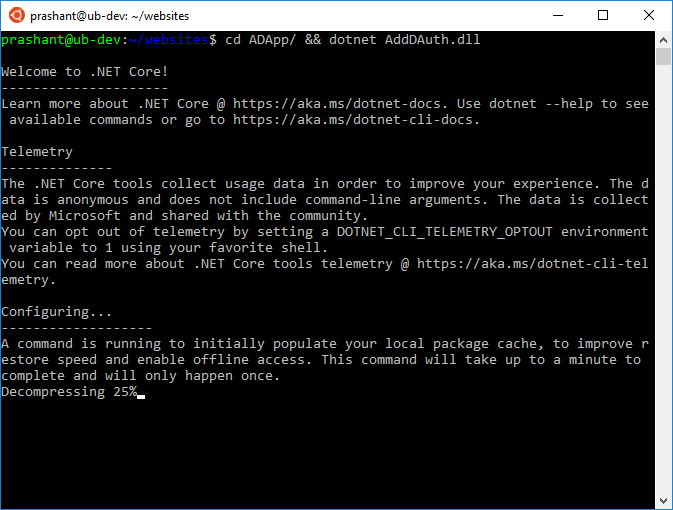
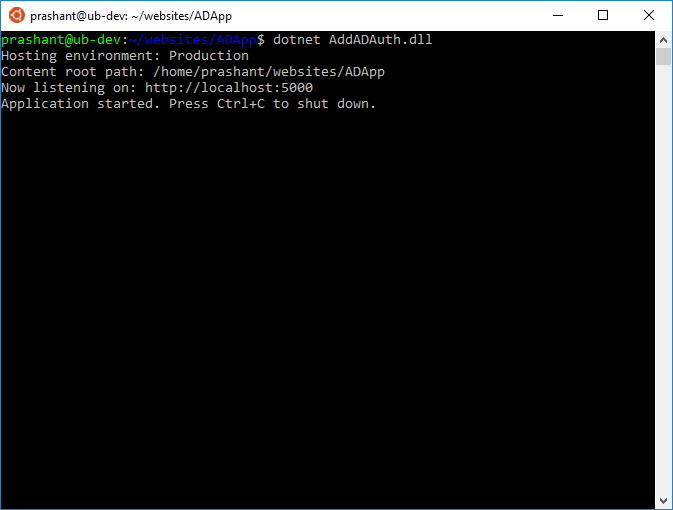
To execute the web application, run the below command. The dll file is the one which is being executed by the .NET Core runtime environment.
$ dotnet AddADAuth.dll
The application started successfully on local server on port 5000.
But there are problems when I run the application like this. One problem is that the command line is now occupied and I cannot do anything. If I terminate the process than the web application will also stop and I will not be able to browse the site. The second problem is that i have configured Nginx web server to power my web application. The internal .NET web server is not something I can use in the production environment. In short, I need this application to be running by .NET Core web server on port 5000 like so but it should not hang up or limit me to use the command line. To overcome these two problems, I can either use nohup command or I can use something more powerful like supervisor. For now I am sticking with nohup as this is just a sample application. When I want to have more control I will switch to supervisor. Here is the nohup command in action. Giving me the terminal control back after I execute the dotnet command.
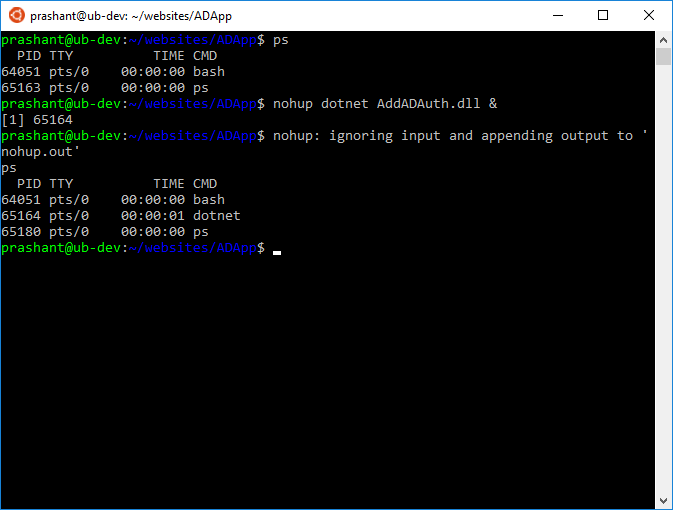
You can notice that first I execute the ps command to list down the processes running in the background. Then I execute the dotnet command with nohup and after that I execute the ps command one more time to check the running processes. You can see that I have the dotnet process running with process ID as 65164.
Just like at the time of configuring Nginx, I have checked whether I was able to access the default page of Nginx from my browser or not, I will now enter the IP address of my VM and this time I should be able to see my AD authentication application running.
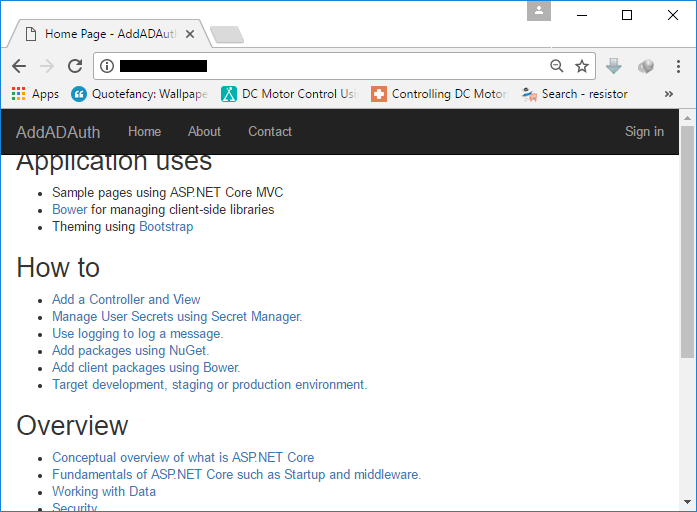
The CSS is bit off in the web application and that is because of the inner URLs need to be configured with the different host name.
Add a custom domain name
Now I have hosted a ASP.NET Core web application in a Linux VM in Azure. The web server I am using is Nginx. Currently I am accessing the web application by IP address of the VM but now I want to access it with a recognizable name. I have a parked domain with GoDaddy called theevilprogrammer.com. I want to associate this domain name to my web application and to do that I just need access to my VM and GoDaddy account.
Go to your domain registrar from where you can access the DNS settings of your parked domain. In my case it is GoDaddy. Select your domain and click on Manage DNS.

I have an A record in the DNS management of my domain. All I have to do here is to change the Value to point to the IP address of the VM. Once this is done, click the Save button.
Restart the Nginx server by running the below command. This will reload the configuration and apply those configurations which we have changed. Now I can check whether I am able to access my site with the domain name I have configured or not.
$ sudo service nginx restart
Open browser and type in the domain name which in my case is theevilprogrammer.com.
So this is how you can also run your .NET Core applications from the VM. Do keep this in mind that there are lot of Nginx configuration and Azure VM configurations you have to set before you go to production. This post is something which can get you started with your own application hosted on a Linux VM in the cloud but there are still lot of little and important things that you have to perform before going to production.