

If you have a static website, blog or a react application, here is how you can host them for cheap with Azure Blob Storage. This article focuses on how you can configure Azure Blob Storage to host your static website or react application.
Starting with create-react-app
Creating a react application is simple with create-react-app and then build the optimized output of the application by running npm run build command. This will publish the optimized version of the react app in the build folder.
IMPORTANT: If you are using Next.JS or any other framework which require server-side rendering then hosting your application with Azure Blob Storage will not work as server-side rendering demands a web server to deliver the content to the client.
Creating and Configuring Azure Storage Account
Once the build is completed successfully, it is time to configure Azure Blob Storage to host the static website. Go to portal.azure.com and create a new resource by clicking Create a resource and then search for Blob Storage.
Select the resource offering which is provided by Microsoft. Click on Create and follow the instructions to create a new Blob Storage Account.
In the Basics tab, fill in the details like shown below.
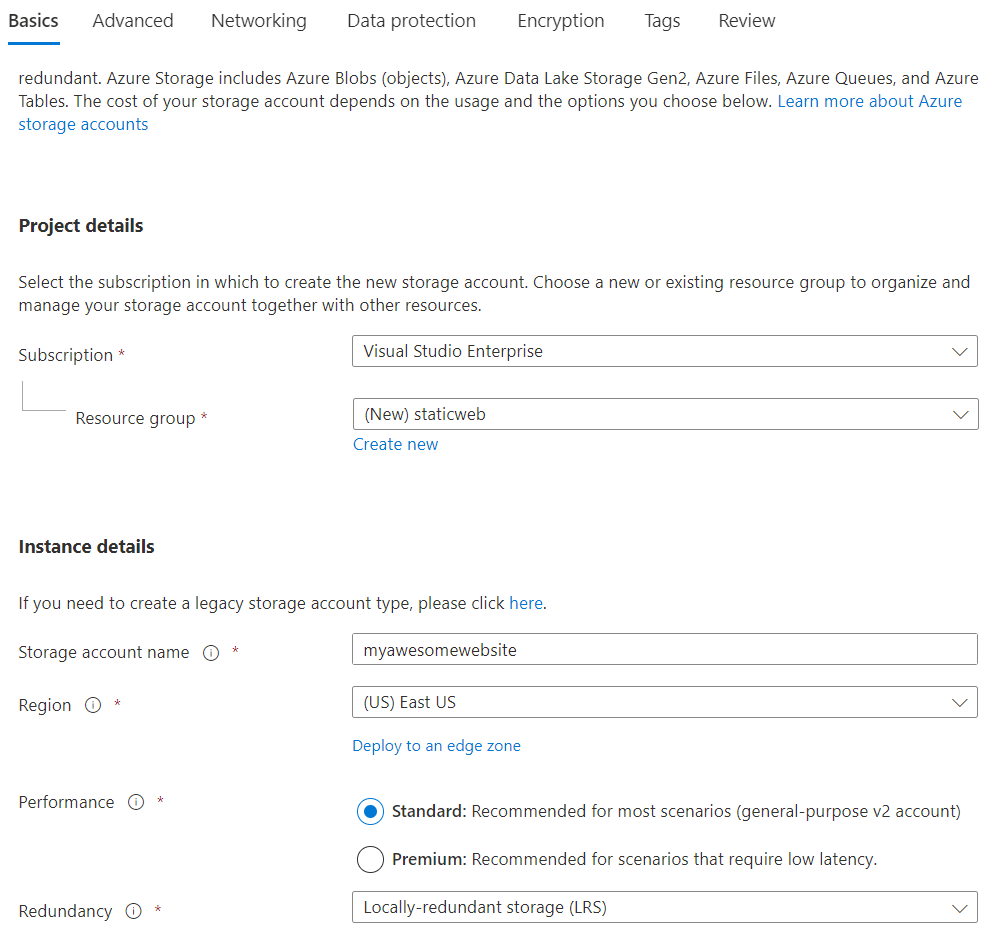
I have created a new resource group and named it staticweb. You can name it anything you want. The next is Storage account name which you can set what you want but the name you choose here should be unique across Azure. Region is the place where your resources/storage account will get created. You can select the region which is close to your geographic location for lower latencies. If your website, application or blog is very critical, then you can also opt for Geo-zone-redundant-storage which is for critical business applications. As our use case is very simple and our application is not critical, we can select Locally-redundant storage. For Performance, you can select Standard, but if you want lower latencies then you can select Premium.
Check pricing with Azure Pricing Calculator before you proceed with any service in Azure. This will give you an idea of how much money you have to spend with these settings over a period of a month.
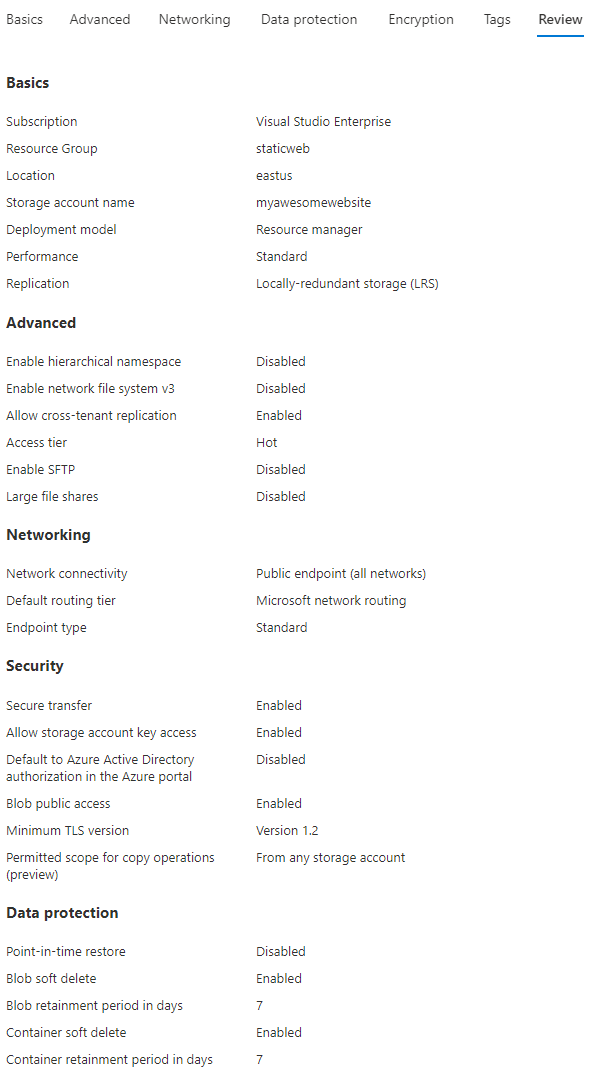
Let’s keep all other settings as they are and click Create to provision a new Storage Account.
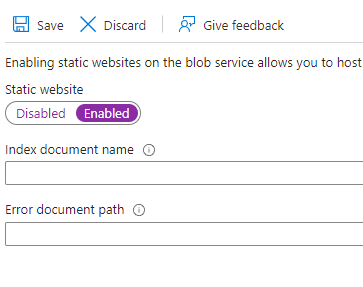
After the storage account is created, under Data management, select Static website.
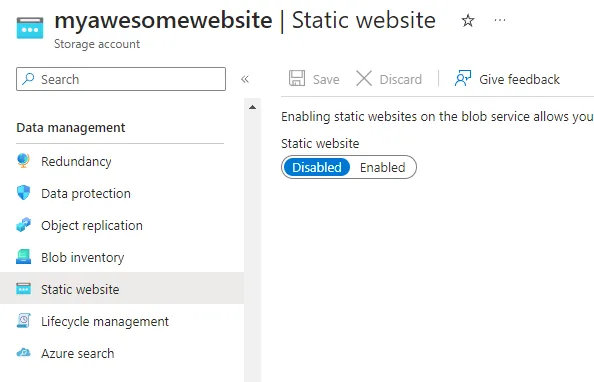
Static websites are disabled by default. Click on Enabled and you will see two fields are now visible asking for the index document name and error document path.
Depending on the landing, default or index page of your application, you can enter the name of the document here. In my case where I am hosting a react application, the index document name is index.html and error document can be 404.html or something else. I don’t have an error document, so I am leaving it blank.
Click Save to save the setting. You will now have the URL of your static website along with the name of the container where the contents of your static app should be uploaded.
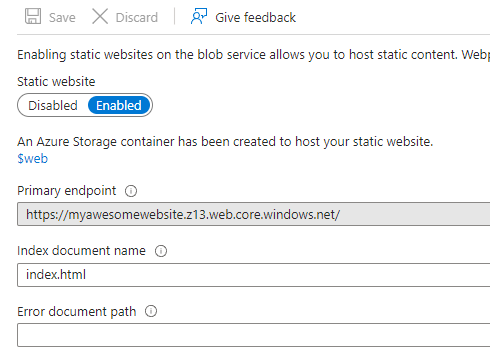
Notice the container name is $web and the primary endpoint is https://myawesomewebsite.z13.web.core.windows.net/.
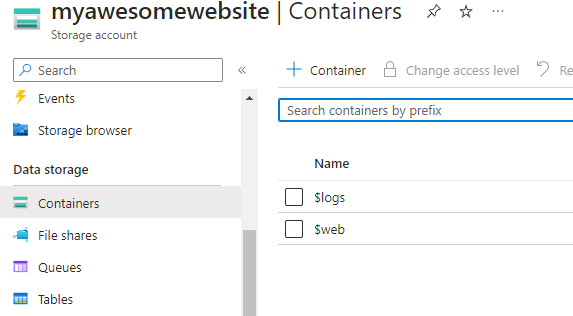
You can also navigate to this $web container by clicking Containers under Data storage section.
Upload static contents of web app
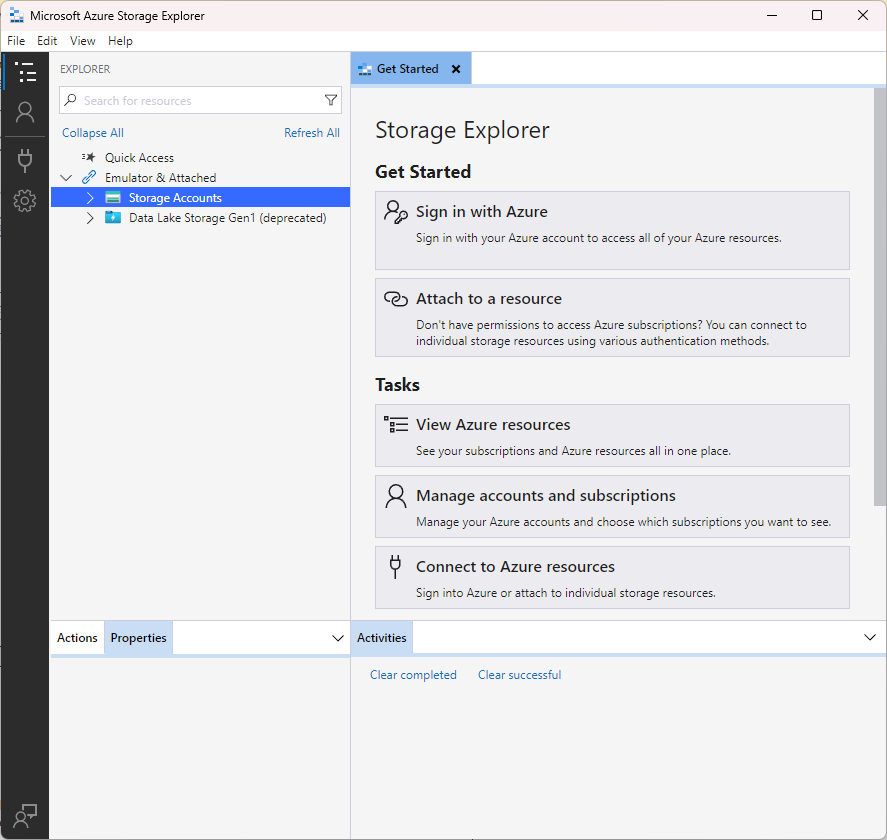
Uploading multiple files directly from the portal is a tedious task and takes a lot of time. I would recommend making use of an open-source tool called Azure Storage Explorer. Download this for your operating system and install it.
There are a few ways to connect to the storage account in Storage Explorer.
- Sign in with your Azure credentials and connect to all the storage accounts you have in your subscription.
- Use storage account connection string to connect to a specific storage account.
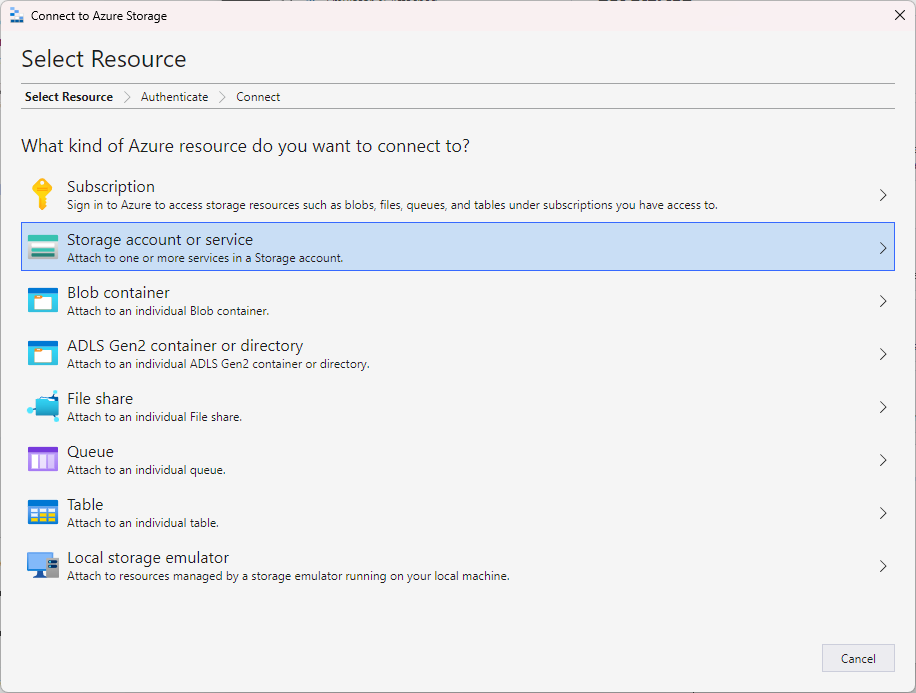
Click on Attach a resource on the Get Started page or right click Storage Account and select Connect to Azure storage…
You can also select Blob container and then generate the SAS token to connect to a container. I am connecting my storage account with storage account connection string. You can get the connection string from the Azure Portal.
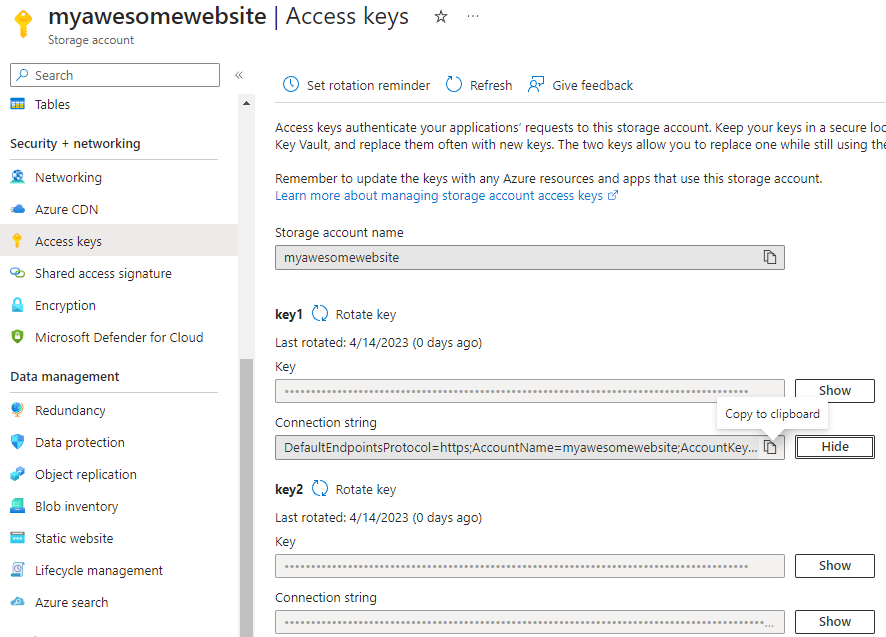
Under Security + Networking, click Access Keys and then click on Show button for Key1 > Connection string. Click Copy to clipboard icon to copy the connection string.
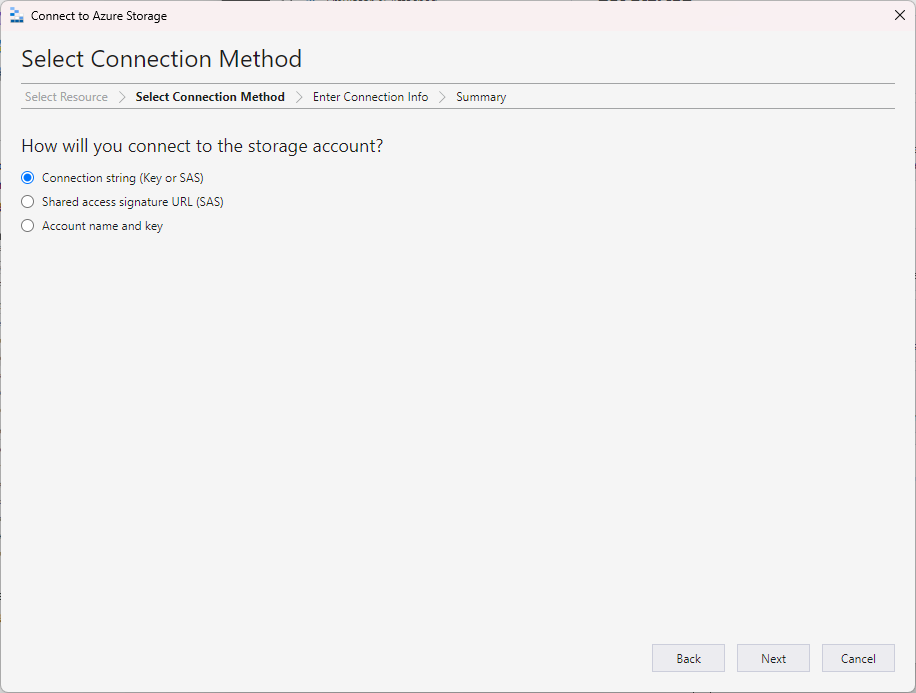
Back in the Storage Explorer, click on Connection string (Key or SAS).
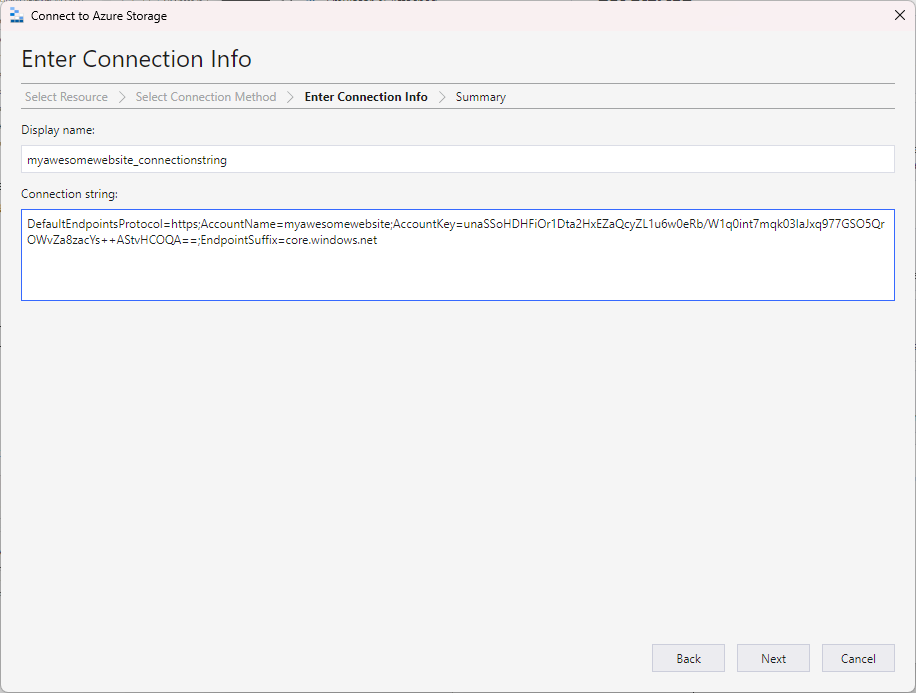
Enter the connection information and click Next.
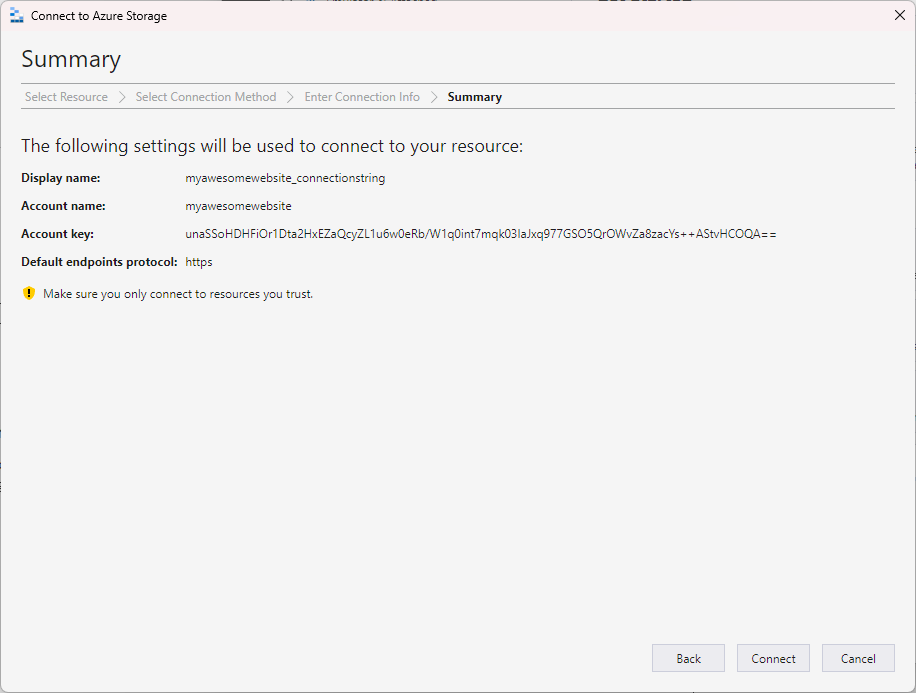
Review the final details and click on Connect to connect to the storage account.
After the connection is succeeded, you should see the list of all the containers in the storage account.
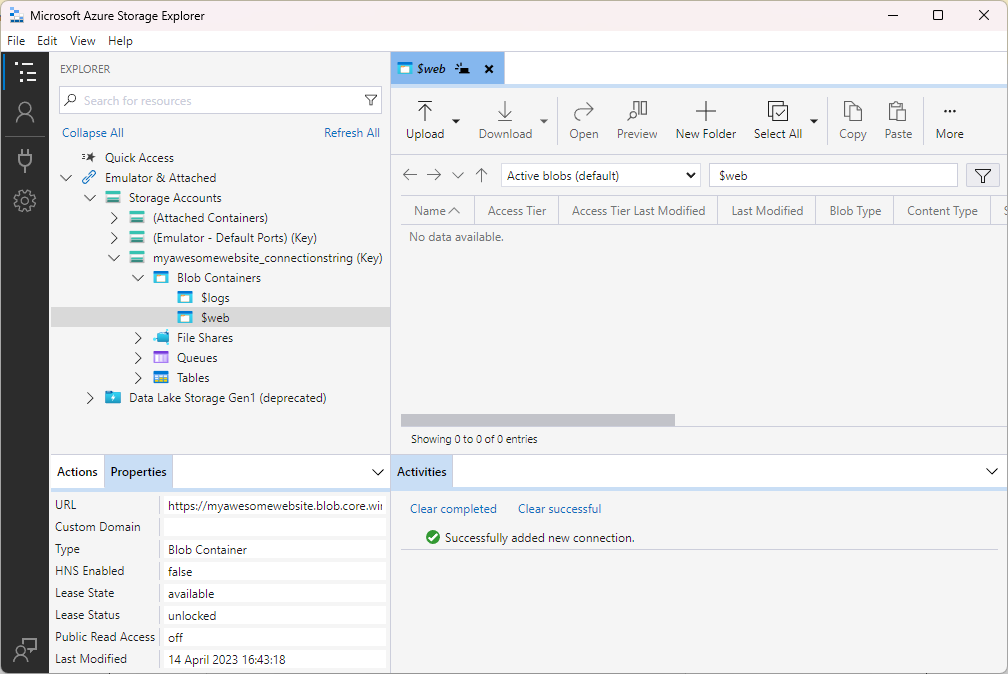
Select the $web container and start uploading the files of your static web app.

That’s all!!
Let’s check if our react application is running through static website blob storage url or not.
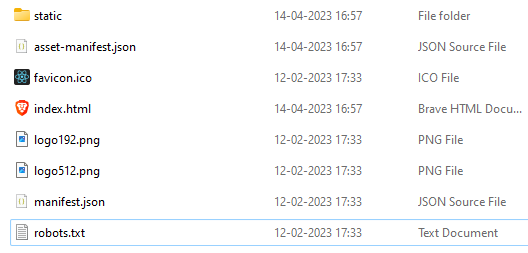
I built my react application by using the npm run build command and these are the files which I am going to upload to the $web container.
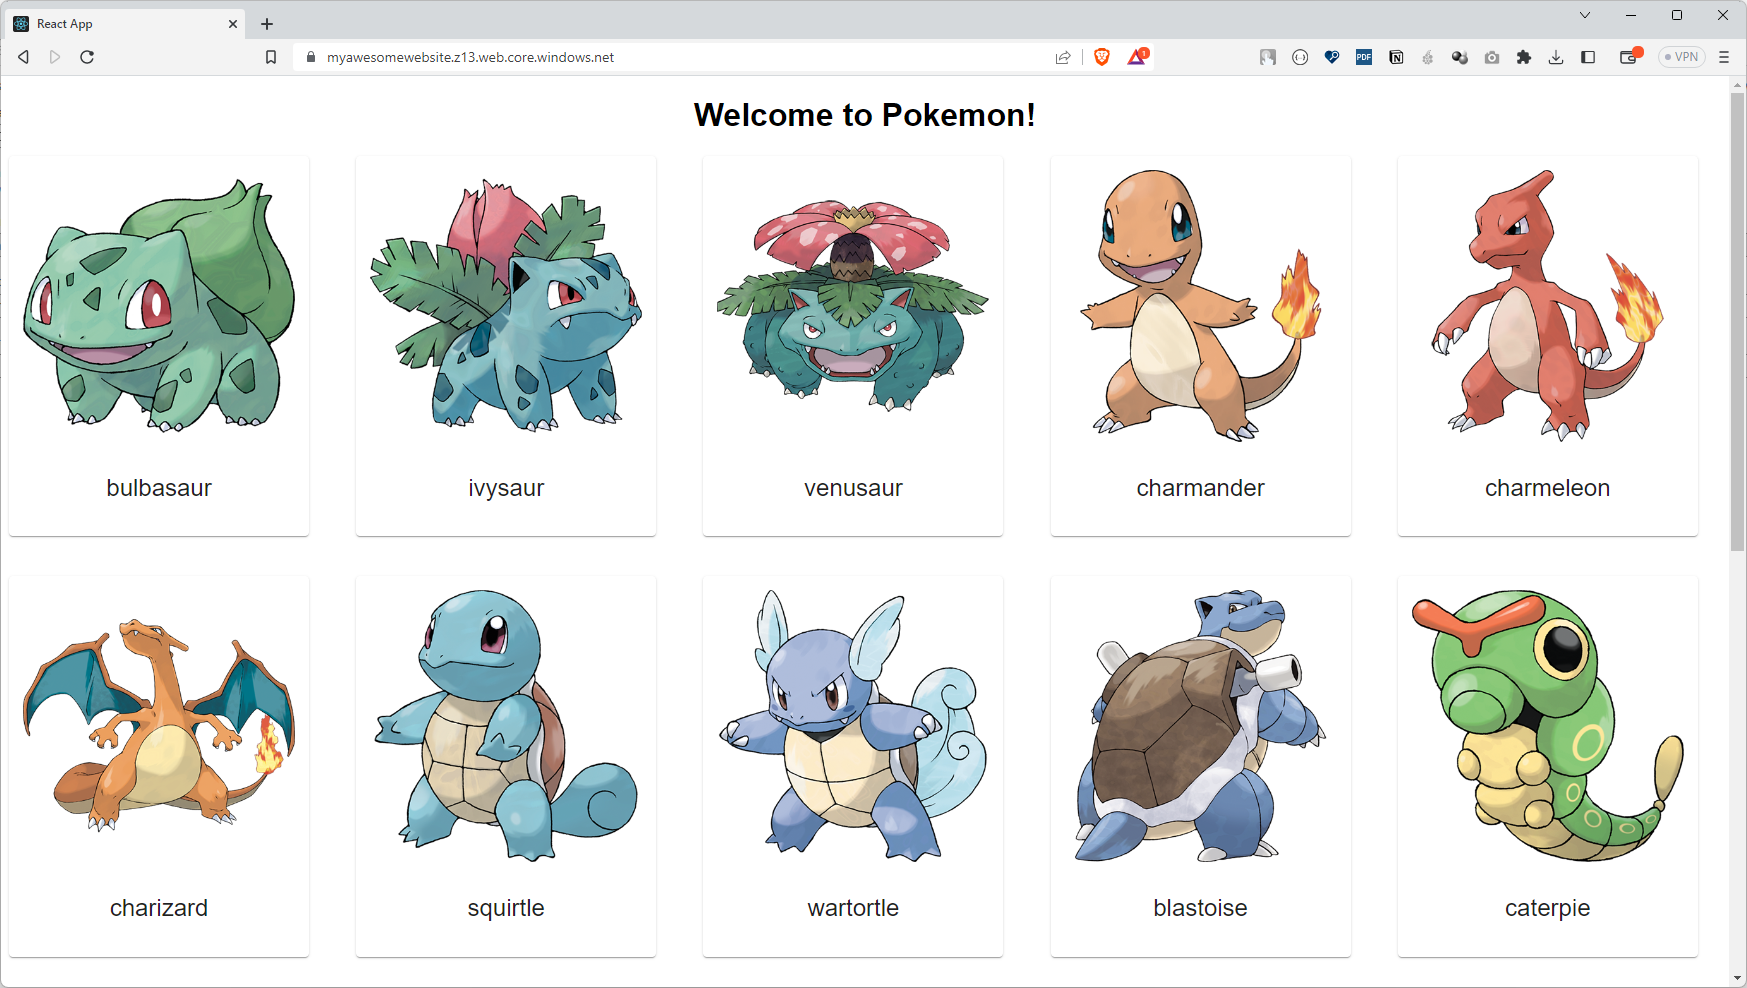
Hooray!! Our react application is successfully hosted and served from Azure Blob Storage.