If you are writing code for a while now then by now you must have a lot of code snippets which you will be using in your application development, and you use them because they save a lot of development time. At this moment I have now a huge collection of code snippets which includes functions, classes, extension methods and functions that I have extracted from different open source applications.
As I was progressing towards building an application in WPF which helps me managing all my code, a thought ran into my mind that it would be good if I could use syntax highlighting in the code. As usual I began my search to find a control in WPF which supports syntax highlighting and what I found, I was and I am at present satisfied. The control called AvalonEdit is a part of the free IDE called SharpDevelop for C# and VB.NET and Boo projects.
Languages support by the control:
- ASP/XHTML
- HTML
- JavaScript
- XML
- XMLDoc
- VB.NET
- C#
- C++
- Coco
- Java
- PHP
- Patch
- Boo
- TeX
- Custom Highlighting
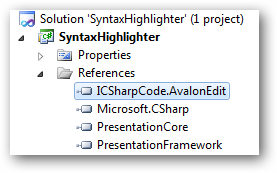
I am a .NET guy so I will be using it for highlighting C# code. Fire Visual Studio and create a new WPF project. Add ICSharpCode.AvalonEdit.dll in the reference of your project.

After adding the reference in your project, add below XAML code on the window where you have your code window.
<Window x:Class="SyntaxHighlighter.MainWindow"
        xmlns="http://schemas.microsoft.com/winfx/2006/xaml/presentation"
        xmlns:x="http://schemas.microsoft.com/winfx/2006/xaml"
        xmlns:avalonEdit="http://icsharpcode.net/sharpdevelop/avalonedit"
        Title="MainWindow" Height="401" Width="617" Loaded="Window_Loaded">
    <Grid>
<avalonEdit:TextEditor  Name="txtCode"
    FontFamily="Consolas"
    FontSize="10pt"/>
    </Grid>
</Window>
At line 4, we will use custom mapping (because it is a third-party control) so we can use the control in our project. At line 7, I have used TextEditor class of the AvalonEdit namespace. The font name and size is the same as of the source code text editor in Visual Studio 2010.
To get the control working with least configuration set some namespaces on the top, and two lines of code on window load for syntax highlighting and to show line numbers respectively.
Namespaces:
using ICSharpCode.AvalonEdit.CodeCompletion;
using ICSharpCode.AvalonEdit.Folding;
using ICSharpCode.AvalonEdit.Highlighting;
Window_Loaded:
txtCode.SyntaxHighlighting = HighlightingManager.Instance.GetDefinition("C#");
txtCode.ShowLineNumbers = true;
If you wish to change the language, then just change the name of the language which is passed as a parameter in the GetDefinition method. The code in the Window_Loaded method will allow you to set syntax highlighting specifically for C#, pretty simple but not very useful. Check out the other way where the text editor will load the file and by reading the file extension, it will set the syntax highlighting. Above method will be useful if the user wants to set syntax highlighting of his choice. But if you want to detect the language and get the syntax highlighting automatically, then use the below code.
txtCode.Load("d:\\Data.cs");
txtCode.SyntaxHighlighting = HighlightingManager.Instance.GetDefinitionByExtension(System.IO.Path.GetExtension("D:\\Data.cs"));
txtCode.ShowLineNumbers = true;
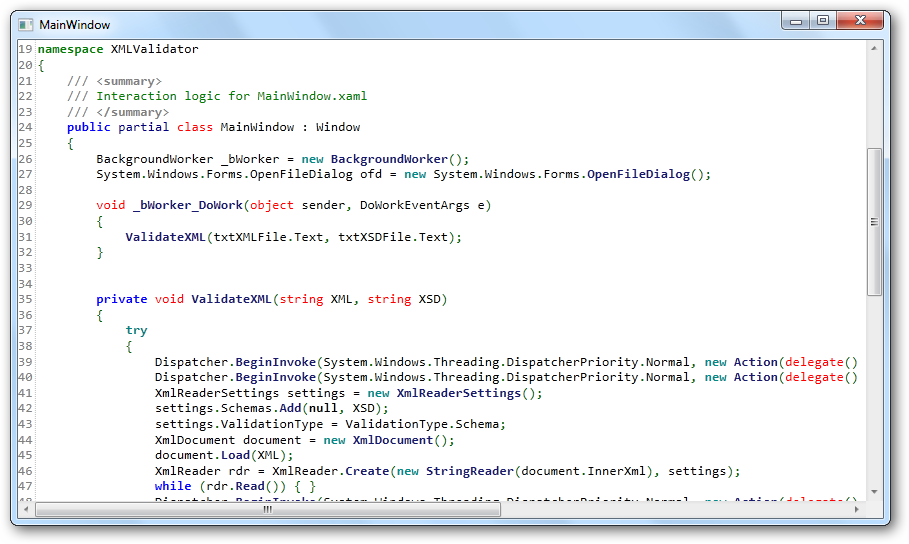
The first line of code will Load the file and the second file will first get the extension of the file loaded, set the instance of the HighlightingManager class and in the end set the syntax highlighting. This is what I got in the end (I am using the second way to load the file).

Note: To make sure that the second method work, you need to make sure that the file should have a language extension like .cs for C#, cpp for C++, xml for XML files etc. AvalonEdit is an open source code, so you can play around with it and can have your own customizations. There are lots of in-built configurations that you can do to set up your syntax highlighting control. I strongly recommend you to download the below files and take a look at the sample application.
Download: AvalonEdit_Source.zip (861.02 kb)
Related Links:

