

I am quite fascinated with Windows 7 before even I get it started using it. Actually I have just started on a fun project for my personal use which includes jump list. Why I am doing this? To navigate and get access to the application and internet addresses I need anytime. I am tired of typing addresses and navigating to the programs I frequently use. I have just started so I thought I must blog about my jump list experience with you all. You won’t believe but I am still using Visual Studio 2008 with .NETFX 3.5. Ok, Let’s talk about some Windows development. In my last post on Windows 7 development I explain how can you have Aero effects for your Windows applications. If you haven’t read my post on Aero effects in Windows Application then you should have a look at this.
Windows 7 API Code Pack comes packed up with some serious development stuff for Windows 7. If you don’t have it yet then check my post for Windows 7 Development resources.
We all know and view the new taskbar in Windows 7 and when your program got pinned in the taskbar you can simply left click to run your program or right-click to view more options associated with your program. To make it more clear I give you an example. I use Winsnap (a tool to take screenshots with dropshadows) to take screenshots and yes I use it quite frequently, so I pinned it to my taskbar.
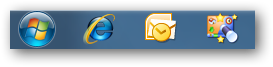
That’s the third icon from the Windows start button. When I click it normally it opens up the Winsnap application and show me the panel from where I can take and make settings for my next screenshot. but when I right-click the pinned Winsnap icon on my taskbar it show me the same basic settings which I will be using if I would have launched the application.
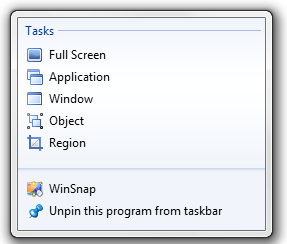
Now when I have to take screenshots with my utility I just right-click Winsnap icon pinned to my taskbar and I am done. The items that you see under the heading Tasks is having all your jump list items. It is indeed possible to have some common functions from your application to be included in the jump list or can have some external links for applications like calculator, notepad, paint etc. If you don’t know (just in case) if you can pin something on the taskbar then you can also unpin it.
I hope now I am quite clear with jump list in Windows 7. So lets gets our hands on developing an application with jump list.
Getting Started
Start it up creating a simple windows forms application with a name of your choice. As we are delaing with Windows 7 API we need to have it added in our project references. Files you need to add to references are:
- Microsoft.WindowsAPICodePack.DLL
- Microsoft.WindowsAPICodePack.Shell.DLL
You can have these API libraries once you donwlod the API code pack. After you are done adding the required references, you can switch to the code window and do the rest of the work.
Creating Jump List
Start up with adding the namespace:
using Microsoft.WindowsAPICodePack.Taskbar;
using Microsoft.WindowsAPICodePack.Shell;
Create a jump list by calling CreateJumpList method, which is a part of Microsoft.WindowsAPICodePack.Taskbar.JumpList namespace.
JumpList list = JumpList.CreateJumpList();
If you want to show the most recent files you have used, then you can do that by using this line of code:
list.KnownCategoryToDisplay = JumpListKnownCategoryType.Recent;
JumpListKnownCategoryType is an enumeration which will let you accomplish this. You can also have some other available options.
- Frequent: Display the frequent known category.
- Neither: Don’t display either known category. You must have atleast one user task and or custom category link in order to not see the default ‘Recent’ known category.
- Recent: Display the recent known category.
To add some commonly used applications to the jump list then you can have it with in less than a jiffy. Create a JumpListLink class object and associate it with the JumpList class object. I use notepad a lot to note down my work, now I want to add to the jump list and I code it this way:
JumpList list = JumpList.CreateJumpList();
string SysPath = System.IO.Path.Combine(Environment.GetFolderPath(Environment.SpecialFolder.System),
"notepad.exe");
JumpListLink JLink = new JumpListLink(SysPath,"Notepad.exe");
list.AddUserTasks(JLink);
list.Refresh();
One line of code can be used to include icon for your program. The IconReference property will let you add the icon the jump list item. Set the default value to ‘0’, if you want to use the default icon for the application.
JumpList list = JumpList.CreateJumpList();
string SysPath = System.IO.Path.Combine(Environment.GetFolderPath(Environment.SpecialFolder.System),
"notepad.exe");
JumpListLink JLink = new JumpListLink(SysPath,"Notepad.exe");
JLink.IconReference = new IconReference(SysPath, 0);
list.AddUserTasks(JLink);
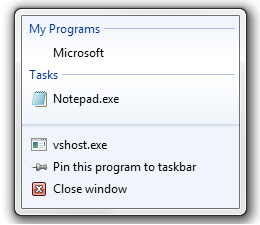
Categorizing programs is bit easy this way. I can categorize web URLs, my favourites programs and some other places/links on my computer. There is lot more you can do with Jump Lists. I hope the explaination above can let you create your own applications with jump lists.