© 2026 Pashant Khandelwal

© 2026 Pashant Khandelwal
Download the source code for the very 1st version and one of its kind, the legendary photo editing software Adobe Photoshop. I remember, I read somewhere that they distributed the code on floppy disks. But here it is, after more than a decade the source code is now available to public.
The source code is just 588KB!! and is hosted at computerhistory.org. You can download the complete source code here.
I have been blogging for more than 4 years now and my articles also got published in many online tech journals, blogs and may be re-written without even my consent. I got lots of email
I have been awarded DZone MVB few years back. The DZone MVB (Most Valuable Blogger) award is a big motivation for bloggers like me. Few weeks back I received an email from DZone after they have shipped a goodie box to my address. I really was not aware that I am actually going to get that, but today while I was busy in office with my work, I received a call from my mom that you have a big blue box arrived from DZone. I took it lightly and continue to do my work. from different fellow programmers and bloggers around the globe. I appreciate the response, feedback and criticism of the work I am doing.
In the evening, after reaching home I take a look at the box and trust me I was not at all accepting this much of stuff. I liked each and everything in the box. Here is a pic I clicked and tweeted:
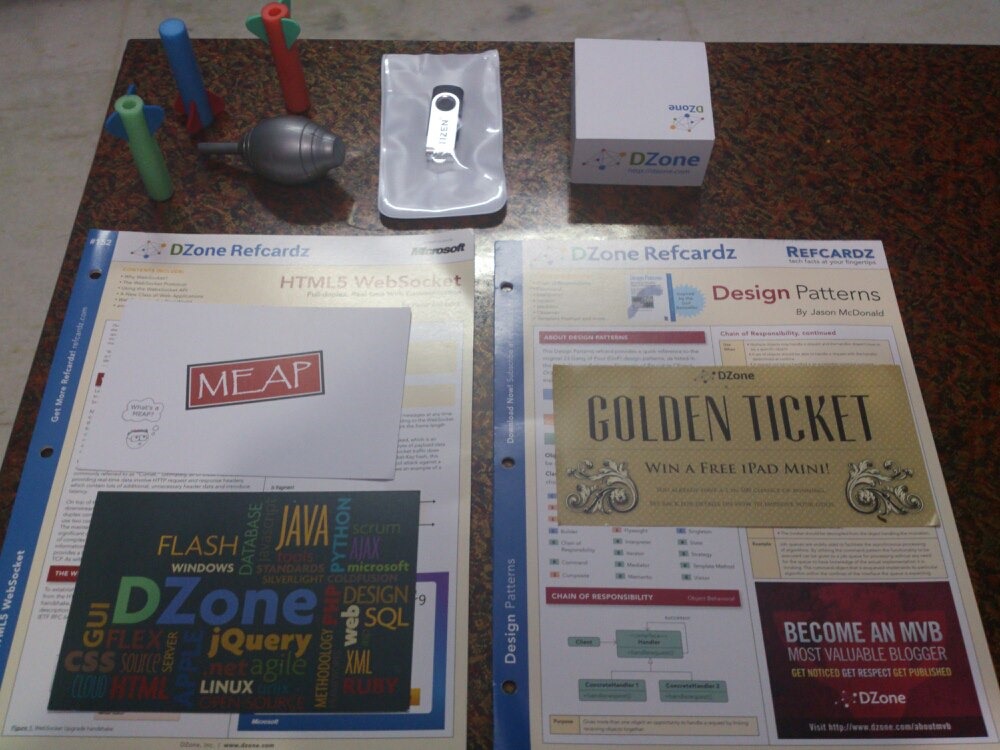
And to my surprise the box contains a T-Shirt with a <dev> tag. This is really going to make me feel like a awesome programmer.

I would like to thank DZone’s Community Relations Manager – Kelly Reiser and CEO – Rick Ross and all DZone team and all the community members across the globe for this awesome goodie box. This gesture is highly appreciated and keep bloggers like me motivated.
Developing application for Windows 8 is fun. I love the UI and the idea of having a live tile for my application. So I try building a live tile application, but unfortunately I can’t find a simple written article or a blog post. I even found MSDN to be a bit difficult for the newbies to get the grasp in first go. There are lot of things to understand and to worked on for creating a live tile in Windows 8. For this post I am just covering the main points. First, create a new Windows store application.
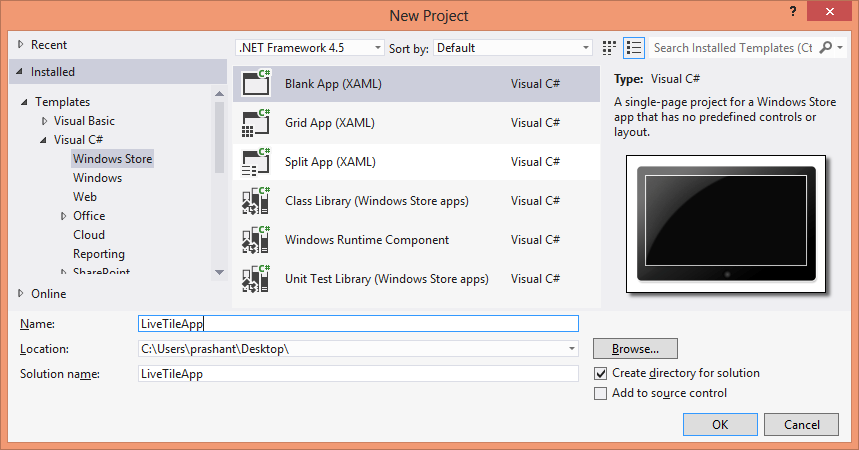
Now to implement in the live tile, there are 2 different ways. For this post I am showing one way using the built-in classes and another way using the NotificationExtensions library from Microsoft. For the tile color, application splash screen, logo and other properties in the package.appxmanifest file. I am not making any changes to this file and using the default values.
For the simplest implementation I have added a button and the code to change image on my tile. There are different types of tiles that you can select with using TileTemplateType enumeration. To keep it simple I am using TileSquareImage which will just show an image in a square tile. Here is the simplest way of using it: Add the below namespaces:
using Windows.UI.Notifications;
using Windows.Data.Xml.Dom;
Add the below code on the click of the button:
XmlDocument xmltile = TileUpdateManager.GetTemplateContent(TileTemplateType.TileSquareImage);
XmlNodeList imgNode = xmltile.GetElementsByTagName("image");
imgNode[0].Attributes[1].NodeValue = "ms-appx:///Assets/pic.png";
TileNotification tileNotify = new TileNotification(xmltile);
TileUpdateManager.CreateTileUpdaterForApplication().Update(tileNotify);
At line number 1, I have used the enumeration TileTemplateType to select the tile type. After you choose the tile type the first line of code above will return the XML that will render the live tile. Depending on the type of tile you have selected the XML is generated and you need to supply the text and images to it to render it properly. You will face problem if you are not aware of the XML for the type of tile you have selected. I came up with a simple solution to overcome this. I declare a temporary string variable and then store the XML from the xmltile object using the GetXML() method. It look something like this:
string tempXml = xmltile.GetXml();
Put a breakpoint and get the XML. In my case where I am using TileSquareImage, therefore my XML looks something like this:
<tile>
<visual>
<binding template="TileSquareImage">
<image id="1" src=""/>
</binding>
</visual>
</tile>
The code at line 2 and 3 will first get the node and set the image to be displayed on the tile. If you look in the solution explorer, you will see a folder labelled Assets. You can place the image file for the tile in this folder and then set the path of the image in the above code. After setting the XML for the tile, it now time to update the tile. I will now use TileNotification class and then pass XmlDocument object (xmltile) as a parameter and then finally call the TileUpdateManager class to update the tile. Below is my live tile in action:

If you right click the tile, notice the option turn live tile off. This means that the tile is a live tile and you can turn off the live notifications if you wish.

For this post, this is it. In the next post I will show how to update the live tile using Notification Extension library and how to animate a tile. I hope this post helps you to understand and gets you started in building a live tile application.
A blog post to wish all the readers of my blog a very happy new year!? Not my style but still….
Wish you and your family a very happy and prosperous new year!! I hope this new year bring lot of happiness to you, family and friends.
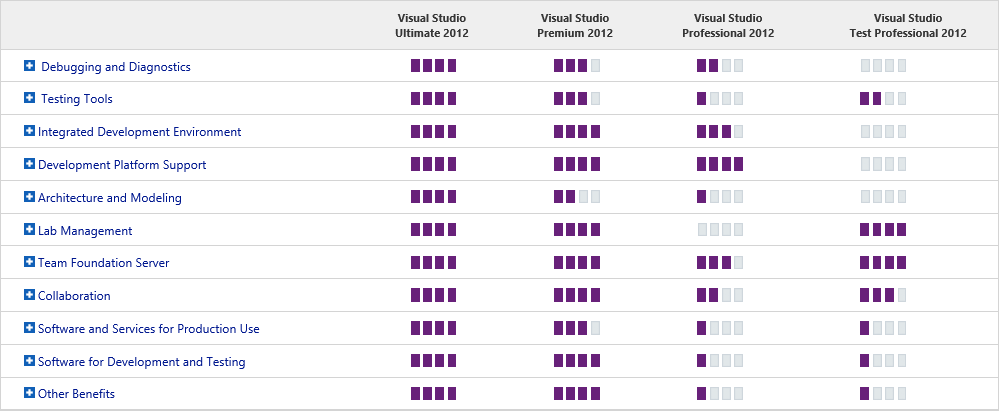
Visual Studio 2012 is now available and here is a chart that compares the features of different versions of Visual Studio 2012.