
© 2026 Pashant Khandelwal

© 2026 Pashant Khandelwal
By converting images into vector embeddings and storing them in a specialized database, we can build systems that understand visual similarity at scale. This approach opens doors to applications in e-commerce, media management, and even creative tools where images drive discovery.
So today we will see how to build your own image search engine using Python FASTAPI and Qdrant, which is a high-performance open-source vector similarity search database. But what exactly a vector is?
If we do quick web search, we can Simply put, vector is a numerical representation of data as an arrays of numbers i.e. You can take any image, file, text and convert it to a vector.
Anyone who’s used vector databases like Milvus, Pinecone, or ChromaDB has probably come across cosine similarity, it’s one of the go-to metrics for comparing vectors in similarity search.
We will be looking at the cosine similarity metric in this demo but there are others which you can also explore like:
In Qdrant, the default metric used is Dot Product if not specified.
In vector database searches, the values of 1, 0, and -1 are highly significant when using cosine similarity, one of the most common metrics for determining how alike two vectors are. Cosine similarity measures the angle between two vectors and, in the context of embeddings, provides a score that indicates the degree of similarity in their meaning or content.
Here is what each value signifies:
1: Identical or maximum similarity
0: Orthogonal or no similarity
-1: Diametrically opposed or maximum dissimilarity
I will be using an CLIP model from HuggingFace called openai/clip-vit-base-patch32 to extract image embeddings , essentially turning an image into a numerical vector that capture its semantic content. The openai/clip-vit-base-patch32 model is a vision transformer trained jointly on images and text. This is the model I am using but you can choose some other model which provides the same functionality. Hence we come to the term Vector Search which is a search technique used to find similar items or data points.
So now let’s get started by setting up the Qdrant!
I am using Podman to run Qdrant on my machine. You can also use Docker if you want to, as the commands for these 2 are same.
$ podman run -d -p 6333:6333 -p 6334:6334 -v E:\qdrant\:/qdrant/storage:z qdrant/qdrant
I am using the Podman desktop for ease of use. But you can also use this command to start Qdrant if you do not have Podman desktop installed.
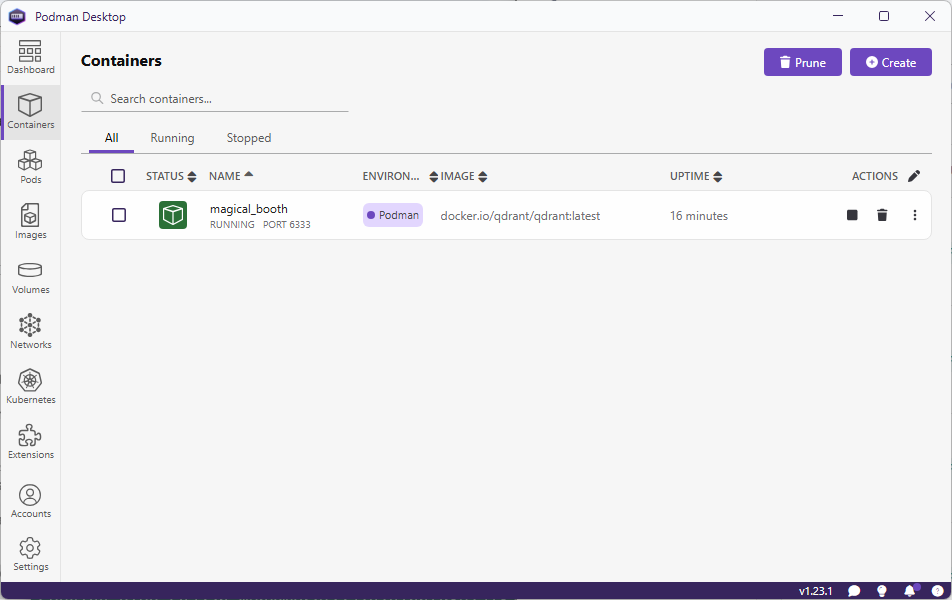
Go to URL , http://localhost:6333/dashboard to view Qdrant WebUI.
Let’s start by setting up Python virtual environment, installing dependencies and activating it.
$ python -m venv env
$ env\Scripts\activate
Next, we will install the dependencies:
The model we are utilizing uses transformers and we will need Pytorch for it to work properly. So head to the Pytorch website and install it by selecting the right options based on the environment you are using.
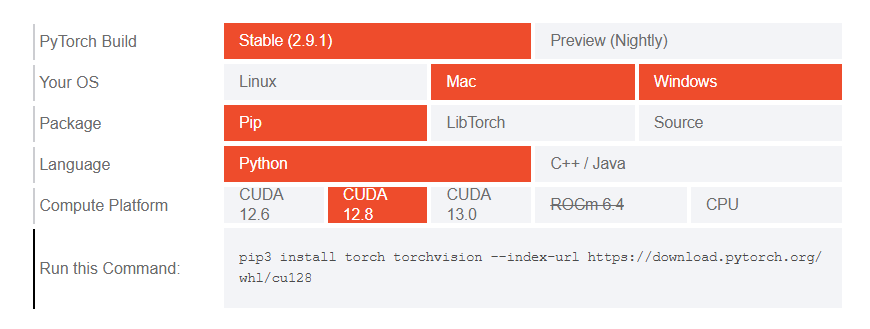
Copy and run the generated command in your terminal window to install Pytorch.
There are few other dependencies which we will need.
$ pip install qdrant-client transformers pillow
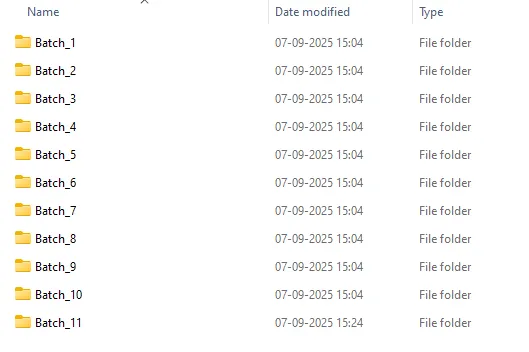
I have downloaded around 4000+ random images from Instagram (for personal use) which I will use in this demo. But before I can feed it to my uploading program I will batch them and put them in separate folders. I am using a PowerShell script which will create batches.
param (
    [int]$FilesPerFolder = 10  # Default count per folder
)

# Get all files in the current directory (excluding folders)
$files = Get-ChildItem -File

# Total number of files
$totalFiles = $files.Count

# Calculate number of folders needed
$folderCount = [math]::Ceiling($totalFiles / $FilesPerFolder)

# Loop through and create folders + move files
for ($i = 0; $i -lt $folderCount; $i++) {
    $folderName = "Batch_$($i + 1)"
    New-Item -ItemType Directory -Path $folderName -Force | Out-Null

    $startIndex = $i * $FilesPerFolder
    $endIndex = [math]::Min($startIndex + $FilesPerFolder, $totalFiles)

    $filesToMove = $files[$startIndex..($endIndex - 1)]

    foreach ($file in $filesToMove) {
        Move-Item -Path $file.FullName -Destination $folderName
    }
}

Write-Host "✅ Done! Split $totalFiles files into $folderCount folders with $FilesPerFolder files each."
You might need to elevate the privileges before on your Windows machine.
-- Elevate privileges for current session.
> Set-ExecutionPolicy -Scope Process -ExecutionPolicy Bypass

-- Elevate privileges permanently
> Set-ExecutionPolicy -Scope CurrentUser -ExecutionPolicy RemoteSigned
Run the script to create the batches.
> .\batches.ps1 -FilesPerFolder 500
Here is how my folder structure looks after batching files in folders.
Next, we set up a python script to create vector data from the images and upload them to a collection we will call instaimages. I have Python script that does everything for me. It creates and setup the Qdrant collection, create vector of the images using AI model and upload them in batches to Qdrant.
My Python script does the work but there were few parts which I wanted to refactor and hence I asked ChatGPT to refactor it. It does more than that and it is good.
import os
from PIL import Image
from transformers import AutoProcessor, AutoModelForZeroShotImageClassification
from qdrant_client import QdrantClient
from qdrant_client.http import models
from tqdm import tqdm
import numpy as np

client = QdrantClient("localhost", port=6333)
print("[INFO] Client created...")

################### Dataset Loading ###################
image_dataset = []
COLLECTION_NAME = 'instaimages'
root_dir = "insta"   # parent folder containing Batches

# Traverse all Batch_* folders
# CHANGE THIS RANGE.
for batch_num in range(1, 12):  # Batch_1 to Batch_11
    batch_dir = os.path.join(root_dir, f"Batch_{batch_num}")
    print(f"[INFO] Traversing {batch_dir}...")

    for subdir, dirs, files in os.walk(batch_dir):
        for file in files:
            if file.lower().endswith((".jpeg", ".jpg", ".png")):
                image_path = os.path.join(subdir, file)
                try:
                    image = Image.open(image_path)
                    image_dataset.append((image, batch_dir, image_path))  # keep folder info
                except Exception as e:
                    print(f"Error loading image {image_path}: {e}")

################### Loading the CLIP model ###################
print("[INFO] Loading the model...")
model_name = "openai/clip-vit-base-patch32"
processor = AutoProcessor.from_pretrained(model_name)
model = AutoModelForZeroShotImageClassification.from_pretrained(model_name)

###################----Creating a qdrant collection----######################
if not client.collection_exists(COLLECTION_NAME):
    print("[INFO] Creating qdrant data collection...")
    client.create_collection(
        collection_name=COLLECTION_NAME,
        vectors_config={
            "image": models.VectorParams(size=512, distance=models.Distance.COSINE),
        }
    )

###################----creating records/vectors ----######################
print("[INFO] Creating a data collection...")
records = []
for idx, (sample, batch_dir, image_path) in tqdm(enumerate(image_dataset), total=len(image_dataset)):
    processed_img = processor(text=None, images=sample, return_tensors="pt")['pixel_values']
    img_embds = model.get_image_features(processed_img).detach().numpy().tolist()[0]

    payload = {"path": image_path, "batch": batch_dir}
    records.append(models.PointStruct(id=idx, vector={"image": img_embds}, payload=payload))

###################----uploading records----######################
print("[INFO] Uploading data records to data collection...")
for i in range(0, len(records), 10):
    print(f"finished {i}")
    client.upload_points(
        collection_name=COLLECTION_NAME,
        points=records[i:i + 10],
    )

print("[INFO] Successfully uploaded data records to data collection!")
Now comes the part where I explain why I created these batches or folders. When I was trying to import lots and lots of files without batching it takes a lot of time to import. The recommended approach is to create batches and upload. This is the way I am doing batching but there are other approaches to batch and upload which you can also try.
In case you are not working with lot of files and not want to get into the hassle of creating folders, then you can use the strip down version of the same script.
import uuid
from PIL import Image
from qdrant_client import QdrantClient, models
import os
from transformers import AutoProcessor, AutoModelForZeroShotImageClassification

ROOT_DIR = 'insta-images'
COLLECTION = 'instaimages'
BATCH_SIZE = 50

client = QdrantClient(url="http://localhost:6333")

print("[INFO] Loading the model...")
model_name = "openai/clip-vit-base-patch32"
processor = AutoProcessor.from_pretrained(model_name)
model = AutoModelForZeroShotImageClassification.from_pretrained(model_name)


if not client.collection_exists(COLLECTION):
    print("[INFO] Creating qdrant data collection...")
    client.create_collection(
        collection_name=COLLECTION,
        vectors_config= {
            "image": models.VectorParams(size=512, distance=models.Distance.COSINE),
        }
    )

#####################BATCH UPLOAD######################

records = []
for sample in os.listdir(ROOT_DIR + '\\' + ROOT_DIR):
    idx = uuid.uuid4().int>>64
    path = os.path.join(ROOT_DIR + '\\' + ROOT_DIR, sample)
    payload = {"path": path}
    sampleImage = Image.open(path)
    processed_img = processor(text=None, images = sampleImage, return_tensors="pt")['pixel_values']
    img_embds = model.get_image_features(processed_img).detach().numpy().tolist()[0]
    records.append(models.PointStruct(id=idx, vector={"image": img_embds}, payload=payload))
    print(idx)

# Upload in batch
for i in range(0,len(records), BATCH_SIZE):
   print(f"finished {i}")
   client.upload_points(
       collection_name=COLLECTION,
       points=records[i:i + BATCH_SIZE],
   )
As I am using OpenAI’s openai/clip-vit-base-patch32 model from HuggingFace. This model will produce embeddings of length 512 for both images and text. Different models produce different embeddings and you should use the right embeddings when you create a collection in Qdrant to match the size.
In the create_collection method vectors_config parameter defines the structure of the vector(s) stores in the collection ,
size, which holds the length of each vector.distance metric, how similarity is measure.I am also adding a small payload with the embeddings to store the path of the image(s). This will come handy when we integrate it with API and frontend application.
sampleImage = Image.open(path), opens the image file located at path using PIL (Python Imaging Library).
processed_img = processor(text=None, images=sampleImage, return_tensors="pt")['pixel_values'], uses the CLIP processor to preprocess the image.
text=None, only encode the image, not text.images=sampleImage, the PIL image is passed in.return_tensors="pt", output is a PyTorch tensor.['pixel_values'] → extracts the actual tensor representation of the image (normalized, resized, etc.) ready for the CLIP model.img_embds = model.get_image_features(processed_img).detach().numpy().tolist()[0], Passes the processed image tensor into the CLIP model.
get_image_features(...), generates the image embedding vector (length 512 for ViT-B/32)..detach(), removes it from the PyTorch computation graph (no gradients)..numpy(), converts the tensor to a NumPy array..tolist(), converts the NumPy array to a Python list (so it can be serialized).[0], takes the first element (batch dimension), leaving just the embedding vector.This results in img_embds as a plain Python list of 512 floats representing the image embedding.
records.append(models.PointStruct(id=idx, vector={"image": img_embds}, payload=payload)), Creates a Qdrant point (a record to insert into the vector database).
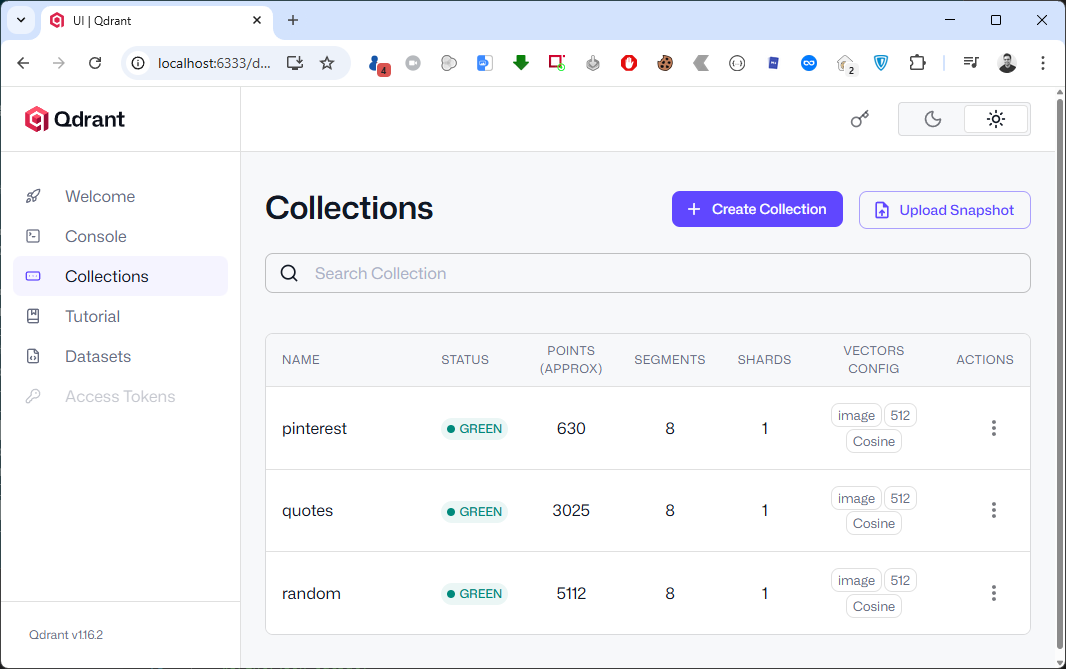
id=idx, unique identifier for this point.vector={"image": img_embds}, stores the embedding under the name "image". This matches your vectors_config where you defined a named vector “image”payload=payload, attaches metadata (like labels, file path, tags, etc.).records.append(...) , adds this point to a list of records that you’ll later upload to Qdrant.In the end I am calling upload_points method and upload these records in batches. If all goes well, you should see a new collection in Qdrant’s WebUI.
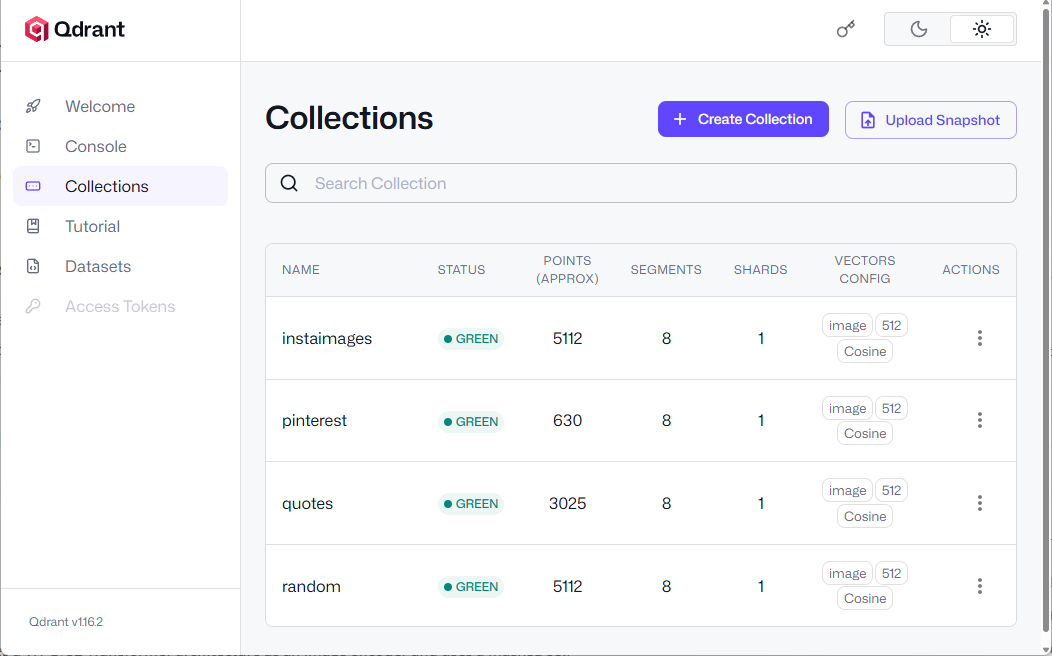
You can see a newly added collection named instaimages
You can also explore the HSNW graph where you can see the all the dependencies for the selected point. It is an internal data structure Qdrant uses for approximate nearest neighbor (ANN) search.
 Click Open Graph in one of the points in the collection.
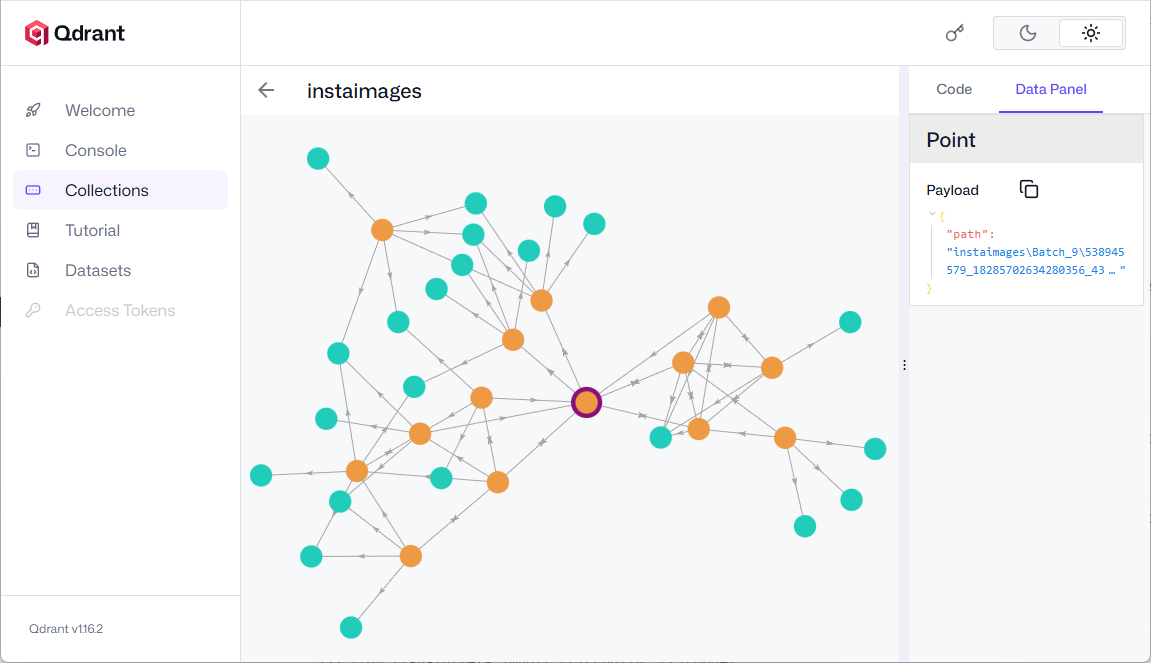 Click on any node to view the nearest neighbor(s).
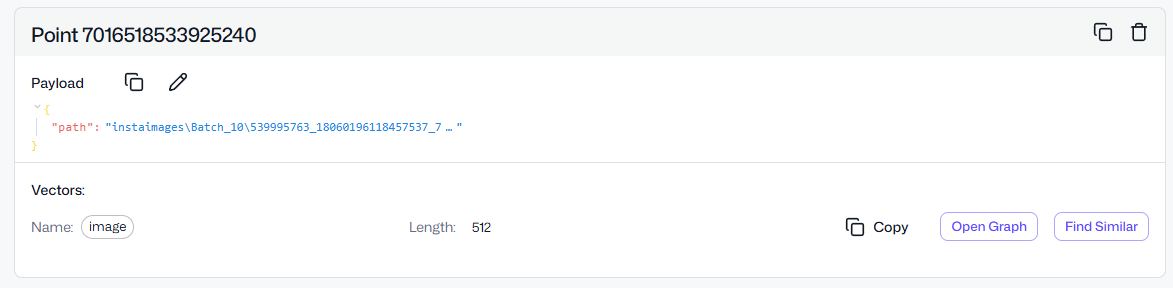
You can also click on Find Similar button which will return the similar looking image(s) or point(s).
The database is ready and now I want to write a very simple and not so scalable FastAPI API. Start by installing dependencies
$ pip install "fastapi[standard]" uvicorn
I am also using uvicorn which will provide us with the web server implementation for our API.
Here is the complete code for our simple API.
from fastapi import FastAPI, File, UploadFile
from fastapi.responses import JSONResponse
from fastapi.staticfiles import StaticFiles
from fastapi.middleware.cors import CORSMiddleware
from pathlib import Path
import shutil
import uuid
import json

from PIL import Image
from qdrant_client import QdrantClient, models
import os
from transformers import  AutoProcessor, AutoModelForZeroShotImageClassification

app = FastAPI()

app.add_middleware(
    CORSMiddleware,
    allow_origins=["http://localhost:5173"],  # Replace with your frontend URL
    allow_credentials=True,
    allow_methods=["*"],  # Allow all HTTP methods (GET, POST, etc.)
    allow_headers=["*"],  # Allow all headers
)

app.mount("/pin", StaticFiles(directory="pin"), name="pin")


UPLOAD_DIR = Path("uploads")
UPLOAD_DIR.mkdir(exist_ok=True)

@app.post("/upload-image/")
async def upload_image(file: UploadFile = File(...)):
    # Generate a unique filename
    file_ext = Path(file.filename).suffix
    unique_name = f"{uuid.uuid4()}{file_ext}"
    file_path = UPLOAD_DIR / unique_name

    # Save the uploaded file
    with file_path.open("wb") as buffer:
        shutil.copyfileobj(file.file, buffer)

    client = QdrantClient(url="http://localhost:6333")

    model_name = "openai/clip-vit-base-patch32"
    processor = AutoProcessor.from_pretrained(model_name)
    model = AutoModelForZeroShotImageClassification.from_pretrained(model_name)

    processed_img = processor(text=None, images=Image.open(file_path), return_tensors="pt")['pixel_values']

    im =  model.get_image_features(processed_img).detach().numpy().tolist()[0]

    search_result = client.query_points(
        collection_name="random",
        query=im,
        using="image",
        query_filter=None,
        # query_filter=Filter(
        #     must=[FieldCondition(key="title", match=MatchValue(value="paris.jpg"))]
        # ),
        with_payload=True,
        limit=20,
    ).points

    json_result = [
    {
        "id": str(point.id),
        "score": point.score,
        "payload": point.payload  # This might include fields like "image", "name", etc.
    }
    for point in search_result
]
    # Optional: Convert to JSON string if needed
    #json_output = json.dumps(json_result, indent=2)
    #print(json_output)

    return JSONResponse(content=json_result)
We start with initializing FastAPI and then add CORS middleware so our web interface can call our API without any CORS errors. When using CORS settings with APIs ensure that you allow right endpoints and methods for proper security and give least privileges to any application.
I am setting up the upload directory where uploaded images will be stored till the operation is completed. We will have an upload-image POST endpoint which will be responsible for handling image upload operation. I extended the function to also perform the reverse search operation. This allows me to get the search results as soon as the image upload is completed.
NOTE: Copy the entire folder which contains all the images which you have imported while setting up Qdrant in the directory where the applicaiton resides. This step is necessary as the database contains the path of the similar images and to display these images in the UI.
After the image is uploaded, we will get the qdrantclient object which will let us query the database. We set the model name as openai/clip-vit-base-patch32. The Autoprocessor handles both image and text preprocessing which is tokenization, resizing, normalization. AutoModelForZeroShotImageClassification loads the CLIP model capable of comparing image and text embeddings. We then process the image and then get the vectors.
Processed_img, opens the image from file_path. Passes it through the processor to:
pixel_values tensor, which is what the model expects as input.The im variable
get_image_features(…), runs the image through the CLIP model to get its feature vector (embedding)..detach(), detaches the tensor from the computation graph (no gradients needed)..numpy().tolist()[0], Converts the tensor to a Python list (1D vector).The vector representation of the image (im) can be used for:
In the last step, we will perform the search on the database using the quadrant client object and calling the query_points function which takes some other parameters.
Client.query_points, is calling the Qdrant client to search for similar vectors in a collection in this case out collection name will be instaimages and this is where our image embeddings are stored.
Query = im, is the image embedding vector we extracted earlier using CLIP. This is the query vector Qdrant will compare against stored vectors.
using="image", indicates the vector space or field to use for similarity search. The image is the name of the vector field in our collection.
No filter is applied, so it searches across all points in the collection. If enabled, this would filter results to only those where the title field matches paris.jpg. Useful for narrowing down search results based on metadata.
with_payload=True, tells quadrant to return the payload (metadata) along with each result. This payload might include things like image title, tags, URLs. etc.
Limit=20, limits the number of results to 20 most similar points.
.points, extracts the actual list of matching points (each with vector similarity score and payload).
Run the command below to initialize a new Svelte project use --template svelte-ts for TypeScript and --template svelte for JavaScript, then follow the setup prompts to name it Qimg or any other name you like.
$ npm create vite@latest Qimg -- --template svelte-ts
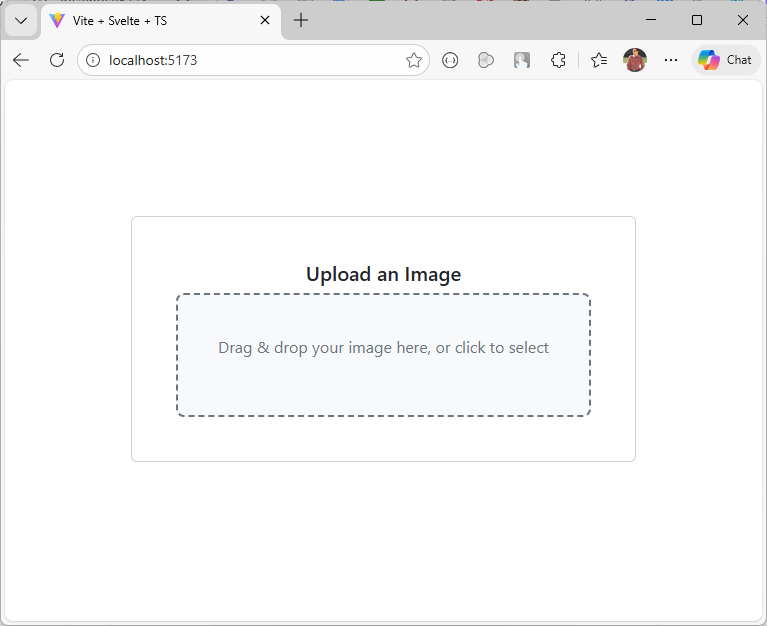
We will create a new component which contains a control allowing us to select or drag and drop the image to perform similarity search.
{#if loading}Upload an Image
Drag & drop your image here, or click to select
{/if}Loading...{#each uploadedImages as data} {#each data as img}{/each} {/each}
{img.id}
Score: {img.score}
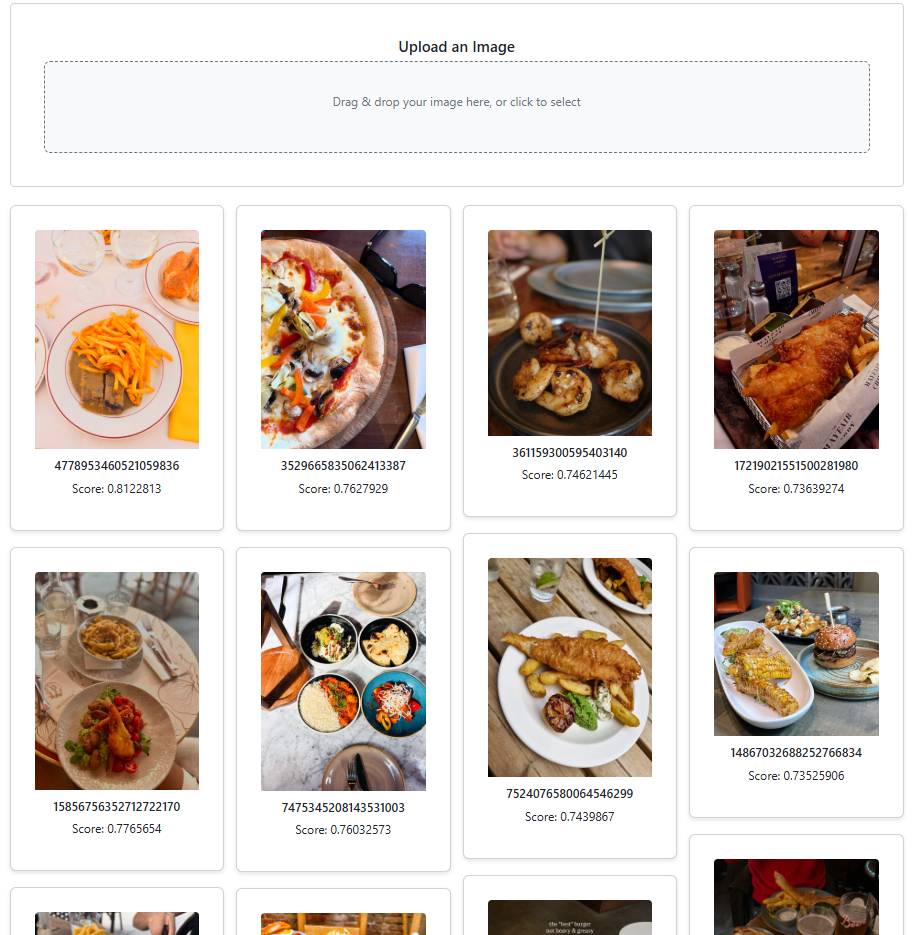
This code lets users upload images either by file picker or drag‑and‑drop, sends them to a backend server, and stores the returned metadata in uploadedImages while showing a loading state during the process. The Gallery Section renders a masonry grid of image cards. It’s a dynamic gallery that displays similar images along with their metadata, arranged in a masonry-style layout.
Observe that the img element’s src attribute points to the actual image file on disk. In this example, the images folder resides in the api folder, but you can place it anywhere within your web server, just be sure to update the path accordingly.
The component is now ready, so let’s proceed to update the App.svelte file.
Run the Svelte application using the npm command.
$ npm run dev
Start the API on the default port 8000 with the following command.
$ uvicorn main:app
If you wish to use another port then append the above command with --port 9999
$ uvicorn main:app --port 9999

Download a bunch of random images from the web and see the results with similar images. You can also view the similarity score at the bottom of each image.
The complete source code is available on GitHub.
The next thing I want to try is to use Binary Quantization which can make the search 40x faster. Here is a great article on it from Qdrant blog.
I also encourage you to follow Qdrant on LinkedIn as they post and share some great content.

In this post, I will walk through how you can create and host a simple website using Python and serve it as a Tor hidden service — nothing shady, just pure geeky fun.
Let’s begin by installing Tor. If you’re already familiar with the Tor browser, feel free to proceed. But if you’re new to it, you can learn more about the service here.
The Tor browser includes a Tor binary (tor.exe) that can be used to start a service or install it as a Windows service. To locate it, navigate to the folder where Tor is installed. On my system, it’s located at: D:\Programs\Tor Browser\Browser\TorBrowser\Tor.
While the initial part of the path may vary depending on your installation location, the rest of the directory structure remains consistent.
Since we’re hosting a website using Python, there’s no need to launch the Tor Browser. Instead, we’ll start Tor as a service using the tor.exe binary. Normally, launching the Tor Browser automatically starts this service in the background, but when running it manually, we need a runtime configuration file (torrc). Below is a sample configuration file with minimal settings—just enough to get the site up and running. For security reasons we would like to have the Tor control port to be password protected . You can generate the password using the tor.exe with this command.
tor.exe --hash-password Msft#win123
Copy the output of the above command and save it to the torrc file along with other configurations. Here is the final configuration file.
ControlPort 9151
SOCKSPort 9050
HashedControlPassword 16:EA735EE7099CC752600CFC4A4BD2F0CE737BA55864A78711C7672E699C
The port settings mentioned above might differ on your system. If the service fails to start or your web application can’t connect to it, this is likely the cause.
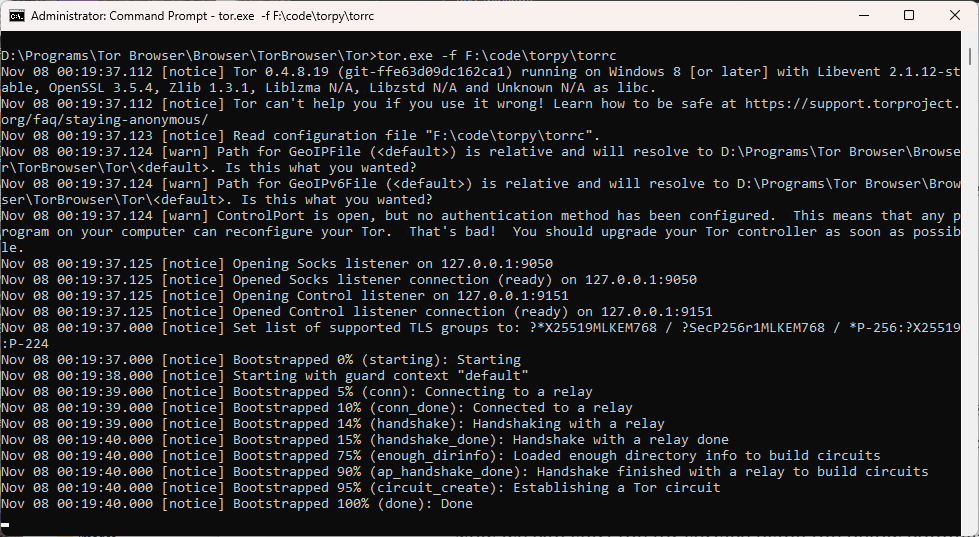
Open command prompt in administrator mode if you are on Windows. Start the tor service by executing the below command.
tor.exe -f
If you do not want to get into a hassle of running this command for starting the service again and again, then you can install tor as a service. To do that use the tor.exe with --service install arguments and pass the torrc file path as a argument to -f flag.
tor.exe --service install -options -f F:\code\torpy\torrc
On Windows, you can place the torrc file at C:\Users\AppData\Roaming\tor, which is the default location used by tor.exe. Once it’s in place, you can run the command as shown below.
tor.exe --service install
If you wish to delete the installed service, use the sc command available on Windows.
sc delete tor
With the Tor service now running, create a new folder — feel free to name it TorWeb or anything you prefer. Inside this folder, set up a Python virtual environment and install the necessary dependencies to enable communication with the Tor service.
pip install stem flask
Here is the entire Python code.
from stem.control import Controller
from flask import Flask, render_template

if __name__ == "__main__":

    app = Flask("TorWeb")
    port = 5000
    host = "127.0.0.1"
    hidden_svc_dir = "e:/web"

    @app.route('/')
    def index():
        return render_template('index.html')

    print('* Getting controller')
    controller = Controller.from_port(address="127.0.0.1", port=9151)
    try:
        controller.authenticate(password="Msft#win123")
        controller.set_options([
            ("HiddenServiceDir", hidden_svc_dir),
            ("HiddenServicePort", "80 %s:%s" % (host, str(port)))
        ])
        svc_name = open(hidden_svc_dir + "/hostname", "r").read().strip()
        print("* Created host: ", svc_name)
    except Exception as e:
        print(e)
    app.run()
stem.control: Lets you interact with the Tor process via control port.flask : Python web framework. You can use some other light-weight framework of your choice.render_template: Lets you render HTML templates.controller = Controller.from_port(address="127.0.0.1", port=9151)
Connects to the Tor control port (usually 9051 or 9151 depending on your setup).
controller.set_options([
    ("HiddenServiceDir", hidden_svc_dir),
    ("HiddenServicePort", "80 127.0.0.1:5000")
])
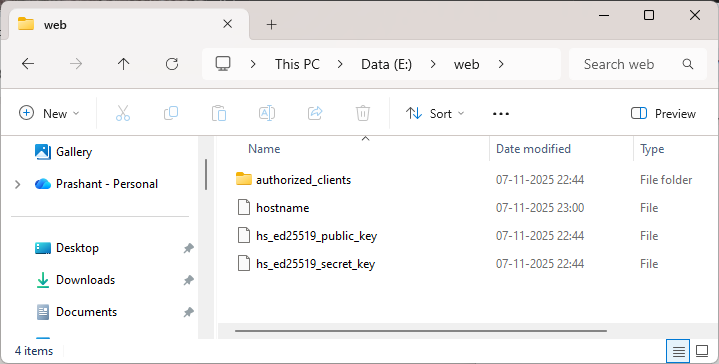
HiddenServiceDir is a path to the directory where Tor will store hidden service data like hostname, private_key etc. This code tells Tor to create a hidden service and store its config in E:\web folder. HiddenServicePort forwards incoming traffic on port 80 to flask application at 127.0.0.1:5000.
svc_name = open(hidden_svc_dir + "/hostname", "r").read().strip()
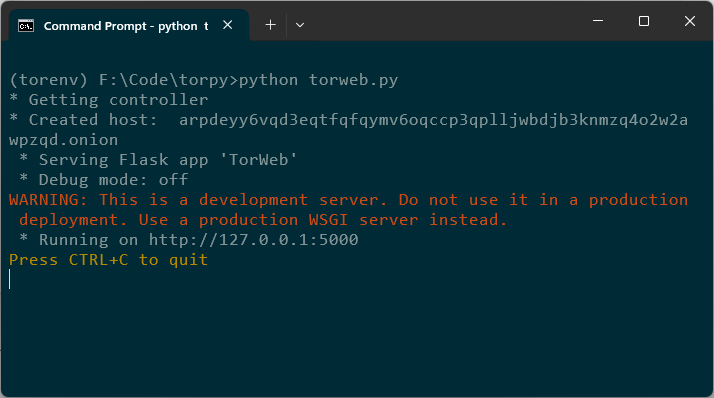
print("* Created host: ", svc_name)
This reads the generated .onion address from the hostname file and prints it.
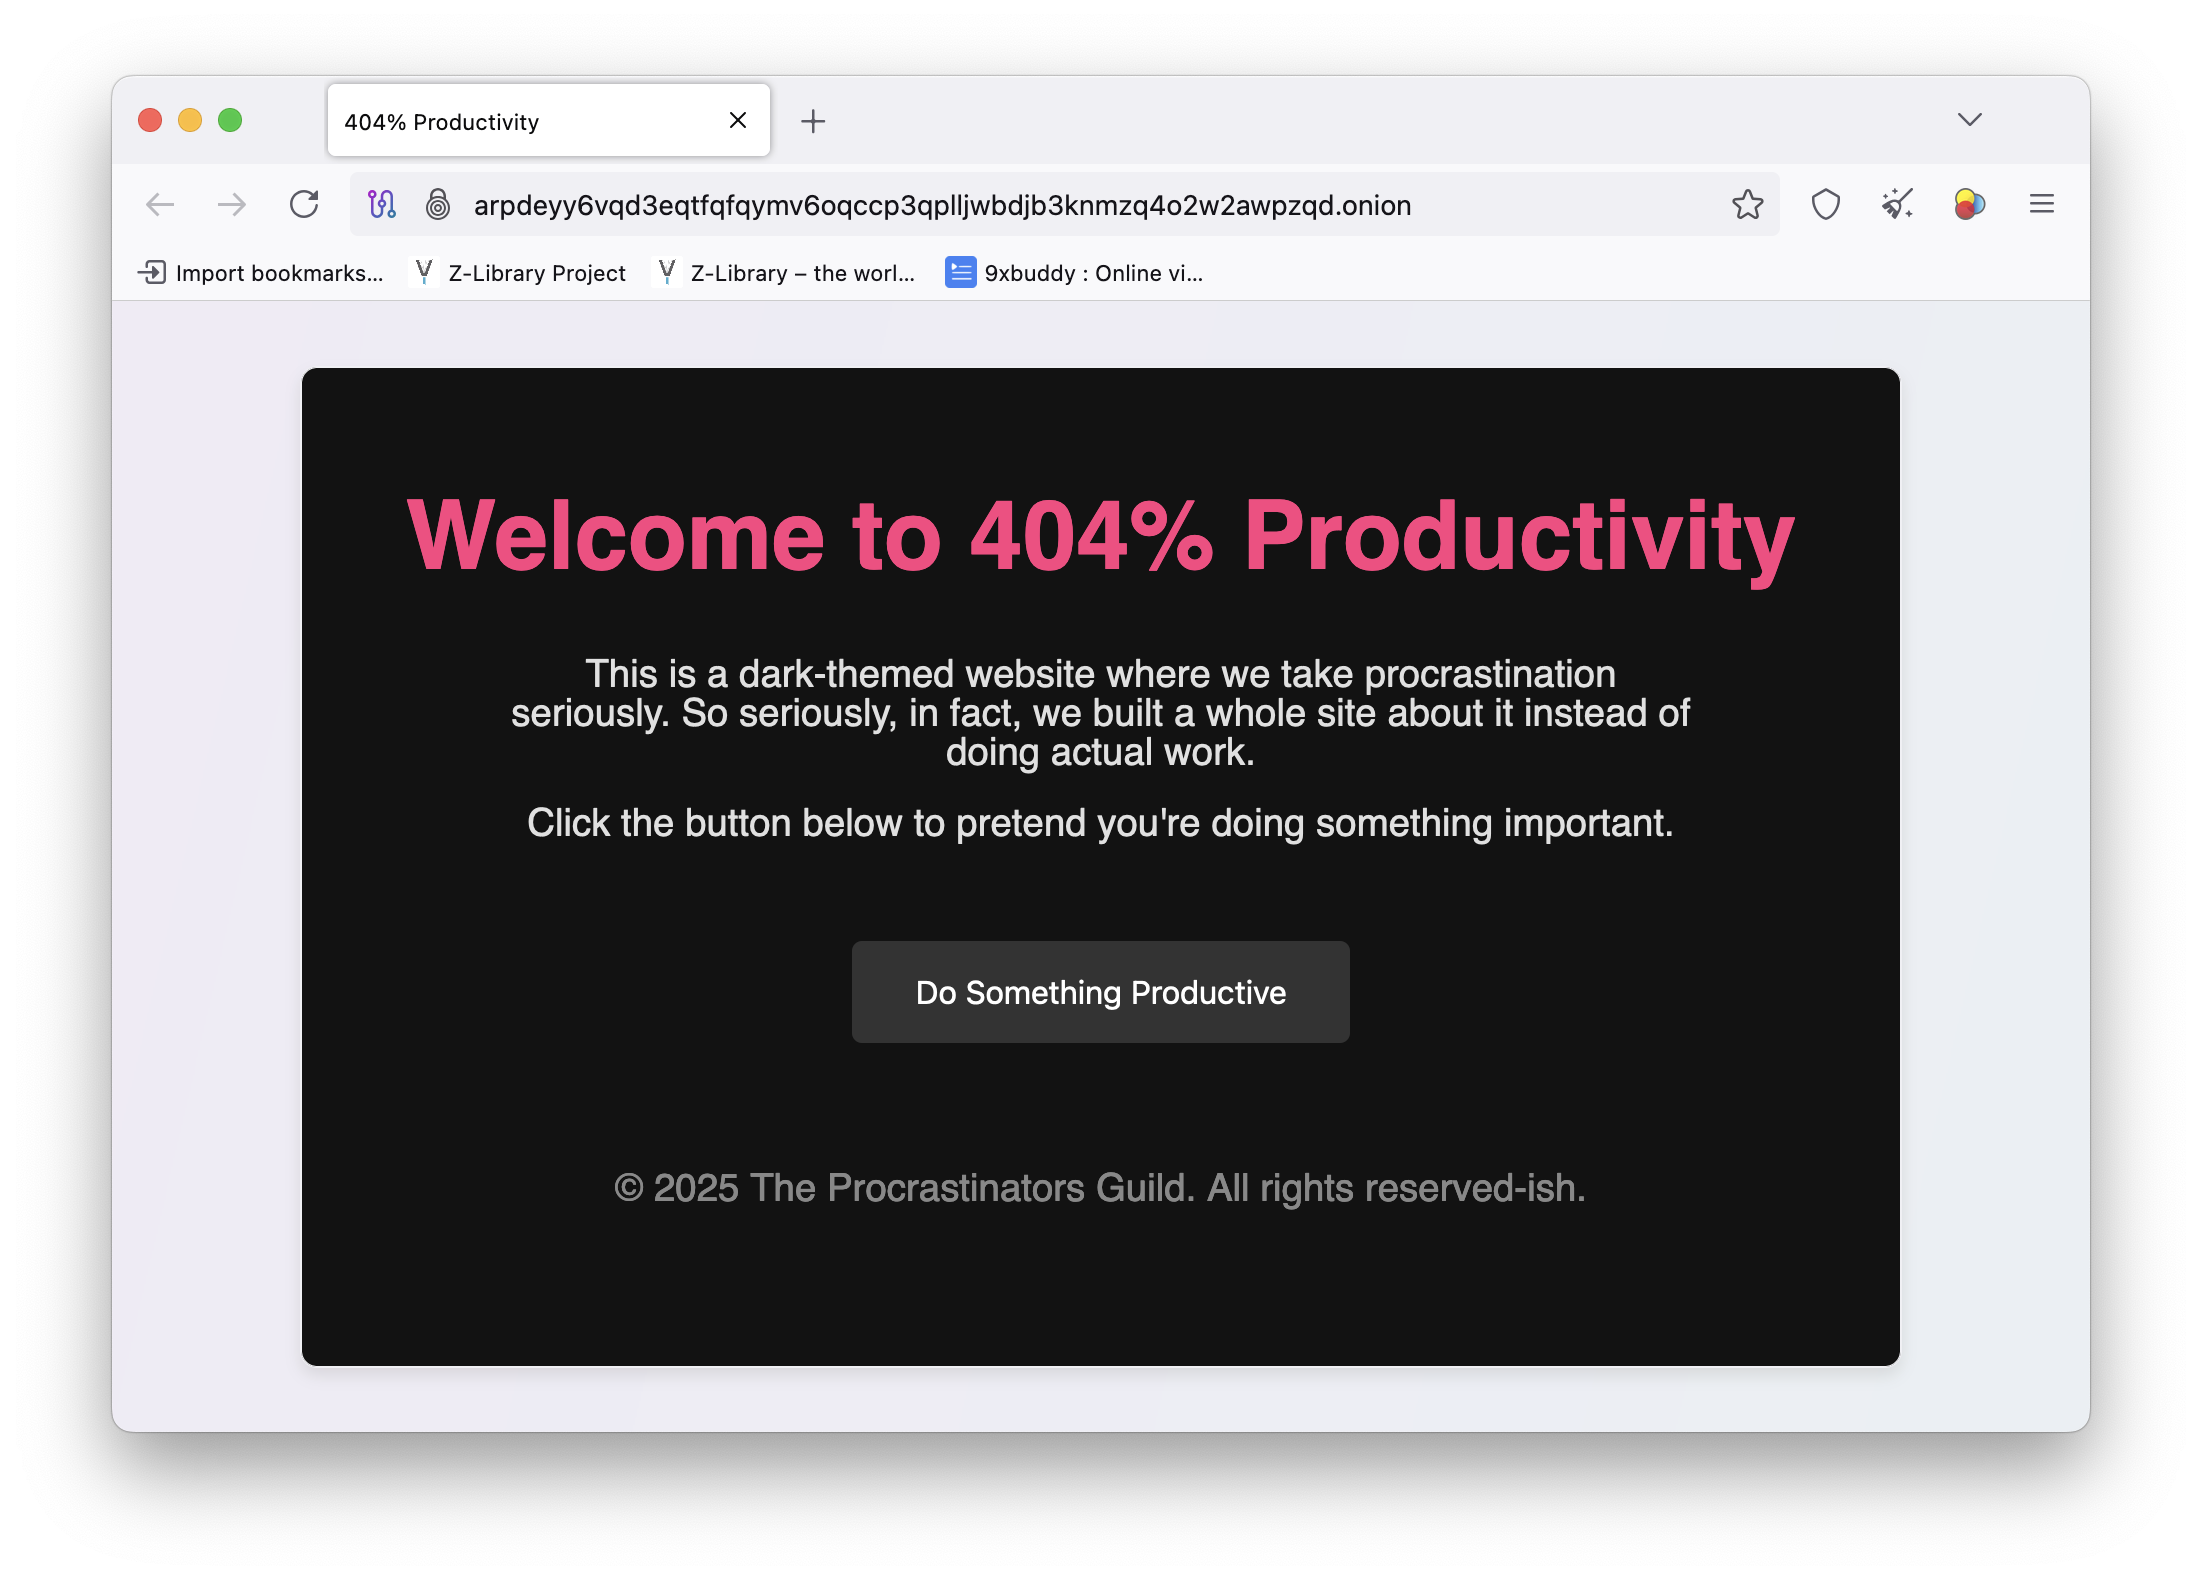
Just to make my first dark web page cool, I asked ChatGPT to render a cool looking HTML page. Copy this HTML page inside a template folder so it can be used with Flask.
Run the app
For enhanced security and greater control, it’s advisable to use a dedicated web server configured with recommended best practices.
You will not be able to open the Tor browser on your system as the Tor service is already running and the browser will not be able to connect to the instance which is already running. Although, Tor browser can connect to the existing Tor service but this is not typical and is not recommended to use.
I am using a different machine to view my application using a Tor browser.
Note that the loading of the page might be slow as it solely depends on the Tor network connectivity. It can take up to several minutes for the page to load.
The souce code along with the torrc file used above can be found in this repo path.

I was checking out the OpenObserve — an open-source observability tool which you can self-host or use their cloud offering which offers free, standard and enterprise tier to choose from.
Written completely in rust so I thought of checking the codebase on Github to get myself more aquatinted with rust language. While doing so I found a #[cfg(feature = "enterprise")] being used in many places.
Looking at it, one can tell that any function or block decorated with this attribute is conditional, available only if the feature is enabled. But does this happen at compile time or runtime? If it’s compile time, the code will be compiled into the binary solely when the feature is turned on.
To test this and to gain more understanding on this, I created a rust application where I added features section in the cargo.toml file and added two features opensource and enterprise Kind of similar to the offering of OpenObserve. Here is my final cargo.toml file.
[package]
name = "cfgfeature"
version = "0.1.0"
edition = "2024"

[features]
community = []
enterprise = []
I updated my main.rs to this. I kept the hello world in the end.
fn main() {
   #[cfg(feature = "enterprise")]
   enterprise_feature();

   println!("Welcome to the app!");
}

#[cfg(feature = "enterprise")]
fn enterprise_feature() {
    println!("Enterprise feature activated!");
}
If I use just the cargo run command without specifying the --features flag, you will see the output Welcome to the app! which is expected. But the other function call like enterprise_feature was not even considered for execution. This is because of the #cfg[(feature)] attribute in Rust which is used to conditionally compile code only when the enterprise feature is enabled in the crate and passed as a parameter with the --features flag while building or running the program.
To make a binary which has the enterprise feature enabled, I can re-run the same command but this time, I will use --features flag.
$ cargo run --features enterprise
Now you we can see the output from our enterprise_feature function as well.
$ cargo run --features enterprise
   Compiling cfgfeature v0.1.0 (F:\Code\rust\cfgfeature)
    Finished `dev` profile [unoptimized + debuginfo] target(s) in 0.31s
     Running `target\debug\cfgfeature.exe`
Enterprise feature activated!
Welcome to the app!
When the enterprise feature is not enabled, any code marked with #[cfg(feature = "enterprise")] is completely excluded from compilation. That means:
enterprise_feature function won’t be compiled.This is one of Rust’s powerful mechanisms for feature gating, allowing you to build modular, efficient binaries tailored to specific use cases or environments.
Let’s modify the above code a bit and look at some other ways of using this. Notice how I am marking a println! macro with #[cfg(not(feature = "enterprise"))] This will print the lineEnterprise features are not enabled if I do not compile the code with --features enterprise flag. This line will not be printed if you pass the --features enterprise flag.
fn main() {
    println!("Welcome to the app!");

    #[cfg(feature = "enterprise")]
    enterprise_feature();

    #[cfg(not(feature = "enterprise"))]
    println!("Enterprise features are not enabled.");
}

#[cfg(feature = "enterprise")]
fn enterprise_feature() {
    println!("Enterprise feature is enabled!");
}
Running the above program with cargo run results in this output —
$ cargo run
   Compiling cfgfeature v0.1.0 (F:\Code\rust\cfgfeature)
    Finished `dev` profile [unoptimized + debuginfo] target(s) in 0.34s
     Running `target\debug\cfgfeature.exe`
Welcome to the app!
Enterprise features are not enabled.
Here is a final example I would like to share. Consider the below code where I have two features enterprise and community and two functions enterprise_feature and community_feature marked with them respectively. But the main eye-catcher in code below are 3 different main functions.
#[cfg(feature = "enterprise")]
fn enterprise_feature() {
    println!("Enterprise feature activated!");
}

#[cfg(feature = "community")]
fn community_feature() {
    println!("Community feature activated!");
}

#[cfg(feature = "enterprise")]
fn main() {
    enterprise_feature();
}

#[cfg(feature = "community")]
fn main() {
    community_feature();
}

#[cfg(not(any(feature = "enterprise", feature = "community")))]
fn main() {
    println!("Not using enterprise or community feature.");
}
This code uses conditional compilation to define different main functions based on enabled feature flags:
enterprise feature is enabled, the main function calls enterprise_feature().community feature is enabled, the main function calls community_feature().enterprise nor community features are enabled—i.e., the program is built without the --features flag—the fallback main function runs, printing a default message.Here is the output of the above program if I try to run it without any feature flag —
$ cargo run
   Compiling cfgfeature v0.1.0 (F:\Code\rust\cfgfeature)
    Finished `dev` profile [unoptimized + debuginfo] target(s) in 0.54s
     Running `target\debug\cfgfeature.exe`
Not using enterprise or community feature.
Output of the above program when I run it using the --features enterprise flag —
$ cargo run --features enterprise
   Compiling cfgfeature v0.1.0 (F:\Code\rust\cfgfeature)
    Finished `dev` profile [unoptimized + debuginfo] target(s) in 0.35s
     Running `target\debug\cfgfeature.exe`
Enterprise feature activated!
Here are other logical combinations that you can use —
enterprise is enabled — #[cfg(feature = "enterprise")]enterprise and community are enabled — #[cfg(all(feature = "enterprise", feature = "community"))]#[cfg(any(feature = "enterprise", feature = "community"))]#[cfg(not(any(feature = "enterprise", feature = "community")))]You can also use this with modules and crates to conditionally compile them based on feature flags. Here is an example.
#[cfg(not(feature = "enterprise"))]
pub mod basic_features;

#[cfg(feature = "enterprise")]
pub mod enterprise_features;
This ensures that only one of the modules is compiled depending on the feature flag. You can also use it inside the module itself to conditionally compile functions or structs.
You can conditionally include dependencies based on features.
Ollama is a lightweight and user-friendly way to run LLMs locally. No need for complex setups and it makes it super easy to explore AI chat models from the comfort of your own device.
This tutorial is a small part of a broader project I’m working on, which involves using local LLMs and vision models to analyze data directly on-device. This approach helps reduce costs and addresses some of the privacy concerns raised by our customers.
Installation and Setup
Download and install Ollama from here.
Once the setup is complete, simply launch the Ollama application—it will open a ChatGPT-like interface that lets you interact with local LLMs.
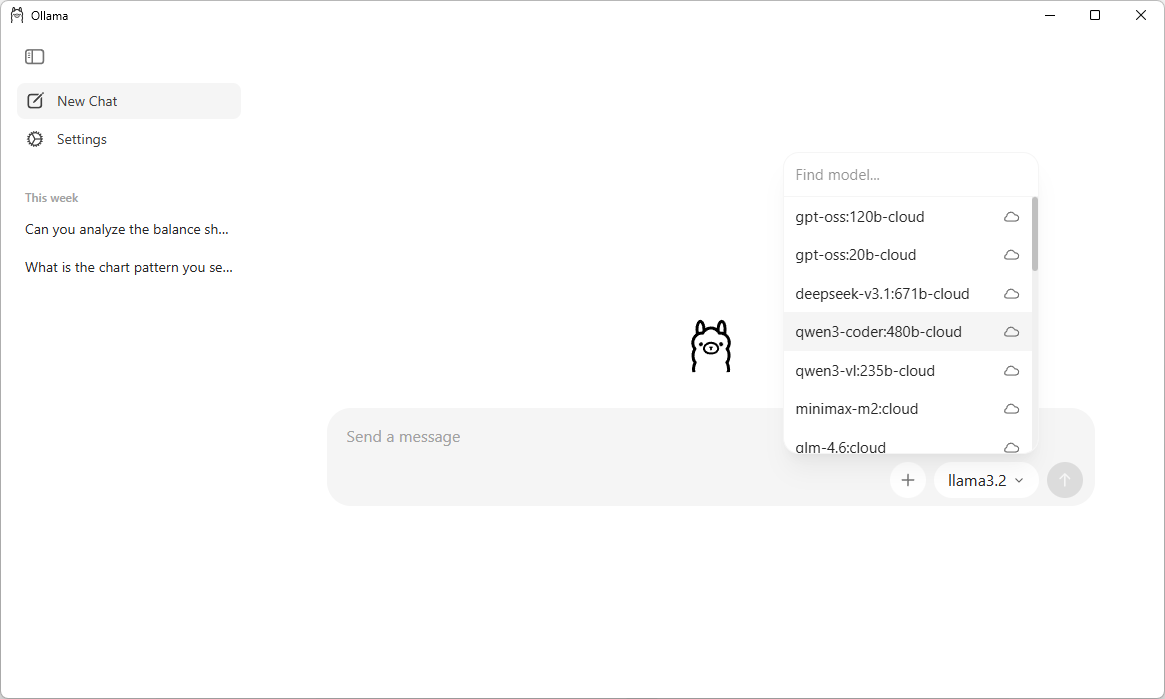
This UI makes it very easy for searching, downloading and communicating with different LLMs. You can also chat with the models which are in the cloud without downloading them. Note that you require a Ollama account in order to communicate with a cloud model.
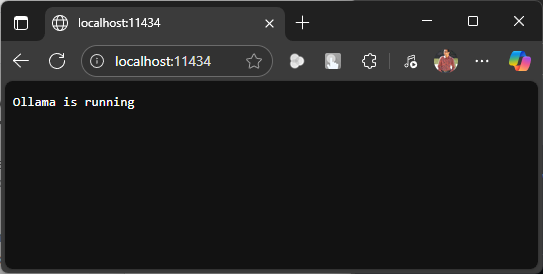
But we need to build a web based chat application and that means that we have to interact with Ollama API which is running at https://localhost:11434
Everyting seems to be set up properly. Let’s create a Python FastAPI endpoint which allows us to communicate with Ollama API. You can also use NodeJS, Go or .NET WebAPI to create a service endpoint.
Create a Python virtual environment and install the below dependencies.
pip install fastapi uvicorn requests httpx
The API uses a POST request and accepts three parameters: prompt, model, and stream.
prompt – The input message or query from the user.model – Specifies which model to run the prompt against. If not provided, it defaults to llama3.2:latest.stream – Optional setting that defaults to false. Set it to true if you want the response to appear in a typing animation, similar to ChatGPT.Note: enabling streaming requires additional changes to the code below. For below version of code, requests and httpx packages are not required.
from fastapi import FastAPI
from pydantic import BaseModel
import requests

app = FastAPI()

class PromptRequest(BaseModel):
    prompt: str
    model: str = "llama3.2:latest"  # Default model, can be overridden in the request

@app.post("/generate")
async def generate_text(request: PromptRequest):
    ollama_api_url = "http://localhost:11434/api/generate"

    payload = {
        "model": request.model,
        "prompt": request.prompt,
        "stream": False # True for streaming responses
    }

    try:
        response = requests.post(ollama_api_url, json=payload)
        response.raise_for_status()  # Raise an exception for bad status codes

        # Extract the generated text from Ollama's response
        generated_text = response.json()["response"]
        return {"response": generated_text}

    except requests.exceptions.RequestException as e:
        return {"error": f"Error communicating with Ollama: {e}"}
Run this API using uvicorn.
uvicorn main:app
The API server will start on default 8000 port. If you wish to change the port then start the API using the below command.
uvicorn main:app --port 8080
Let’s check the API response using Postman.
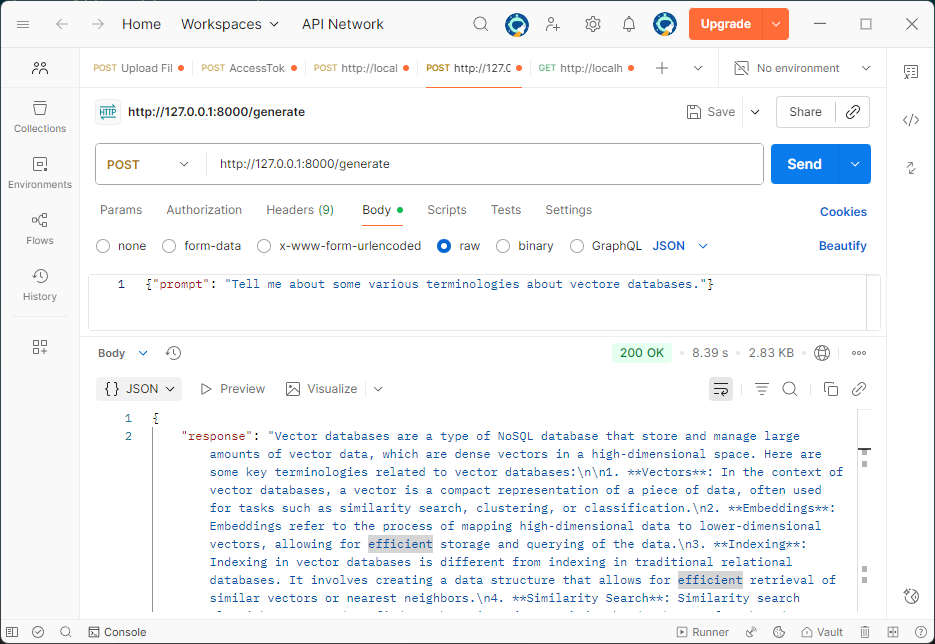
It’s quite helpful to see the response streamed in real time, just like how ChatGPT displays it. So let’s change the stream parameter to true and update our API code.
from fastapi import FastAPI
from fastapi.responses import StreamingResponse, HTMLResponse
from fastapi.staticfiles import StaticFiles
from pydantic import BaseModel
import httpx
import json
import os

app = FastAPI()

class PromptRequest(BaseModel):
    prompt: str
    model: str = "llama3.2:latest"

@app.post("/generate")
async def generate_text(request: PromptRequest):
    ollama_api_url = "http://localhost:11434/api/generate"
    payload = {
        "model": request.model,
        "prompt": request.prompt,
        "stream": True
    }

    async def stream_text():
        async with httpx.AsyncClient(timeout=None) as client:
            async with client.stream("POST", ollama_api_url, json=payload) as response:
                async for line in response.aiter_lines():
                    if line.strip():
                        try:
                            data = json.loads(line)
                            chunk = data.get("response", "")
                            if chunk:
                                yield chunk
                        except json.JSONDecodeError:
                            continue

    return StreamingResponse(stream_text(), media_type="text/plain")
Now we have a streaming response, let’s make a UI, I am using Svelte. Start by creating a new project.
npm create vite@latest ollama-chat -- --template svelte-ts
Update the vite.config.ts file to include a custom proxy setting for the development server. This setup ensures that any requests made to /generate are forwarded to http://localhost:8000, allowing the frontend to communicate seamlessly with a backend API like FastAPI. It also helps prevent CORS-related issues during development.
export default defineConfig({
  plugins: [svelte()],
   server: {
    proxy: {
      '/generate': 'http://localhost:8000'
    }
  }
})
The response is formatted in Markdown, so to render it correctly, you’ll need an additional npm package called marked. You can install it using the command below.
npm install marked
Remember to change the port if your have setup the custom port for your API via uvicorn.
Replace the code in App.svelte with the below code.
Ollama Chat
{#if loading}Loading...
{:else if chatHtml}{@html chatHtml}{:else}No response yet.
{/if}Ollama Chat
{chat}
Start the UI using this command.
npm run dev
We are now all set to run our local LLM based chat agent. Let’s start by asking a question.
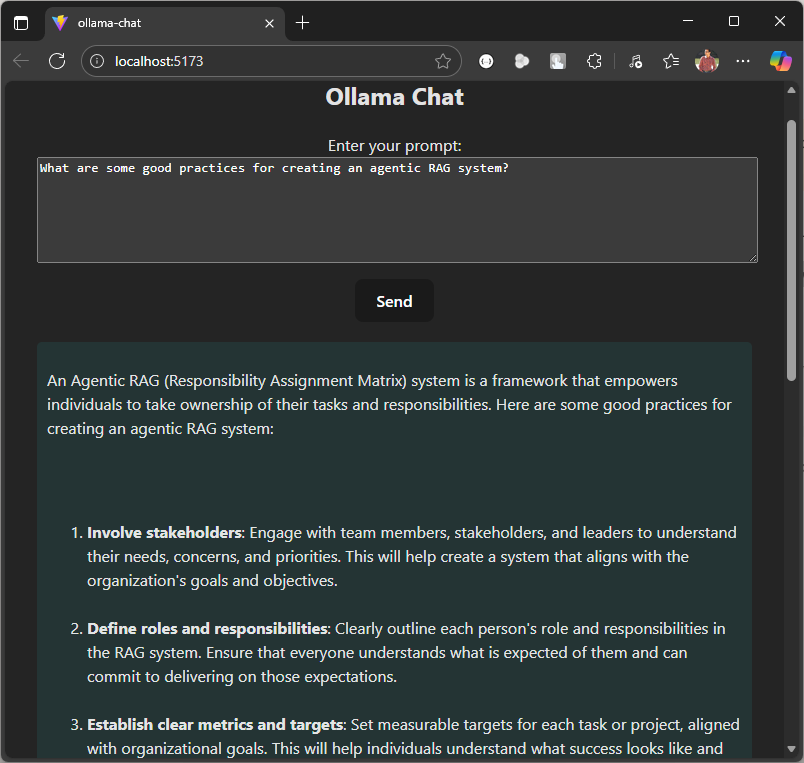
This code serves as a starting point. You can extend it by adding image or file upload functionality, allowing users to summarize content or ask questions based on the data within the uploaded document or image.
Here is the Github repo where you can find the entire code.

Today, my Amazon feed was flooded with mouse jiggler suggestions in various shapes, sizes, and features. A few days ago, during a chat with a friend, he mentioned wanting a device to keep his status active on Microsoft Teams while doing household chores. It was my first time hearing about such a gadget, and I found it fascinating to explore what it can do.
In a nutshell, mouse jiggler is a device which moves your mouse or simulate its movement to keep your computer active.
The cheapest mouse jiggler I can found on Amazon was around Rs. 880 or $11 (approx.). Now mouse and keyboard are Human Interface Device (HID) and this can be easily mimic with something like a cheap Raspberry PI Pico and the total cost of this will be around Rs. 330 or $4.00.
Grab a Raspberry PI Pico from Robu.in or ThingBits.in as these are the official reseller of Raspberry PIs in India.
Thonny is a Python IDE which has excellent support for Raspberry PI. I will be using this IDE so the steps are more clear to anyone who is working with a RPI for the first time.
After the installation is complete, plug the Pico to your computer while holding the BOOTSEL button on the PICO. This will put the PICO in the bootloader mode.
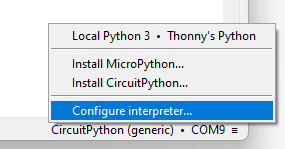
Click the bottom right corner of the main window, and select Configure interpreter.
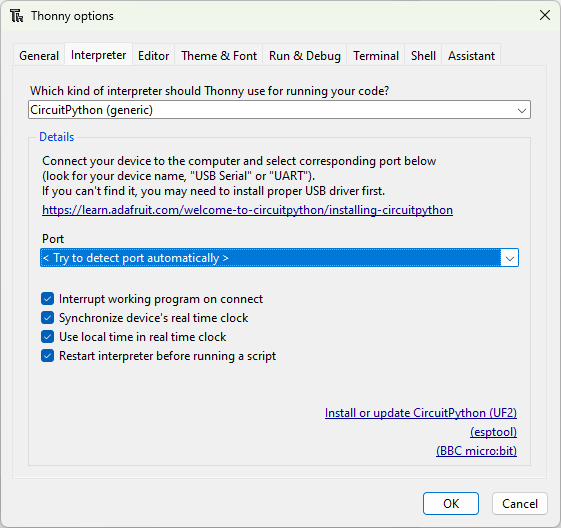
Thonny options window will pop up where you will now click Install or update CircuitPython(UF2).
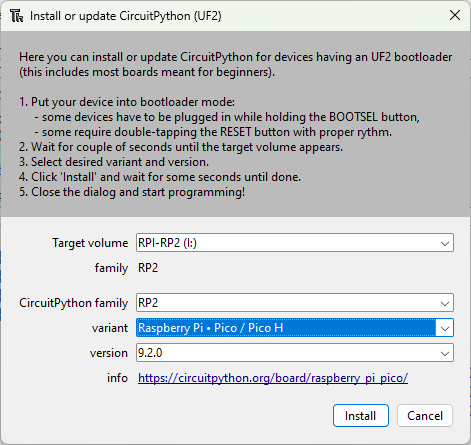
Click Install to start the installation and wait for it to finish. The device will restart after the installation is completed.
We need Adafruit’s HID library which you can download from here. Extract the contents of the zip file and copy adafruit_hid folder to the lib folder which is at the root of the Pico.
If you are using Thonny then open code.py file by pressing CTRL + O and paste in the following code.
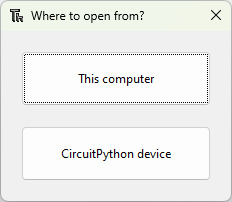
NOTE: You will not see this dialog box if you have a wrong backend or no backend selected. You can change or select the right backend from the bottom right corner of of the Thonny IDE.
import usb_hid
from adafruit_hid.mouse import Mouse
from time import sleep

m = Mouse(usb_hid.devices)

while True:
       m.move(-5, 0, 0)
       sleep(0.5)
       m.move(5, 0, 0)
       sleep(0.5)
The line from adafruit_hid.mouse import Mouse imports the Mouse dependency, allowing us to control the mouse programmatically. The code is straightforward and can be tailored to your specific needs. In my case, I want to move the mouse slightly to keep my status active while I’m away. You can increase the time interval beyond 0.5 seconds, as both Teams and Slack take a while to detect inactivity before marking your status as inactive.
Currently, this Raspberry Pi Pico-based Mouse Jiggler is a fixture on my other always-on machine, saving me from having to re-login whenever I forget to move the mouse while deep in work.