
© 2026 Pashant Khandelwal

© 2026 Pashant Khandelwal
We have been programming a lot so we need some time to refresh our minds and get ourselves in a state where our mind processors can start working again more beautifully. When I am pushing myself hard I play 3 games that is on my favorite list. Though I do have many games but these are the 3 games that I play.
The legendry dot-eating games Pac-Man. I first played this game on 8-bit Atari console and I remember I used to bet with my firends. We played Pac-Man on a single maze, we don’t have many options, but here we have lots and lots of mazes to choose from. The statistics is a section.
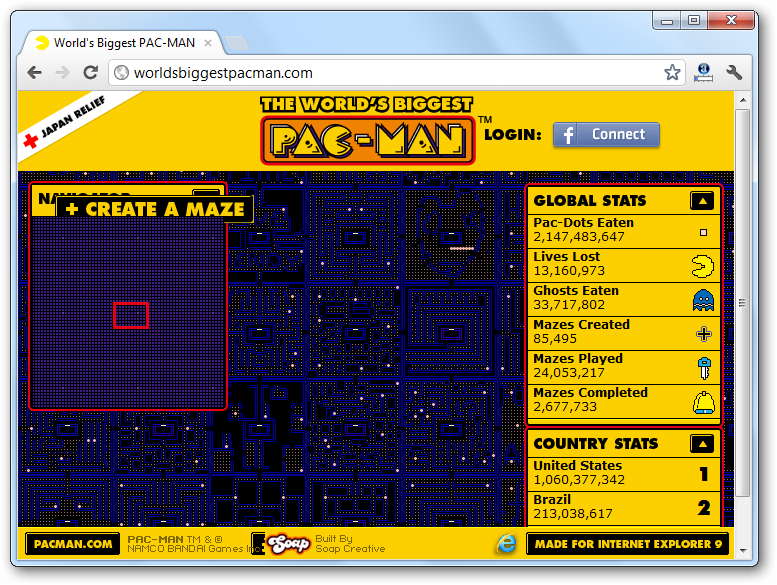
One of the most playable and most addicted games at the moment available on the web. Amazing stages and awesome game play. I have spent numerous amount of effort and time on this game. I have played the offline version of this game, if you don’t want to install then play it right here.

This game is more or like Angry Birds. Why? If you have played Angry Birds then you must have noticed that in Angry Birds it is not just about hitting the pillars. It’s about how you kill the pigs by consuming fewer birds. Cut The Rope is the game initially written in Objective-C and later written in JavaScript by the awesome developers at Zepto Labs. I love playing this game as it allows you think before you make the move.

I am not a web developer but still I love working with jQuery, CSS3, HTML5 and other web development frameworks. But as a programmer I love collect code snippets for my ease and store them on the cloud so I can get the access when I am in need and want to save my time while I am writing code. Out of the box I have a list of few image manipulation plugins which seems pretty impressive to me. Let’s take a look:
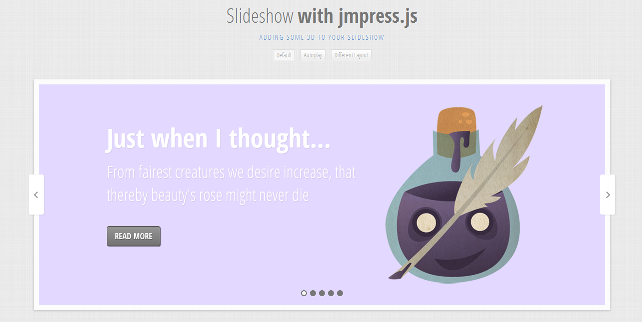
For simple image carousels you can use rcarousel. The plugin is good if you are planning to implement a simple image carousel. If you are looking for some CSS3 taste then take a look at slideshow using jmpress. The transitions effects are awesome.
This is the best image hover plugin I used and available on the web so far. The plugin has to offer you some amazing effects. My favorite is the greyscale and popout, both effects are good if you plan to have a web based gallery.

If you are looking to have a caption for your images, then do that in style. Captify is a plugin let you have pretty image captions for the image. You can have the caption on the image by default or you can show it to the user on mouseover. You can take a look at a little demo here and download it from the GitHub

Want to work with sprites but don’t know how to kick off? Don’t wait and go to Spritely. Before you download check the gallery examples. In short Spritely allows you to turn your images into a movie. Simply awesome!!
![]()
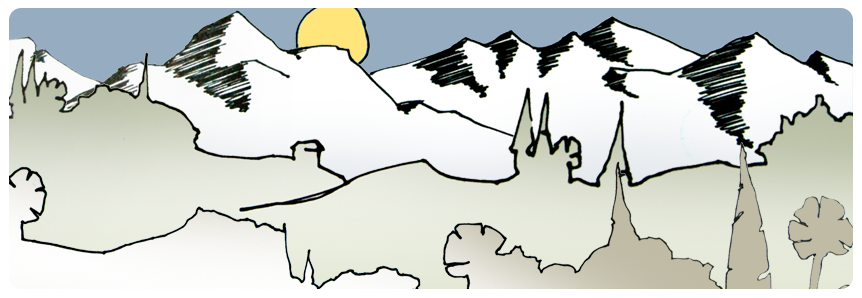
I will be surprised if you have not heard about this plugin. One of the most amazing and powerful plugin or I should say a library that can make your images speak or work on their own. I am not going to describe what it does, so you have to go and look for yourself. Visit the demo page.
No one likes if their favourite site is loading up slow. Using CSS sprites instead of using individual images and minify javascript and css files is a way to minimize the request send to the server and also saves you few KBs or may be even MBs. If your site is high on using javacript and CSS then you should minimize them.
I recently used SquishIt to combine/minimize my CSS and javascript files. I found 2 major benefits, first, I am able to combine all of my CSS files into one and minimize it, and second it reduces the request sent to the server to load several .css and .js files. In a typical web application I can have one style sheet and one javascript or jQuery file, but if I am planning to use some plugins then there might be more than one style sheet and javascript files which will get loaded on every page request. Here is an example of a sample web forms application loading two css and javascript files which includes the plugin code.
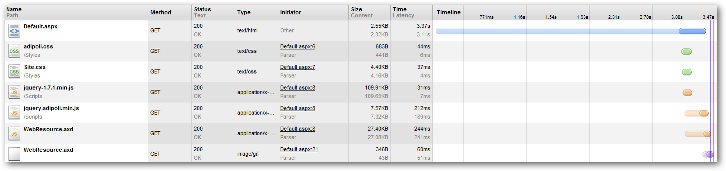
Here you can see that there are 4 requests in total to load site CSS and Javascript files. Though in this case the size of the file is less but when you have really large files then it can really affect your site performance and also save MBs in a long run. So, what happens when I use SquishIt? Install the package by firing the below command at NuGet console.

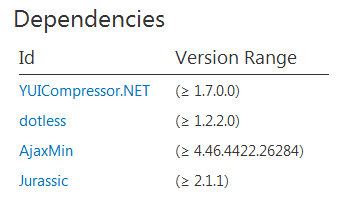
SquishIt is not an independent package, it has dependencies which is doing all the work of minifying and compressing CSS and JS files behind the scenes.
After the package is installed successfully, time to squish the files. Open the web page or the master page where you are loading CSS and JS files (in my case it is site.master) and add a reference to the SquishIt assembly on the top of that page.
<%@ Import Namespace="SquishIt.Framework" %>
In the head section of your page we can then combine all the CSS and JS files and then render them into ONE single file. There are two different methods to minimize CSS and JS files i.e. Bundle.Css() for CSS files and Bundle.JavaScript() for JS files. Here is an example:
To bundle CSS:
<%= Bundle.Css()
       .Add("Styles/adipoli.css")
       .Add("Styles/Site.css")
       .Render("Styles/squishstyle#.css")
%>
To bundle JavaScript:
<%= Bundle.JavaScript()
       .Add("Scripts/jquery-1.7.1.min.js")
       .Add("Scripts/jquery.adipoli.min.js")
       .Render("Scripts/squishjs#.js")
%>
You can go on adding all the css and javascript files using the Add() method. After all the files has been added call the Render() method. You can say that the Add() method just keep all the files in a stack and the Render() method will combine and minimize the files. If you look closely in the Render() method has a new file name with a (hash) #. The hash symbol is just generates a new unique id of the bundled script.
When you run the application and check the network call stack in your browser, you’ll find that the files are not combined. The page is still loading 4 files!? To overcome this set the debug mode to false in the web.config file.
<compilation debug="false" targetFramework="4.0" />
Now if you look in the network call stack, you will find the files have been squished and minimised and compressed!!

And here are my saving statistics:
Without SquishIt:
Four requests in total!!
| Name/Path | Type | Size Content | Time Latency |
|---|---|---|---|
| adipoli.cs | text/css | 683B | 62ms |
| /Styles | text/css | 441B | 55ms |
| Site.css | text/css | 4.40KB | 68ms |
| /Styles | text/css | 4.16KB | 61ms |
| jquery-1.7.1.min.js | application/x-javascript | 109.91KB | 80ms |
| /Scripts | application/x-javascript | 109.65KB | 67ms |
| jquery.adipoli.min.js | application/x-javascript | 7.57KB | 242ms |
| /Scripts | application/x-javascript | 7.32KB | 163ms |
The Squish effect:
Two requests in total. Check out the file size and content being loaded.
| Name/Path | Type | Size Content | Time Latency |
|---|---|---|---|
| squishstyle6788C36F832FE70161B88F2D08193F3E.css | text/css | 2.95KB | 80ms |
| /Styles | text/css | 2.71KB | 72ms |
| squishjs0F44BB5917C6332E4D49DFCDA5F3556D.js | application/x-javascript | 98.29KB | 91ms |
| /Scripts | text/css | 98.03KB | 76ms |
The same can be done in MVC with this NuGet package.
![]()
Bing maps are out there for a long time now and is getting mature pretty fast. I have used Bing maps myself in few of my projects and I remember as a first time user I have a hard time configuring it according to my project requirement. To get myself out of the overhead I searched the web for a jquery plugin, but I can’t find a single jquery plugin for Bing Maps instead I found few for Google Maps. I do have some knowledge of jquery and Bing map API, so I decided to write a jquery plugin for Bing map in my free time that will handle all necessary configurations and all the hard work for me and more importantly save my time.
Initially I started writing a plugin to just set up the default configuration like setting the map with different modes, zoom level and other necessary configurations, but I ended up doing something more. Besides just the normal configurations of the map I was also able to incorporate Bing map API to search and pinpoint the address on the map. Now if you have an address and you want that to be located on the map then you just have to write in the address in the address parameter and do the other necessary configuration like if you want to show the pushpin on the map or not, or you can set the description on the balloon tip when the user hover the mouse on the pushpin. You can also change the view modes and can also set the zoom level. Plenty of stuff in the plugin and I will add more to make it more flexible and more productive. The API thing in the plugin was just the test from my side, I never thought of using the API in the plugin when I started writing it. But I am happy that I ended up making something useful for myself and I am sure enough that it will help other fellow developers out there also.
I have a dedicated a page for the Bing Map plugin here. There are still few changes to be made on the page so that it can have more information. In the next phase I am planning to have a demo page and provide more information on plugin.
Make sure to read about the plugin and the configurations before you get started with the plugin at Bing map plugin home page.
If you are using NuGet then you can fire up the below command to install it into the Scripts folder.

I came across an announcement made by Candy Chiang at MSDN Forums at ClickOnce and Setup & Deployment Projects forums.
In Visual Studio 2010, we have partnered with Flexera, makers of InstallShield, to create InstallShield Limited Edition 2010 just for Visual Studio 2010 customers. The InstallShield Limited Edition 2010 offers comparable functionality to the Visual Studio Installer projects. In addition, you can build your deployment projects using Team Foundation Server and MSBuild. For more information, see here.
With InstallShield available, the Visual Studio Installer project types will not be available in future versions of Visual Studio. To preserve existing customer investments in Visual Studio Installer projects, Microsoft will continue to support the Visual Studio Installer projects feature that shipped with Visual Studio 2010 and below as per our product life-cycle strategy. For more information, see Expanded Microsoft Support Lifecycle Policy for Business & Development Products.
The question here is how we are going to create a setup within Visual Studio? How we are going to install the Windows service? How the application gets deployed in the production environment? The in-built Setup and Deployment template was extremely useful and I have no idea at the moment what is the best alternative Microsoft will come up with in Visual Studio 11 which is flexible enough to provide all what the developer needs. Well, in time we’ll see but this is for sure that we are not going to have project templates for Setup and Deployment in the next release for Visual Studio. Microsoft also confirms that InstallShield will be available in the future versions of Visual Studio, but again it will be a limited edition (as what we have in Visual Studio 2010). Let’s hope we are going to see more advanced version of InstallShield in next release of Visual Studio.
With Setup and Deployment gone from Visual Studio, there is an excellent Visual Studio extension which allows you to create setup packages. This extension will let you create NSIS and Inno Setup installers for your application. At the moment this extension supports Visual Studio 2005, 2008 and 2010 and as I see excellent potential in this extension and the people behind the extension, I hope we will be able to see this extension for Visual Studio 11 soon. The current/latest version is still in beta and is only available for Visual Studio 2010.
Note: Before you start installing the add-in make sure you have few of the pre-requisites installed in your machine. Read for the pre-requisites here.
The best part about this extension is that alike traditional Setup and Deployment projects it gives you a complete wizard to create a setup package for your application. For folks who have never put their hands on NSIS, I would like to tell them that is a scriptable installer and that means that you can write your own custom scripts to get more out of the box.
Let’s see what this add-in has to offer us in future.