
© 2026 Pashant Khandelwal

© 2026 Pashant Khandelwal
Most of the times I have seen people looking for song lyrics on online MP3 or lyrics database sites. Few of them provide API to fetch lyrics which is good for developers. Last.fm has a powerful API but they don’t provide any API call to fetch lyrics. The two most popular APIs on the web that I am aware of is WikiLyrics, LyricsDB (popularly known as LyrDB), there is another API from ChartLyrics but I don’t find it as useful as the other two APIs. The WikiLyrics API works beautifully, but it has one drawback the lyrics fetched from the service is incomplete. I wrote a complete desktop application to fetch lyrics, album art, artist image, album name and album release date but never made it available to download for public. I am planning to release it to general users. But till then you can take a look at this simple little app which I created in my spare time to fetch lyrics from LyrDB.
This little simple application is in ASP.NET MVC. I am not a designer so I will take advantage of the default design. In the home controller I have a simple method named GetLyrics which accepts two parameters Artist Name and Song Name. The method returns results in JSON as it will be good for me to parse the results in JQuery. Take a look at the code:
[AcceptVerbs(HttpVerbs.Post)]
public ActionResult GetLyrics(string ArtistName, string SongName)
{
          string response = string.Empty;
          string LyrURL = string.Empty;
          string url = "http://webservices.lyrdb.com/lookup.php?q=" + ArtistName + "|" + SongName + "&for=match";
          WebResponse wResp = (WebRequest.Create(url) as HttpWebRequest).GetResponse();
          using (StreamReader sReader = new StreamReader(wResp.GetResponseStream()))
          {
              response = sReader.ReadToEnd();
          }
          if (response == "")
          {
              response = "No Lyrics found on LyrDB for " + SongName + " by " + ArtistName;
              goto Output;
          }

          string[] lyrID = response.Split('\\');

          response = "";

          LyrURL = "http://webservices.lyrdb.com/getlyr.php?q=" + lyrID[0]+"&callback=?";

          Output:

          return Json(new
          {
              success = true,
              Lyrics = LyrURL
          });
}
The above code does not return the lyrics but the URL to get the lyrics. I am a big Jquery fan and as usual I will be using it here to make an AJAX call and load an IFRAME with the lyrics URL.
$(document).ready(function () {
        $("#btnSearch").click(function () {
            $("#btnSearch").attr('disabled', true);
            $("#lyrics").addClass("loading");
            $("#LyrFrame").attr('src', '');
            var Artist = $("#txtArtistName").val();
            var Song = $("#txtSongName").val();
            var url = "/Home/GetLyrics?ArtistName=" + Artist + "&SongName=" + Song;
            $.ajax({
                url: url,
                type: "POST",
                dataType: "json",
                data: "{'ArtistName': " + Artist + ",'SongName': " + Song + "}",
                success: function (data) {
                    $("#lyrics").html("");
                    $("#btnSearch").attr('disabled', false);
                    $("#lyrics").removeClass("loading");
                }
            });

        });
});
The URL in the above script calls GetLyrics method which is inside Home Controller takes artist and song name as query string. On the success of the call the IFRAME gets loaded with the lyrics URL. The output will look something like this:
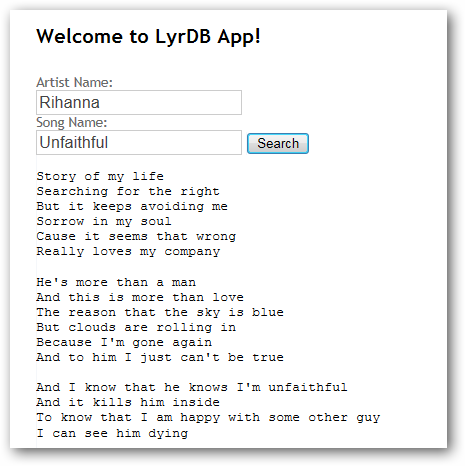
You can download the application source code from the below link, but I want to tell you that it will not fetch each and every song lyrics for you. It’s a database and it can provide us only information it has. But the desktop application I am will release in future will check around 2 lyrics API at least and I believe that my application guarantees 100% result. So follow my upcoming posts.
Download: LyrDBApp.zip (886.46 kb)
Related Links:
Previously in a lot of hurry I wrote a post on how to upload files in MVC3 with the help of Uploadify, a famous jQuery plugin to upload files. If you have not heard about it yet, then it is time for you to check and find out what this plugin can do for you. Appending my last post about this plugin (which was not very well written) I tried one more thing with it today. This time I am trying to upload an image and then show it inside a DIV without a post back. If you have the source code from the previous post, then it will be good as you need not to start from the scratch.
I assume that you are a good designer as I am not. I am saying this because I really got a blank head in designing. Therefore it is up to you how you are going to show off the images on the page, I am just telling you a way to do that. I am using MVC3 for this example but it will work for both web forms and MVC. The only difference in MVC and web forms is in the server side code which is responsible to upload the file. If you are using MVC3 then your method to upload the file in the controller will be something like this:
public string Upload(HttpPostedFileBase fileData)
{
        var fileName = this.Server.MapPath("~/uploads/" + System.IO.Path.GetFileName(fileData.FileName));
        fileData.SaveAs(fileName);
        return "OK";
}
As we are using Uploadify, we now have to make changes in some of the parameters of the plugin. The Upload method is inside home controller, so the script parameter of the plugin will be /Home/Upload. For my convenience I have changed the multi and auto parameter to false and true respectively. By now this is the jQuery code I have:
In the end I append one more parameter onComplete which gets fired when the plugin finish uploading the file. To get the uploaded path of the image I am using fileObj.filePath and response to check if the file has been uploaded successfully or not. If the response I received after the uploading of the file is completed is ok then I will set the html to show the image in another DIV. Below is the complete configuration of the plugin.
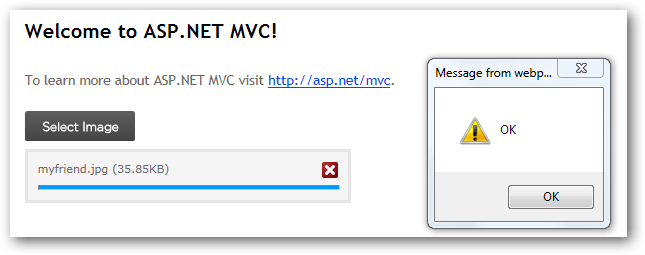
Just to demonstrate I have placed an alert message box with the response which got fired on the onComplete event after the image has been uploaded successfully. After this I have created a html string which is actually a html img tag with src and alt tags. I have then set the same html string to another DIV which acts as a holder of the image being uploaded. Here is an output after the image is uploaded. Just to remind you, it is all done without post back.

This is it, try it yourself and I recommend you to check out the documentation of the plugin I used. Check out the other links below and one more thing that I would like you to do is to set the multi property of the plugin to true and the try uploading multiple images. If you end up making something awesome then do share with me/us.
Related Links:
I have been working on a MVC project which I will be using to save and manage all my code snippets. I get this plan in my head when my 160GB of HDD got crashed which holds most of my work and code. I started writing the web application in web forms and almost got it completed, but eventually changed my mind and started writing the application from scratch in MVC 3 with Razor view engine.
As I will be making this application online, I am sure to receive some comments when I share my code with others. To know what people thing about the code I published, I must have a commenting system for my application to know what people think. Instead of writing my own comment mechanism I would rather want to go with DISQUS commenting system. For my blog I am not using DISQUS, but for this application I will use DISQUS as it will save my time and is also a reliable way to manage comments.
Working with MVC is fun and even more when you are working with helper classes. Read my blog post on Working with Microsoft Web Helpers in ASP.NET to know more about helper classes and their features and how they can save your time in developing applications. I am going to show you how you can integrate DISQUS commenting system in your MVC application with ease. To get started, register a DISQUS account.
Create a new MVC project in Visual Studio and without any delay go to NuGet console and type in the below command to add the DISQUS helper class.

The DISQUS helper class has 2 methods which we will be going to use.
To initialize DISQUS, we need to set the Initialize method in _ViewStart.cshtml file. You can find this file under Views folder. Make sure that this is a first line in the file as we have to initialize before the layout of the page gets rendered.
@{
    Disqus.Initialize("shortforumname");
 }
Now as we have initialized, we can show the comments on the page. To show the comments on the page we will use the ShowComments method and pass the page name in the parameter. Just to be more precise about this parameter, I would like to point out that on a forum, blog or on a website every page has a unique name or forum post id or blog post and the parameter that we are going to pass to this method should also be the same unique post id or page name.
@Disqus.ShowComments(pageIdentifier: "post123")
This will render the DISQUS comments as shown below:
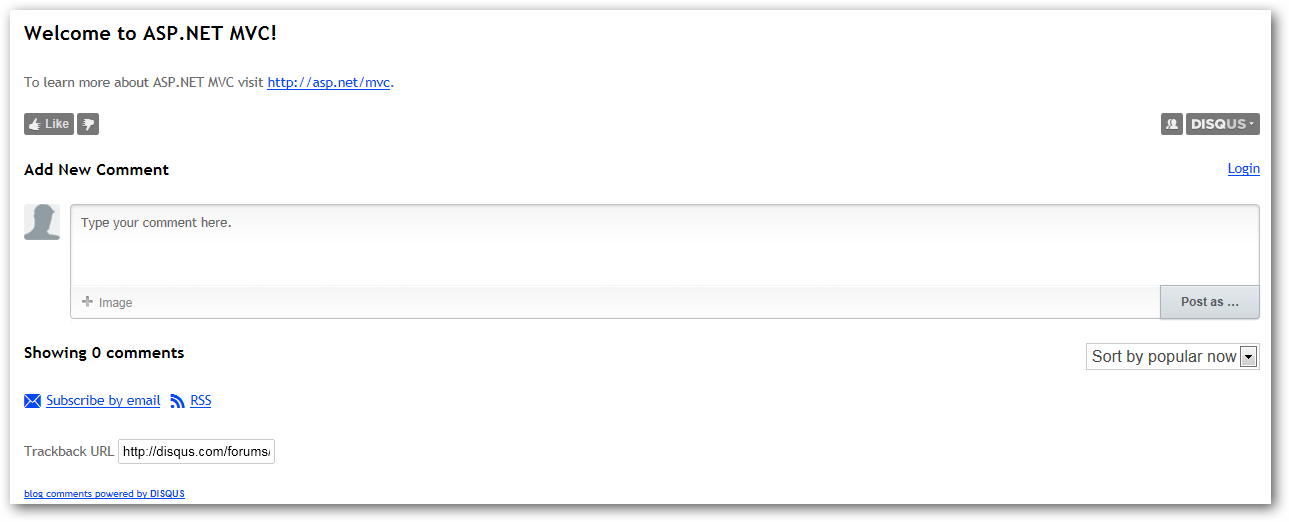
Someone will now make a comment here and move to another page and then make another comment. The only way DISQUS has to identify the comments on the basis of the PageIdentifier parameter in the ShowComments method. When some other user requests the same page again from a different geographical location, the DISQUS will check the PageIdentifier and then load the related comments.
I hope this post gives you an overview on how you can integrate DISQUS commenting system on you site in MVC.
Appending my previous post, I have created a plugin in JQuery to get twitter followers count, facebook likes and feed readers count. In my previous post, I have shown a way to get the counts in ASP.NET and I have created this plugin so that everyone can use and show counts on their blogs or site.
To get started add the two javascript files, one is the jquery file and the other one is the plugin file.
Before I proceed to show you how to get it done, I should explain a bit about my small plugin. This plugin accepts 2 parameters:
Twitter, Facebook and Feeds (case-sensitive).Now it’s all on the developer/designer where he wants to show the counter. I have set 3 divs on my page with ID. It is not at all necessary to use divs, you can use whatever you want. To get the counts I will do the following on the document.ready function.
$(document).ready(function () {
       $("#tweet").SocialCounter({ SocialSite: 'Twitter', UName: 'prashantmx' });
       $("#FBLikes").SocialCounter({ SocialSite: 'Facebook', UName: 'http://facebook.com/audi' });
       $("#FeedReader").SocialCounter({ SocialSite: 'Feeds', UName: 'Midnightprogrammer' });
});
Download: jquery.SocialCounter.zip (889.00 bytes)
I am working on some web stuff these days and surfing around to look at some of the best web developer’s work around the web. As I was surfing I came across one of the most popular and reputed web tutorials site Nettus+. I am not going talking about any tutorial or article published on this site, but one thing that attracts my attention was the way they are displaying their followers count on twitter, facebook likes and RSS readers.
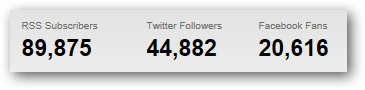
This looks pretty cool and just out of curiosity I viewed the page source, hoping to find some script or API call which gets the count. But eventually I can’t found anything. For Twitter and Facebook I know that there is an API and therefore I can get the twitter followers and facebook like count but don’t know anything about the feed readers count. So I search the web get myself aware of the feedburner API. So let’s take a look at the code.
To get your twitter followers count, I am making a REST API call. This call will return XML string and then I am going to parse the received XML using LINQ. You just need to pass your twitter user name to get the followers count.
public string GetTwitterFollowersCount(string UserName)
{
            XDocument xdoc = XDocument.Load("http://api.twitter.com/1/users/show.xml?screen_name=" + UserName + "&include_entities=false");
            return (from item in xdoc.Descendants("user")
                    select item.Element("followers_count").Value).SingleOrDefault();
}
To get total Facebook likes count you need to remember that you have to use the URL of your page for e.g. http://www.facebook.com/audi or http://www.facebook.com/nettutsplus and not just the name of your page. Check out the code:
public string GetFacebookLikes(string FaceBookURL)
{
         string URL = "https://api.facebook.com/method/fql.query?query=select%20%20like_count,%20total_count,%20share_count,%20click_count%20from%20link_stat%20where%20url=%22" + FaceBookURL + "%22";
         XElement xdoc = null;
         XElement counts = null;
         xdoc = XElement.Load(URL);

         IEnumerable<XElement> total_Like_count =
             from elem in xdoc.Descendants()
             where elem.Name.LocalName == "like_count"
             select elem;

         counts = total_Like_count.First();
         string FBLikes = Convert.ToString(counts.Value);
         return FBLikes;
}
To get the RSS feed readers count you need to pass the complete URL of your feed URL for e.g. http://feeds.feedburner.com/MidnightProgrammer
public string GetFeedReadersCount(string url)
{
            XDocument xdoc = XDocument.Load("http://feedburner.google.com/api/awareness/1.0/GetFeedData?uri=" + url);
            return (from item in xdoc.Descendants("entry")
                    select item.Attribute("circulation").Value).SingleOrDefault();
}
This is it, now it all depends on the designer or developer how to get the stats and present it in a more attractive way. I am not a designer and this is why I am not putting any effort to do something like this to show you this thing in action. At present I am working on JQuery version of the above code, so people who are willing to show stats on their blogs or website which are different platforms. Till that time, try the above code with ASP.NET and let me know of this helps you out.