
© 2026 Pashant Khandelwal

© 2026 Pashant Khandelwal
There are many syntax highlighting plugins available on the web right now. Majority of the sites are using javascript based Syntax Highlighter from Alex Gorbatchev. I am using it for my current blog and BlogEngine.NET has it as a default syntax highlighter. It is good because it has a lot of themes to offer and you can also customize according to the look and feel of your blog or site. Moreover it has support for multiple languages which makes it acceptable among most of the bloggers and developers.
I also like the way MSDN and Codeplex style their code. Although it has some flaws like moving the code to the next line if it exceeds the length of the pre or div tags. The library MSDN and Codeplex are using for syntax highlighting is ColorCode. ColorCode is open-source and supports every language specific to Microsoft. The way ColorCode works is totally different than that of any other syntax highlighting library. Javascript based syntax highlighter use CSS for different styles whereas ColorCode uses in-line CSS to set styling for the code.
To install ColorCode you can use NuGet command or add ColorCode reference as a library downloadable from Codeplex. NuGet command:
PM> Install-Package ColorCode
Only Microsoft stack languages are supported by ColorCode. Here is the complete list:
As I mentioned earlier that this library uses in-line CSS and therefore you cannot use it in the windows forms application. You can use the webbrowser control in windows forms application if you want code to render correctly.
This is a sample basic usage of ColorCode.
string code = File.ReadAllText(Server.MapPath("~/Test.txt"));
string finalCode = new CodeColorizer().Colorize(code, Languages.CSharp);
codediv.InnerHtml = finalCode;
First line of the code will read all the text from a file. The second line will initialize a new CodeColorizer class Colorize method which will take 2 parameters, first is the code for which we want the syntax highlighting for and the second parameter is language. I now have the finalCode string which has the code with syntax highlighting. This is the output I have in my browser window.
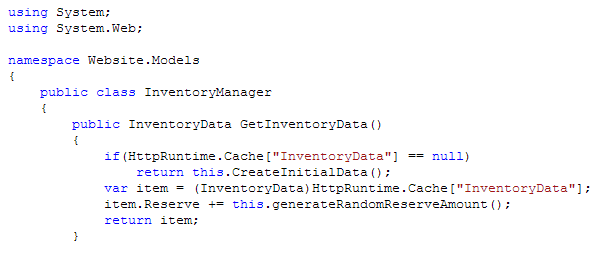
It looks pretty good from the front but behind the scenes it’s not that pretty.
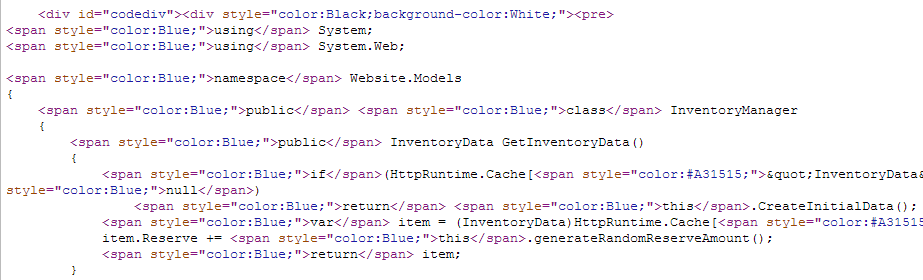
ColorCode is an open-source library and is hosted on Codeplex.
When I heard about Glimpse, I thought it like to be another MiniProfiler like stuff or a combination of MiniProfiler and this. But it seems to be more robust diagnostic tool for developers. Here is my experience with this awesome diagnostic tool.
Glimpse is a diagnostic tool for ASP.NET applications which let you see detailed diagnostic information of your web application. Glimpse knows everything your server is doing and displays it straight away to you in your browser. Currently Glimpse is supported for ASP.NET – Web Forms and MVC and PHP and other languages are in queue as well. If you want to contribute to the project as it is open-source, you can contact the project developers here. The Glimpse project is still under development and there are more that 70 bugs reported at Github.
I have used MiniProfile in the past and the major difference between the two tools I noticed is that in MiniProfile you have to make changes in the code to profile or view the diagnostic information. On the other hand Glimpse is just simply plug and play library. If you are going to give Glimpse a try make sure that you use NuGet to get the library. Glimpse comes with lots of configurations and setting them out manually in the application will be a pain just like ELMAH. As we are now living in post-NuGet era, we must use the power of NuGet to do all the hard work and configuration for us. You can get Glimpse depending on the type of project you have. To add Glimpse in MVC application fire the below NuGet command.
PM> Install-Package Glimpse.MVC
For Web Forms
PM> Install-Package Glimpse.ASP
After the command gets completed, take a look at the web.config file where you can see all the configurations. Without paying more attention to the configs, run the application to see Glimpse in action. Unlike MiniProfiler, there were no changes in the code. Before you can actually see Glimpse in action you have to turn it on, and to turn Glimpse on navigate to the URL http://localhost:XXXX/glimpse.axd
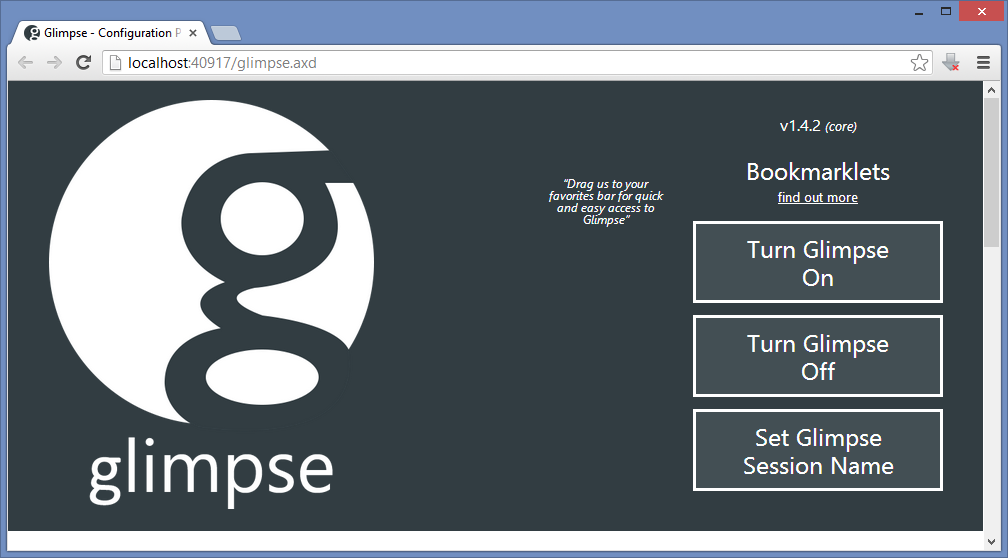
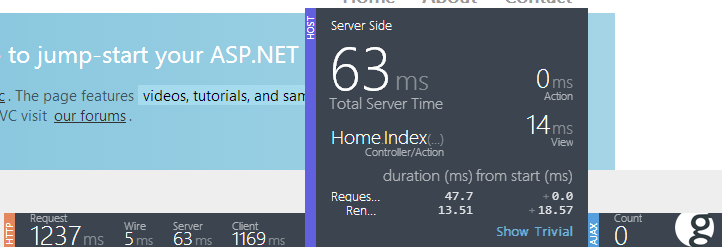
A cookie is set when Glimpse is turned on. This cookie tells the server to send the diagnostic data to the application. Here is how it looks on my home page.

The above screenshot gives you a summarized information of what your application and server is doing. The summary part is distributed in three parts i.e. HTTP, HOST and AJAX. The HTTP segment shows the summary of the diagnostic information that flows over HTTP. In the HOST segment you can also see the name of the controller and action name. AJAX segment shows zero count as there are no AJAX call yet in my application which communicates with the server. This is just a summary which is visible at the bottom right hand corner of the web page. To view more detailed diagnostic information hover the mouse over any of these segments and you get one level more information.
If this is not enough for you then click on the big g icon at the bottom right corner.
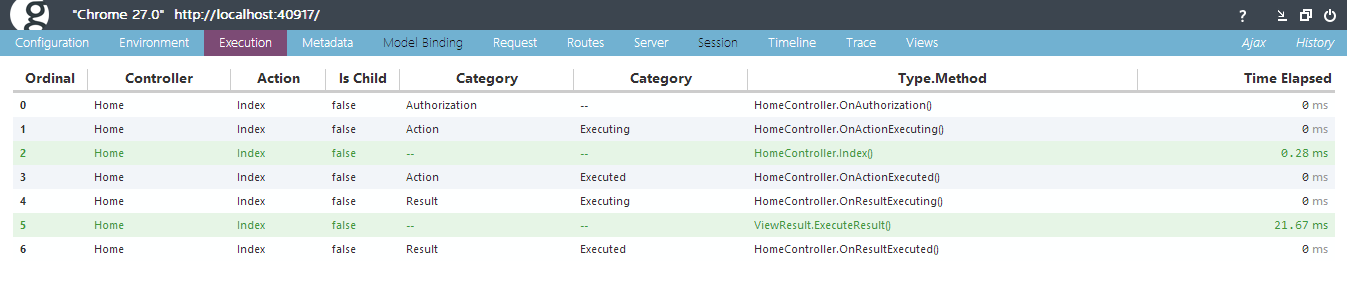
The screenshot above just covering one tab out of 12 tabs which have complete diagnostic information about the application.
Glimpse has extensions that will let you get information about EF, nHibernate, Ninject and many more. You can view the complete list of extensions here which you can use to see what these libraries are doing behind the scenes. Check out the complete list of extensions here.
Glimpse is a diagnostic tool and is very powerful from a developer’s perspective. When moving the website or web application to the production servers, no developer would want to leave Glimpse working on the landing page of your site. So before you move to production you have to turn Glimpse off. To turn off Glimpse you can navigate to the same URL which you have used earlier to turn it on. This is the easy option available, but anyone with the Glimpse handler URL can easily turn it on!? The best approach is to change the setting in the web.config file, so even if the third person has the URL of the Glimpse handler he will never be able to turn it on. To turn off Glimpse permanently set defaultRuntimePolicy to Off. The line in your web.config after the change will look like this.
Once this property is set to Off, there is no way a user can turn Glimpse on without changing its value back to On. Glimpse has a lot more options to explore which I can’t cover in single blog post. I am looking forward on using some extensions now for Ninject and Entity Framework.

Dev Buzz is an abbreviated form of Developer Buzz which will be a carrier of my bookmarks. There is no point of saving me a bookmark if I can’t share out with other developers (this is my thought on bookmarks). Therefore, from today onward I’ll be doing a blog post week or may be monthly to share by bookmark with the rest of you guys and moreover I have a huge collection of funny programmer pics which also accompany my bookmarks. Hope you all like this.
I was exploring Github for some image effects/filters and I found some but still keep exploring and found an interesting plugin called face-detection. This plugin uses HTML5 getUserMedia to use your web camera only if your browser supports it. Unfortunately, IE10 still doesn’t support it. This seems cool to me, so I created a sample application to test it. This sample application will let you preview the video using your web camera and allows you to capture the image from your web camera and upload it to the Azure storage. The javascript code for the HTML5 video I am using is from David Walsh’s post. Not every browser supports getUserMedia, so if the user is not using the browser which supports getUserMedia then you can show an alert message to the user notifying about the browser incompatibility. Here is the function which will check your browser compatibility for getUserMedia.
function hasGetUserMedia() {
 // Note: Opera is unprefixed.
 return !!(navigator.getUserMedia || navigator.webkitGetUserMedia ||
 navigator.mozGetUserMedia || navigator.msGetUserMedia);
}

if (hasGetUserMedia()) {
 // Good to go!
} else {
 alert('getUserMedia() is not supported in your browser');
}
To know more and explore more what you can do with getUserMedia visit HTML5Rocks. Moving further, I have a normal HTML page where initially I am placing 3 elements on the page. One is a video tag which will show the stream from the web camera attached to your machine or your laptop camera. Second, is the canvas tag which is used to show the image captured from the web camera and the third one is the normal button which will let me capture the image at my will on its click.
Notice the autoplay property in the video tag. I have set it because I don’t want the video to be frozen as soon as it started. To make the video work I am using David Walsh’s code as it is without any changes.
window.addEventListener("DOMContentLoaded", function () {
    // Grab elements, create settings, etc.
    var canvas = document.getElementById("canvas"),
        context = canvas.getContext("2d"),
        video = document.getElementById("video"),
        videoObj = { "video": true },
        errBack = function (error) {
            console.log("Video capture error: ", error.code);
        };

    if (navigator.getUserMedia) { // Standard
        navigator.getUserMedia(videoObj, function (stream) {
            video.src = stream;
            video.play();
        }, errBack);
    } else if (navigator.webkitGetUserMedia) { // WebKit-prefixed
        navigator.webkitGetUserMedia(videoObj, function (stream) {
            video.src = window.webkitURL.createObjectURL(stream);
            video.play();
        }, errBack);
    }

    // Trigger photo take
    document.getElementById("snap").addEventListener("click", function () {
        context.drawImage(video, 0, 0, 640, 480);
    });
}, false);
In the above script, you can see that it first checks if the browser or navigator has the getUserMedia support. if you see there are two conditions one for the standard and other one with the webkit prefix. In the end, the click event on the button which will let me capture the image.
When you view the application in the browser, the browser will prompt you whether you want to allow or deny the application to use the web camera.

You cannot run this just by double-clicking the file due to security reasons. You must access the web page from the server itself, either from within the Visual Studio development server, from IIS or by publishing the file on your production server. It can be annoying for many users to grant the access to the camera every time they access the page. You can save the user consent if you are using https. If you plan to stick with http, you will not be able to do this.
Looking in the address bar again, you will notice that the fav icon of the web application, changed to an animated icon. It is a little red dot which keeps on flashing notifying the user that the camera is in use. If you plan to block the access to the camera permanently or temporarily, you can then click the camera icon which is on the right hand side of the address bar.
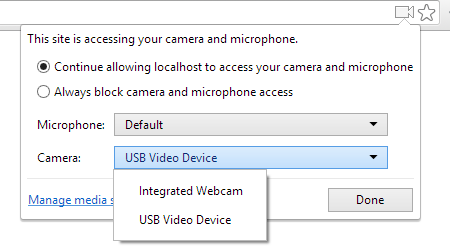
When you click the icon you will be prompted with options to continue allow the access to the camera or always block the camera. Also if you notice the camera option, you will see that it is showing me two devices or camera attached to the machine. I build this application on my laptop so I am able to the integrated camera which is the front facing camera of my laptop and the second one is the USB camera I have plugged on my laptop’s USB port. I can choose to use any one of these. If you make any changes to these settings and click on done, you will be asked to reload the page.
This is how my web page looks.
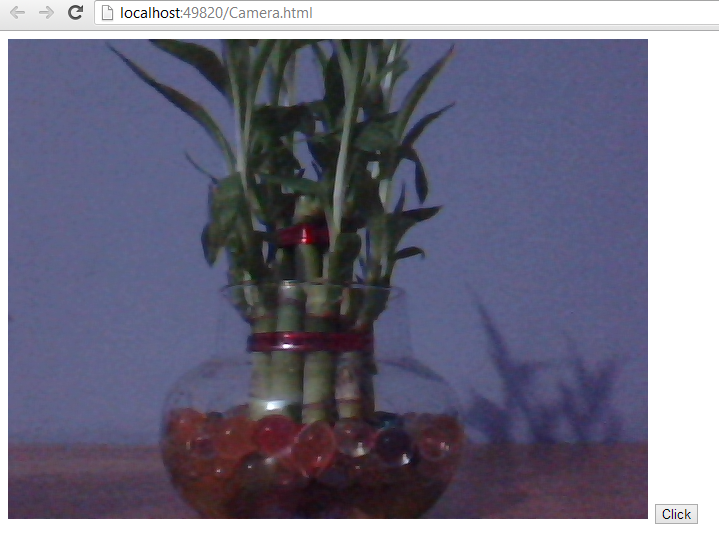
The click button is at the bottom right hand side will let me take a snap of the feed coming from my camera. When I click the Click button, the image is captured and show on the canvas we have added on the page. This is my web page after I took the snap from my web camera.
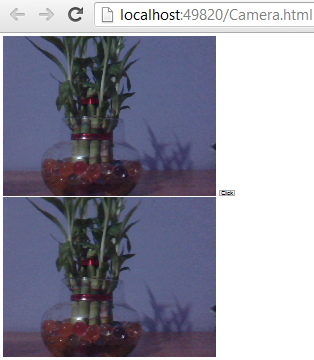
The second image (at the bottom) is the image on the canvas that is snapped from the camera. Now I want to upload the image to my Azure cloud storage. If you look at the address bar, you’ll notice that I have used normal HTML page. It’s you wish if you want to use a simple HTML page or a web form. Both works good. The problem I am going to face with web forms is if I am going to upload the snapped image to my cloud storage or to my server repository, the page will post-back which is not cool at all. So I am going to accomplish it by making an AJAX call. Add a HTML button to your page and on its click event upload the file to the cloud.
I have the image on my canvas, therefore you just cannot retrieve the image Base64 string just like that. I am going to extract the Base64 string of the image from the canvas and pass it as a parameter. The server method will then convert the Base64 string to stream and upload it to the cloud storage. Here is the jQuery AJAX call.
function UploadToCloud() {
    $("#upload").attr('disabled', 'disabled');
    $("#upload").attr("value", "Uploading...");
    var img = canvas.toDataURL('image/jpeg', 0.9).split(',')[1];
    $.ajax({
        url: "Camera.aspx/Upload",
        type: "POST",
        data: "{ 'image': '" + img + "' }",
        contentType: "application/json; charset=utf-8",
        dataType: "json",
        success: function () {
            alert('Image Uploaded!!');
            $("#upload").removeAttr('disabled');
            $("#upload").attr("value", "Upload");
        },
        error: function () {
            alert("There was some error while uploading Image");
            $("#upload").removeAttr('disabled');
            $("#upload").attr("value", "Upload");
        }
    });
}
The line 4 in the above script is the one which will get the Base64 string of the image from the canvas. The string is now in the variable named img which I am passing as a parameter to the Upload web method in my code-behind page. You can use web service or handler or maybe a WCF service to handle the request but I am sticking with page methods. Before you can actually make use of the Azure storage, you have to add reference of the Azure Storage library from NuGet. Fire the below NuGet command to add the Azure Storage reference to your application.
PM> Install-Package WindowsAzure.Storage
After the package/assemblies are referenced in your code, add the below namespaces.
using Microsoft.WindowsAzure.Storage;
using Microsoft.WindowsAzure.Storage.Blob;
using Microsoft.WindowsAzure.Storage.Auth;
using System.IO; //For MemoryStream
using System.Web.Services; //For WebMethod attribute
These all the namespace will help me to connect to my local cloud storage emulator or to my live cloud storage. This is my upload method which will upload the file to my live cloud storage.
[WebMethod]
public static string Upload(string image)
{
    string APIKey = "LFuAPbLLyUtFTNIWwR9Tju/v7AApFGDFwSbodLB4xlQ5tBq3Bvq9ToFDrmsZxt3u1/qlAbu0B/RF4eJhpQUchA==";
    string AzureString = "DefaultEndpointsProtocol=https;AccountName=[AccountName];AccountKey=" + APIKey;

    byte[] bytes = Convert.FromBase64String(image);

    CloudStorageAccount storageAccount = CloudStorageAccount.Parse(AzureString);

    CloudBlobClient blobClient = storageAccount.CreateCloudBlobClient();

    CloudBlobContainer container = blobClient.GetContainerReference("img");

    string ImageFileName = RandomString(5) + ".jpg";

    CloudBlockBlob imgBlockBlob = container.GetBlockBlobReference(ImageFileName);

    using (MemoryStream ms = new MemoryStream(bytes))
    {
        imgBlockBlob.UploadFromStream(ms);
    }

    return "uploaded";
}
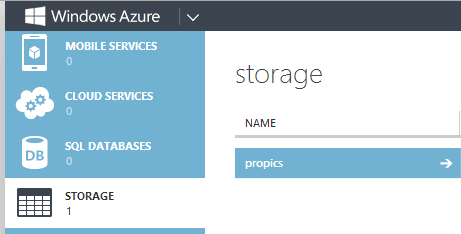
I have decorated this method with WebMethod attribute. This is necessary as I have to call this method from jQuery/javascript. Also the method should be public static. The AzureString serves as the connection string for the cloud storage. You have to change the [AccountName] in the connection string to the storage account name. In my case it is propics. The method accepts the Base64 string as a parameter.
Storage is something different than that of the container and therefore I have to create a container which actually holds my images which I upload to the cloud storage. I am not explaining the code completely but it is not that complicate. To upload the file to the storage I must have a file name. The image I get from the canvas is just a Base64 string and does not have a name, so I have to give it a name. I have a random function which will generate the random string which I will be using as a file name for my image file.
//stole from http://stackoverflow.com/questions/1122483/c-sharp-random-string-generator
private static string RandomString(int size)
{
    Random _rng = new Random();
    string _chars = "ABCDEFGHIJKLMNOPQRSTUVWXYZ";

    char[] buffer = new char[size];

    for (int i = 0; i < size; i++)
    {
        buffer[i] = _chars[_rng.Next(_chars.Length)];
    }

    return new string(buffer);
}
This is a small function which I stole from Stackoverflow to generate random name for my image file. So this is it and when I click the upload button on my page.

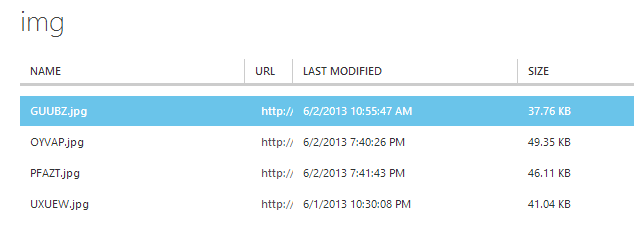
Now if I check my cloud storage I have can see the uploaded files.
This is just a simple example to get you started. You can give some cool effects before you can actually upload the files. If you do a quick search you’ll find plenty of links which will let you give some cool effects to your pictures. I came across a brilliant plugin called filtrr. You should try it and come up with something which is awesome or may be something like Instagram. Hope this help some folks out there.