 I was busy in few of my freelance projects and got a very rough weekends this whole month. But still I get a bit of time to work on my so called in-house project and somehow I was able to get it completed after a bit of testing. The application I built is a simple web application which will allow you to enter artist name and the song name and let you search the lyrics, album art, artist image, album name and album release date. I hope this application help few people out there.
Now, something about the internals and history of the application. I created a windows application 2 years back and thought of porting the same application for the web. For the, web I used ASP.NET MVC 3 with jQuery but the internals of the application remains the same as it was for my windows app. To fetch the lyrics I use LyrDB and WikiLyrics web services and for album art, album name, artist image etc. I used Last.FM web service. I package the whole stuff and what I got is the application which I was running since 2 years on my machine and now the same application is out for you, use it and suggest me something new if you anything in your minds.
I am not yet finished with this application and you’ll see more in coming days.
I love working with MVC but I do have a hard time working with complex data with EntityFramework (EF). I heard of using inline SQL queries in MVC but don’t know how to use it and will it have any performance issues? Few month’s back I downloaded the StackOverflow (SO) Data Explorer which is an open-source project built on MVC to explore data dump provided by SO. The thing that took my attention in that code was that they have been SQL queries to get the data from the database. This looks promising to me as the guys at SO will never compromise with performance. SO Data Explorer uses the micro-ORM called Dapper which is authored by Sam Saffron of Stack Overlfow.
Dapper is also available on NuGet or you can also drop this single file in your project which is hosted at Google Code. You can use the below NuGet command to install Dapper.

Performing CRUD operations in EF is simple for simple scenarios, but when the required data is complex I prefer using SQL queries with joins and other related stuff which make my work far much easier. To demonstrate how to use Dapper to perform CRUD operations, I am building a simple application to manage contacts. I started up with creating a model named ContactModel. You can copy the below code or you can have one for yourself.
public class Contacts
{
    [Key]
    public int ContactID { get; set; }
    public string Name { get; set; }
    public string Address { get; set; }
    public string Email { get; set; }
    public string Skype { get; set; }
}
The model is ready but we are not using EF Code First which created the database for us on the fly and therefore I have a bit more work to do. I’ll now create a database with a table which is same like my model. After the table has been created now I will add a new class to my project where I will write functions which will help me in performing CRUD operations. I will talk about view and controllers later when I am done with my DB access class. For this sample application I have used SQL CE 4.0 DB, but if you wish you can use SQL Server DB.
At the first, I just want to list down the contacts I have in the database. Practically this would have been the last thing to show in the example but I am showing this at first so you get an idea how Dapper works. As we have fresh database with no records, write down and insert query or just simply punch in the data in. Now in my data access class I will create a simple function which returns me the collection of contacts.
try
{
    using (SqlCeConnection con = new SqlCeConnection(ConStr))
    {
        con.Open();
        var contacts = con.Query("Select Name, Address, Email, Skype from Contacts");
        return contacts;
     }
}
catch (Exception x)
{
    throw x;
}
The above functions returns the collection of the contacts which I will use in my Index view where I am going to list down all the contacts I have with me (See the SQL query :) ). Add a new controller or use the existing Home controller and add the below ActionResult method ListContacts.
public ActionResult ListContacts()
{
    var db = new DB();
    return View(db.GetContacts());
}
I now must have a view which will display the list of all the contacts. Right-click on ListContacts() method and choose Add View. A pretty familiar dialog pops up like the one below.
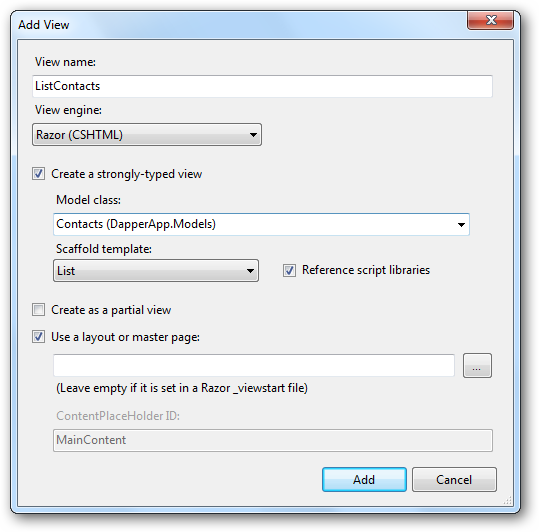
Nothing fancy here, just select the model class as the Contacts and Scaffold template as List. Hit F5 and change the URL to {View}/ListContacts and you will be able to see the list of contacts.

To insert the data in the database create the below method in the DB access class:
public bool CreateContact(Contacts contact)
{
    try
    {
        using (SqlCeConnection con = new SqlCeConnection(ConStr))
        {
            con.Open();

            string sqlQuery = "INSERT INTO Contacts([Name],[Address],[Email],[Skype]) VALUES (@Name,@Address,@Email,@Skype)";
            con.Execute(sqlQuery,
                                  new
                                  {
                                      contact.Name,
                                      contact.Address,
                                      contact.Email,
                                      contact.Skype
                                  });
        }
        return true;
    }
    catch (Exception x)
    {
        return false;
    }
}
I have a normal INSERT statement which will insert the records for me. The point that you need to note is that it is executed by the Execute extension method of the SqlCeConnection class. If you use SQL Server then the class will be SqlConnection class. Returning to controller and just to remind you that if we were working with EF which would have done the CRUD part for us then you must be aware that there are 2 ActionResult methods which were required for this purpose. One will just return the view and the other one with [HttpPost] attribute will create the record. I require a create view so I can add contacts. Follow the same steps you have followed above while creating the ListContacts view. For your further help here are the 2 ActionResult methods to create a new record (I am sure you can create a view!! Just right-click Create() method and click AddView and the scaffold is Create).
public ActionResult Create()
{
    return View();
}

[HttpPost]
public ActionResult Create(Contacts contact)
{
    var db = new DB();
    bool isCreated = db.CreateContact(contact);
    if (isCreated)
    {
        return RedirectToAction("ListContacts");
    }
    else
    {
        return View();
    }
}
The process of updating a contact will be similar like we have done for the insert. Before updating a contact I need to get the details of the contact when the user clicks on the Edit link on the page. When the user clicks the Edit hyperlink on the list page, the contact ID will be paased as a parameter.
public Contacts GetContactByID(int ContactId)
{
    using (SqlCeConnection con = new SqlCeConnection(ConStr))
    {
        con.Open();
        string strQuery = string.Format("Select ContactID, Name, Address, Email, Skype from Contacts where " +
        "ContactID={0}", ContactId);
        var customer = con.Query<Contacts>(strQuery).Single<Contacts>();
        return customer;
    }
}

public bool UpdateContact(Contacts contact)
{
    try
    {
        using (SqlCeConnection con = new SqlCeConnection(ConStr))
        {
            con.Open();
            string sqlQuery = "UPDATE Contacts SET Name =@Name, Address =@Address, Address = @Address, " +
            "Email = Email, Skype = @Skype WHERE ContactID=@ContactID";
            con.Execute(sqlQuery, new
            {
                contact.Name,
                contact.Address,
                contact.Email,
                contact.Skype,
                contact.ContactID
            });
        }
        return true;
    }
    catch (Exception)
    {
        return false;
    }
}
The GetContactByID method will accept the contactId which is passed as a parameter to the Edit ActionResult method. I am calling this method from the Edit ActionResult. The main purpose of this method is to fetch the contact details on the basis of the ID passed to it. The returned Contacts serves as a model to the Edit view which then populates the details of the contact I want to edit. I assume here you know how to create a View. Here is my Edit and Edit with HttpPost which does the actual update work. The UpdateContact method will get called from the Edit ActionResult method which is attributed with HttpPost.
public ActionResult Edit(int ContactID)
{
    var db = new DB();
    return View(db.GetContactByID(ContactID));
}

[HttpPost]
public ActionResult Edit(Contacts contact)
{
    var db = new DB();
    db.UpdateContact(contact);
    return RedirectToAction("ListContacts");
}
Following the same procedure that I followed for insert and update I am going to implement the delete functionality. The below code will be used to delete the contact details.
public bool DeleteContact(int ContactID)
 {
     try
     {
         using (SqlCeConnection con = new SqlCeConnection(ConStr))
         {
             con.Open();
             string sqlQuery = "DELETE FROM Contacts WHERE ContactID=@ContactID";
             con.Execute(sqlQuery, new { ContactID });
         }
         return true;
     }
     catch (Exception)
     {
         return false;
     }
 }
And for your ease, here are the 2 ActionResult methods.
public ActionResult Delete(int ContactID)
{
    var db = new DB();
    return View(db.GetContactByID(ContactID));
}

[HttpPost]
public ActionResult Delete(int ContactID, FormCollection frm)
{
    var db = new DB();
    bool IsDeleted = db.DeleteContact(ContactID);
    if (IsDeleted)
    {
        return RedirectToAction("ListContacts");
    }
    else
    {
        return View();
    }
}
This is it. A simple application where you can perform CRUD operations using SQL queries with micro-ORM Dapper.
Another reason for using a micro-ORM, Dapper in my case, but if you check the documentation you can see the table which clearly state the difference between the different ORMs.
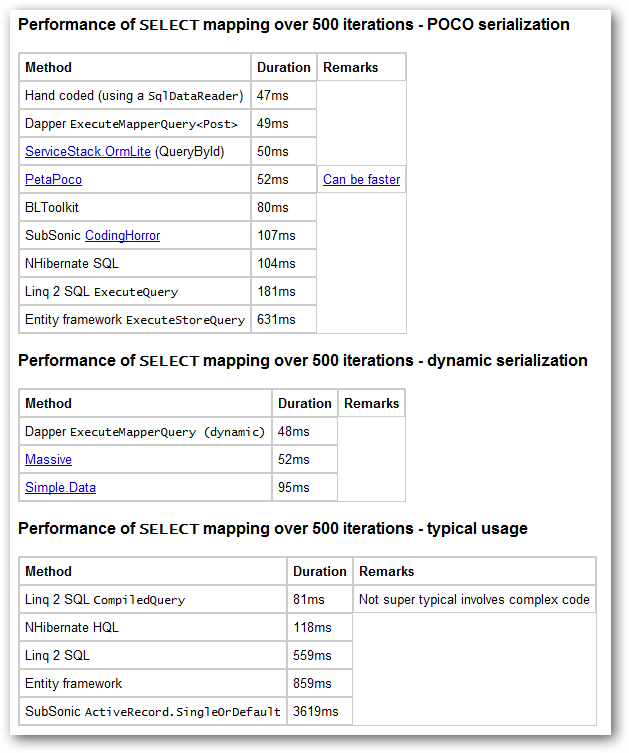
There are other ORMs that you can try like the Massive ORM and PetaPOCO.
I didn’t create the whole solution by myself. The initial idea is from the All-In-One Code Framework sample. I was just customizing my BlogEngine and for one of the module I thought it would be nice not to use paging and I should go for infinite scrolling stuff. This idea seems cool to me and without wasting any time I just do a quick web search and I came across a solution which is a part of a All-In-One Code Framework. This was not the complete solution I was looking for but I can re-use the jQuery part in the sample.
I just re-use the all jQuery script as it is without any major modification. The only change I made is the name of the web method in the url parameter of the Ajax method I have in page code behind and change the method name to InfiniteScroll:
function InfiniteScroll() {
$('#divPostsLoader').html(' ');
//send a query to server side to present new content
$.ajax({
type: "POST",
url: "Default.aspx/GetData",
data: "{}",
contentType: "application/json; charset=utf-8",
dataType: "json",
success: function (data) {
if (data != "") {
$('.divLoadData:last').after(data.d);
}
$('#divPostsLoader').empty();
}
})
};
I already have 2 divs in the page where the data is being loaded when the user scrolls down at the bottom of the page. This is the simplest Ajax call written in jQuery and I assume you are aware of the syntax and methods and require no explanation. What I require here is to call this function when the user scrolls at the bottom of the page. So how to know when the user scrolls and reach at the bottom of the page? Here is the method which fires the InfiniteScroll() function:
$(window).scroll(function () {
    if ($(window).scrollTop() == $(document).height() - $(window).height()) {
        InfiniteScroll();
    }
});
Make sure you put the scroll function inside the document.ready function. Now when the user scrolls at the bottom of the page then it will call the InfiniteScroll() function which in turn loads new data in the divLoadData div.
In the code-behind create a WebMethod function that returns a HTML string. For this example I am loading all my blog posts title, post date and slug from my blog engine database which is a SQL Server CE 4.0. Here is the method:
[WebMethod]
public static string GetData()
{
    RecordCount = RecordCount + 10;
    string Sql = "SELECT Title, DateCreated, Slug FROM be_Posts ORDER BY Title OFFSET " + FirstCount + " ROWS FETCH NEXT 10 ROWS ONLY";
    FirstCount = RecordCount;
    StringBuilder sb = new StringBuilder();
    dt = new DataTable();
    da = new SqlCeDataAdapter(Sql, con);
    con.Open();
    da.Fill(dt);

    DataView dv = dt.DefaultView;

    foreach (DataRowView row in dv)
    {
        sb.AppendFormat("<p>Post Title" + " <strong>" + row["Title"] + "</strong>");
        sb.AppendFormat("<p>Post Date" + " <strong>" + row["DateCreated"] + "</strong>");
        sb.AppendFormat("<p>Slug" + " <strong>" + row["Slug"] + "</strong>");
        sb.AppendFormat("<hr/>");
    }

    sb.AppendFormat("<divstyle='height:15px;'></div>");
    con.Close();
    return sb.ToString();
}
Infinite scrolling is nothing but is a sort of automatic paging. Every time a user scrolls down at the bottom of the page, the query gets fired and gets the new set of data. As I am using SQL CE 4.0 the paging query is different than that of the SQL Server 2008.
SELECT Title, DateCreated, Slug FROM be_Posts ORDER BY Title OFFSET 0 ROWS FETCH NEXT 10 ROWS ONLY
Change the OFFSET and FETCH NEXT to get the next result set.
SELECT Title, DateCreated, Slug FROM (
     SELECT
          ROW_NUMBER() OVER (ORDER BY title) AS row, Title, DateCreated, Slug
     FROM be_Posts
) AS a WHERE row BETWEEN 1 AND 10
I have changed the query in the above code to get me the set of next results every time a user scrolls at the bottom of the page. When the user scrolls down I increment the FirstCount with 10 which is a value of RecordCount variable. I have attached the complete solution so you can try. I don’t have the database included in the solution as it is my blog database. You have to create one to test it out.
Download: InfiniteScroll.zip (2.28 mb)

On 23rd April Microsoft announces the launch of official SkyDrive application for Windows on Windows 8 blog. This is one of the most awaited applications among the developers and users. All we wanted is a simple app through which we can manage our cloud storage with ease. Download the SkyDrive app here.
Here is what available now according to this blog post:
SkyDrive for the Windows desktop (preview available now). View and manage your personal SkyDrive directly from Windows Explorer on Windows 8, Windows 7, and Windows Vista with this new preview app available in 106 languages worldwide.
Fetching files through SkyDrive.com. Easily access, browse, and stream files from a remote PC running the preview app to just about anywhere by simply fetching them via SkyDrive.com.
SkyDrive storage updates. A new, more flexible approach to personal cloud storage that allows power users to get additional paid storage as their needs grow.
SkyDrive for other devices. We’ve updated the SkyDrive apps on Windows Phone and iOS devices, bringing better management features and sharing options to those devices. We’re also releasing a new preview client for Mac OS X Lion, letting you manage your SkyDrive right from the Finder.
After downloading the application run the setup. This will install the app.
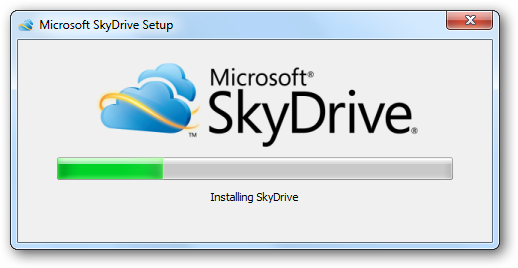
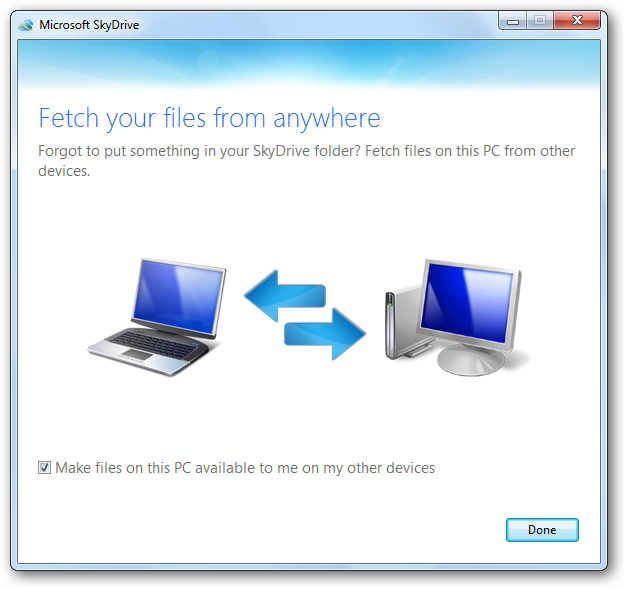
The installation will also let you sync the folders between your PC and other devices like WP7, Android and iPhone. You can un-check the option at this moment but if you wish to enable file sharing among devices then you can set this from SkyDrive app settings option later on.
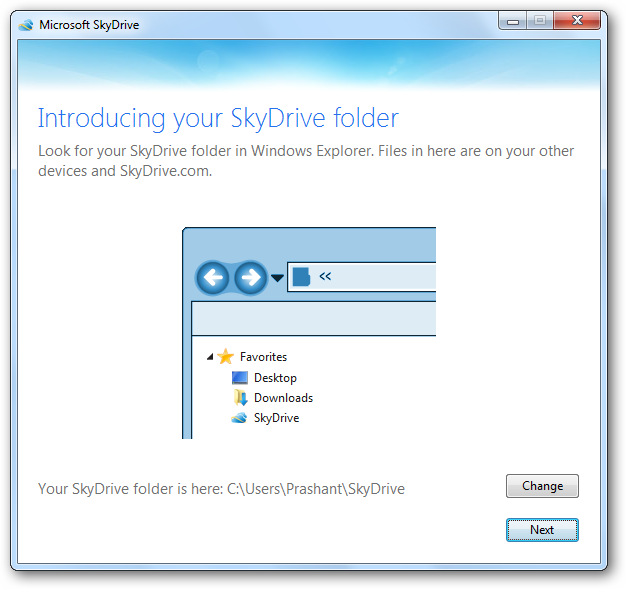
Once the installation is complete you can then set the folder SkyDrive path:
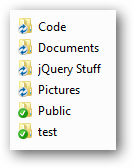
After the folder has been set up the SkyDrive app will started in the background. The SkyDrive app will then download the files from the SkyDrive inside the SkyDrive folder set up while installing the app. Check out the below screenshot, as the SkyDrive is sitting in the task bar and syncing the files on the other hand. The folders which are synced are marked with tick icon and the folders which are still in sync process is having the sync icon. If you have worked with LiveMesh then you must be aware of the sync icon.
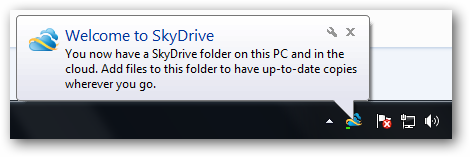
I am quite familiar with the application even before it’s launch. I have use LiveSync app so this app seems pretty similar to me. To add a new file just copy and paste or drag & drop the file in the local SkyDrive folder. The file or folder will then get synced to SkyDrive which can be accessed from anywhere around the planet. If you want to un-install the app then make sure that you un-link the SkyDrive folder before you do that (I don’t know why someone will remove the app!!) To un-link the local folder right-click the settings icon and click Unlink SkyDrive button to unlink the folder.
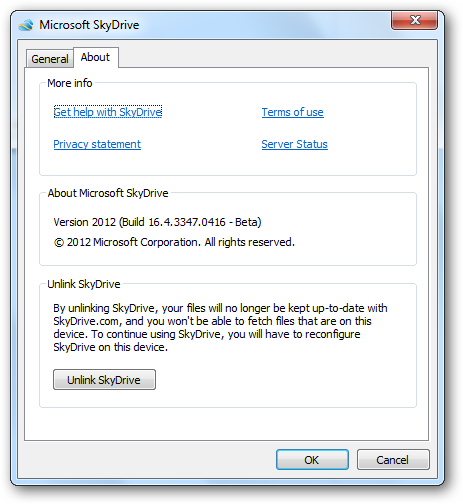
In the end the most awaited SkyDrive app is out and is going to be a big hit soon. If you have some suggestions for the SkyDrive app or want to report back a bug or you have some suggestions or want some new features then please do so. Let’s make this app a hit.
IMPORTANT: If you are not the current user of SkyDrive then be advised that for the new users the storage capacity available will be 7GB and not 25GB which is offered to old account holders. So make it quick to get the 25GB storage capacity before it gets too late.
We have been programming a lot so we need some time to refresh our minds and get ourselves in a state where our mind processors can start working again more beautifully. When I am pushing myself hard I play 3 games that is on my favorite list. Though I do have many games but these are the 3 games that I play.
The legendry dot-eating games Pac-Man. I first played this game on 8-bit Atari console and I remember I used to bet with my firends. We played Pac-Man on a single maze, we don’t have many options, but here we have lots and lots of mazes to choose from. The statistics is a section.
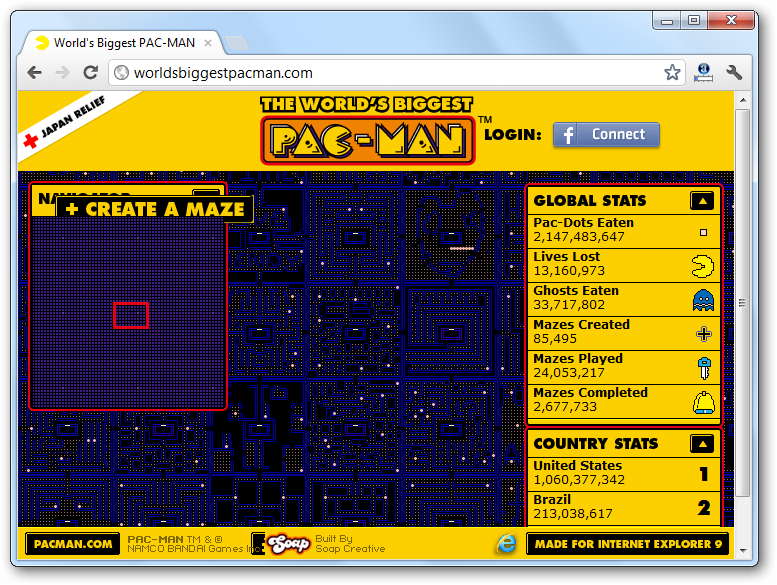
One of the most playable and most addicted games at the moment available on the web. Amazing stages and awesome game play. I have spent numerous amount of effort and time on this game. I have played the offline version of this game, if you don’t want to install then play it right here.

This game is more or like Angry Birds. Why? If you have played Angry Birds then you must have noticed that in Angry Birds it is not just about hitting the pillars. It’s about how you kill the pigs by consuming fewer birds. Cut The Rope is the game initially written in Objective-C and later written in JavaScript by the awesome developers at Zepto Labs. I love playing this game as it allows you think before you make the move.
