
© 2026 Pashant Khandelwal

© 2026 Pashant Khandelwal
My Netduino card arrived this Sunday but I was not able to play with my new development board due to some serious “crap work” I was doing. Today I was able to run a small piece of code which blinks the user LED on the Netduino board. The code is simple enough and just like “hello world” example like we have for all other programming languages.
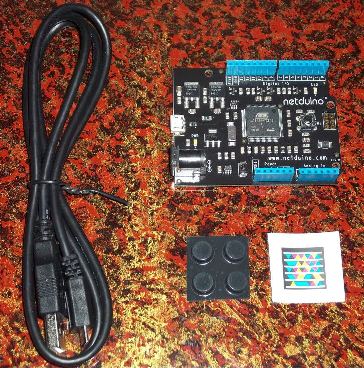
Here is my Netduino kit:
The best part of this development board is that it is the advanced version of the very famous Ardunio boards. Below is the detailed comparison of the three boards.
| Netduino | Arduino Uno | Arduino Mega 2560 | |
|---|---|---|---|
| CPU | Atmel ATSAM7X | Atmel ATmega328 | Atmel ATmega2560 |
| Architecture | 32-bit ARM7 | 8-bit AVR | 8-bit AVR |
| Clock | 48 Mhz | 16 Mhz | 16 Mhz |
| MIPS / Mhz | 0.9 | 1 | 1 |
| MIPS | 43.2 | 16 | 16 |
| Code | 128 KB | 32 KB | 256 KB |
| RAM | 60KB | 2 KB | 8 KB |
| Flash | 512 KB | 32 KB | 256 KB |
| SRAM | 128 KB | 2 KB | 8 KB |
| EEPROM | – | 1 KB | 4 KB |
| Pins | 14 Dig. I/O (4 PWM) | 14 Dig. I/O (6 PWM) | 54 Dig. I/O (14 PWM) |
| 6 analog-in or digital I/O | 6 analog-in | 16 analog-in | |
| UARTs | 2 | 1 | 4 |
| output limits | 8 mA / pin & 16 mA / PWM | 40 mA per Pin | 40 mA per Pin |
As you can see from the above comparison, the Netduino board is 3x faster than the Arduino and on the top it has 30x the RAM and check the processor 32-bit ARM7 awesome!!
Getting Started
To get started, you first need to set up your machine with some SDKs from Microsoft and Netduino. Below is the list of the SDKs you need to install on your development machine:
This is it and you are good to go with your first Netduino application. Fire Visual Studio and create new project under Micro Framework and select Netduino Application.
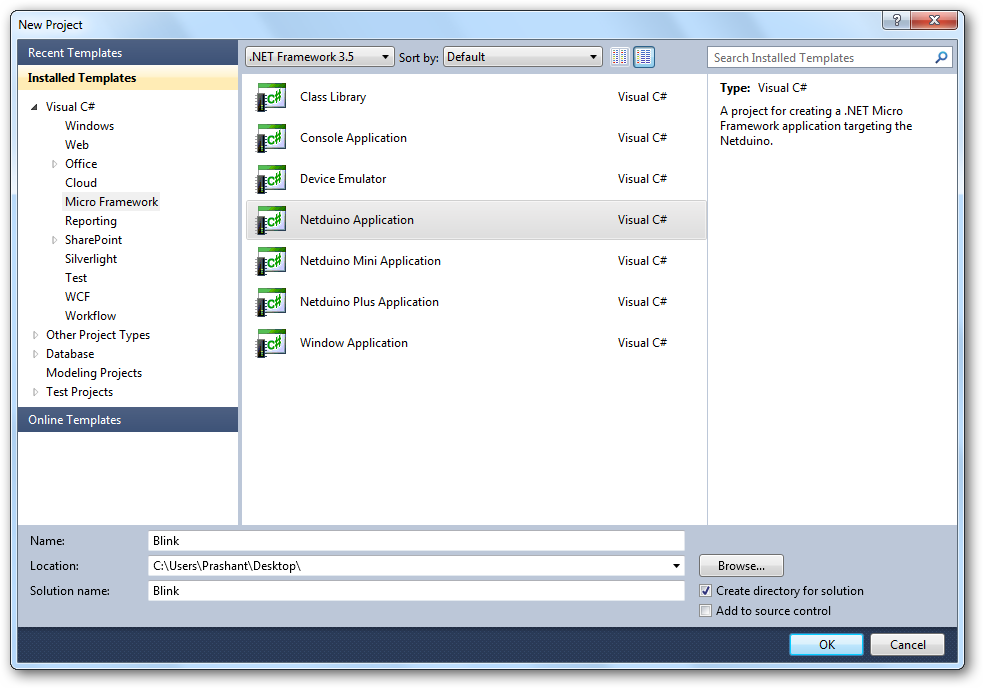
I have named the project Blink because we are going to blink the LED on board. As you can see there are two LEDs on the board. The one near the micro-USB indicates power (white) and the one near the onboard button is user LED (blue).
We are going to blink the user LED and for this I am going to use the code from the getting started guide form Netduino (nothing fancy here from my side) I am just re-using the code. below is the code you have to put inside you main method:
OutputPort led = new OutputPort(Pins.ONBOARD_LED, false);
while (true)
{
        led.Write(true); // turn on the LED
        Thread.Sleep(250); // sleep for 250ms
        led.Write(false); // turn off the LED
        Thread.Sleep(250); // sleep for 250ms
}
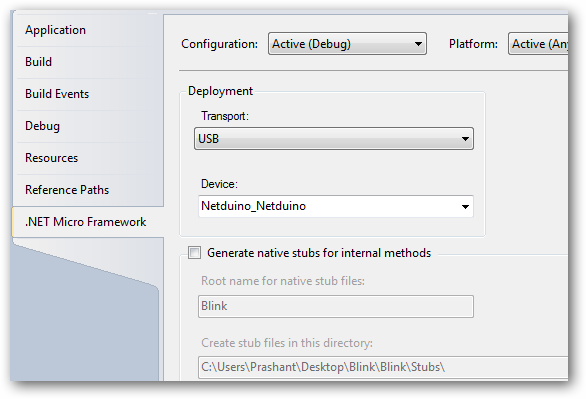
Now before you hit F5 go to project properties and under .NET Micro Framework change the Transport mode from Emulator to USB. As soon as you change the Transport mode you will notice the Device has been changed from Microsoft Emulator to Netduino_Netduino. Now press F5 and the application will get deployed to your Netduino board.
This is just a simple thing to do with a small but powerful development board. There are people around the globe building some amazing things with Netdunio and Arduino shields. In my next post I will show you how to erase Netduino memory for other application to deploy.
Below are some of the resources that I think you may find useful:
A friend of mine who is a freelancer purchased the PDF version of this book and sends over me a copy to read today. If you are a freelancer or working from home then this is the book you should read and follow. I am bit lazy in reading non-tech related books or articles but this book is worth reading as compared to some other tech books. I am reading this book at the moment and I must said that this is the best book available for freelancers and for the people who are working from home.
I always wanted to be a freelancer but somehow I got into the job thing. Maybe not today but in the near future I will start freelancing but part-time. It’s the right time for me to start following to the guidelines in this book so when I start I will have a complete picture in my head about my work and time.
Here is the quote from the publisher’s (Rockable Press) site:
Covering everything from getting started to expanding your business, How to Be a Rockstar Freelancer is the official FreelanceSwitch book. Written by Collis & Cyan Ta’eed – the founders of the site – it’s packed with new information, advice and insights not covered on the blog.
If you want to start your freelance career the right way, then How to Be a Rockstar Freelancer will give you everything you need to become the best freelancer in town!
You can purchase this book online from the Rockable Press website. There are two versions of this book available one is in PDF and a paperback copy. And don’t forgot to check other stuff on their website, they also have some other Rocking books.
![]()
This is great stuff. If you own a website or a blog you should use this excellent feature of pinning fav links of your site on user’s Windows 7 taskbar. Though this feature of IE9 was on hype since it’s beta realease. Now it’s time to use this feature for my blog. But before you start grab the latest stable version of the Pinify (formerly know as IE9ify) from Codeplex.
About Pinify
This plugin is written in jQuery and is hosted on Codeplex. I highly recommend you to follow this project on Codeplex. This plugin is not just about pinning, but also allows the user to customize the skin of the browser, adds a jumplist of your favourite links to the taskbar, overlay icons, tasks and thumbbar buttons. This is a total different user experience for the users /readers of your blog or site.
Preparing your site for the new experience
By now you have downloaded the latest release of the pinify from Codeplex. Open your site in Visual Studio and get to the head section. Fire the below NuGet command to install the Pinify plugin.

For the simplest implementation of this plugin, use the below script in the head section of your page.
<script src="Scripts/jquery-1.5.2.js" type="text/javascript"></script>
<script src="Scripts/jquery.pinify.js" type="text/javascript"></script>

<script type="text/javascript">
$().ready(function () {
     $('head').pinify();
});
</script>
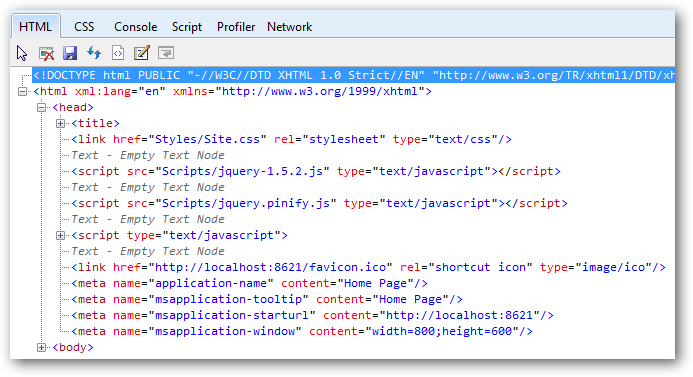
Hit F5 and make sure you have selected IE9 as your default browser. After you see your site home page in the browser hit F12 to get the IE9 developer window. Under HTML tab expand the Head tree and you will come to see few meta tags.
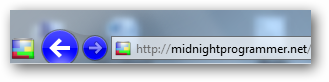
Drag and drop the tab to your task bar. This time a new IE window will open but with a difference. Check out below, the navigation buttons has a different color, the site has an icon also.

In the above screenshot you can see the default IE icon because I have not set the favicon for my site. Once I set the fav icon in the head section of my page, I will then have a new favicon to show off. Same is with the navigation buttons, here what you are seeing is the default color, you can set your own like yellow or red or some other different color which matches the theme of your site.
Let’s take a bit more complicate example. Now I want to do the same for my blog. For the moment I will have the following in the jumplist.
The icon will be the same as my current favicon. To implement pinify for my blog I do all the work in master page which is site.master in my case. Copy and paste the below script in the head section of your page. Change the text and links accordingly.
<script src="Scripts/jquery-1.5.2.js" type="text/javascript"></script>
<script src="Scripts/jquery.pinify.js" type="text/javascript"></script>
<script type="text/javascript">
        $().ready(function () {
            $('head').pinify({
                applicationName: 'Midnight Programmer',
                tooltip: 'Programming For Fun',
                tasks: [{
                    'name': 'Archive',
                    'action': 'http://midnightprogrammer.net/archive.aspx',
                    'icon': 'favicon.ico'
                },
                {
                    'name': 'Twitter',
                    'action': 'http://twitter.com/prashantmx',
                    'icon': 'twitter.ico'
                },
                {
                    'name': 'Facebook',
                    'action': 'http://facebook.com/khandelwal.p',
                    'icon': 'facebook.ico'
                },
                {
                    'name': 'Contact Me',
                    'action': 'http://www.midnightprogrammer.net/contact.aspx',
                    'icon': 'favicon.ico'
                }]
            });
        });
</script>
After adding the script drag the tab to the taskbar and right-click it to view the task list.
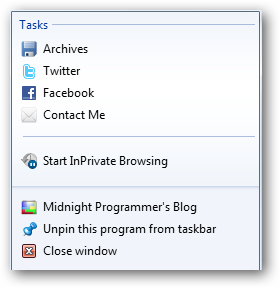
There are many other things which you can do with this plugin. I have just showed a simplest way to get you jump started with pinify. As you are reading this post try dragging the tab on your windows taskbar and right-click to see the task list as shown above.
There are many things which can be done with pinify. To know more read the below links.
If you are writing code for a while now then by now you must have a lot of code snippets which you will be using in your application development, and you use them because they save a lot of development time. At this moment I have now a huge collection of code snippets which includes functions, classes, extension methods and functions that I have extracted from different open source applications.
As I was progressing towards building an application in WPF which helps me managing all my code, a thought ran into my mind that it would be good if I could use syntax highlighting in the code. As usual I began my search to find a control in WPF which supports syntax highlighting and what I found, I was and I am at present satisfied. The control called AvalonEdit is a part of the free IDE called SharpDevelop for C# and VB.NET and Boo projects.
Languages support by the control:
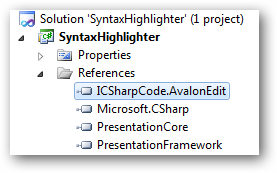
I am a .NET guy so I will be using it for highlighting C# code. Fire Visual Studio and create a new WPF project. Add ICSharpCode.AvalonEdit.dll in the reference of your project.
After adding the reference in your project, add below XAML code on the window where you have your code window.
<Window x:Class="SyntaxHighlighter.MainWindow"
        xmlns="http://schemas.microsoft.com/winfx/2006/xaml/presentation"
        xmlns:x="http://schemas.microsoft.com/winfx/2006/xaml"
        xmlns:avalonEdit="http://icsharpcode.net/sharpdevelop/avalonedit"
        Title="MainWindow" Height="401" Width="617" Loaded="Window_Loaded">
    <Grid>
<avalonEdit:TextEditor  Name="txtCode"
    FontFamily="Consolas"
    FontSize="10pt"/>
    </Grid>
</Window>
At line 4, we will use custom mapping (because it is a third-party control) so we can use the control in our project. At line 7, I have used TextEditor class of the AvalonEdit namespace. The font name and size is the same as of the source code text editor in Visual Studio 2010.
To get the control working with least configuration set some namespaces on the top, and two lines of code on window load for syntax highlighting and to show line numbers respectively.
Namespaces:
using ICSharpCode.AvalonEdit.CodeCompletion;
using ICSharpCode.AvalonEdit.Folding;
using ICSharpCode.AvalonEdit.Highlighting;
Window_Loaded:
txtCode.SyntaxHighlighting = HighlightingManager.Instance.GetDefinition("C#");
txtCode.ShowLineNumbers = true;
If you wish to change the language, then just change the name of the language which is passed as a parameter in the GetDefinition method. The code in the Window_Loaded method will allow you to set syntax highlighting specifically for C#, pretty simple but not very useful. Check out the other way where the text editor will load the file and by reading the file extension, it will set the syntax highlighting. Above method will be useful if the user wants to set syntax highlighting of his choice. But if you want to detect the language and get the syntax highlighting automatically, then use the below code.
txtCode.Load("d:\\Data.cs");
txtCode.SyntaxHighlighting = HighlightingManager.Instance.GetDefinitionByExtension(System.IO.Path.GetExtension("D:\\Data.cs"));
txtCode.ShowLineNumbers = true;
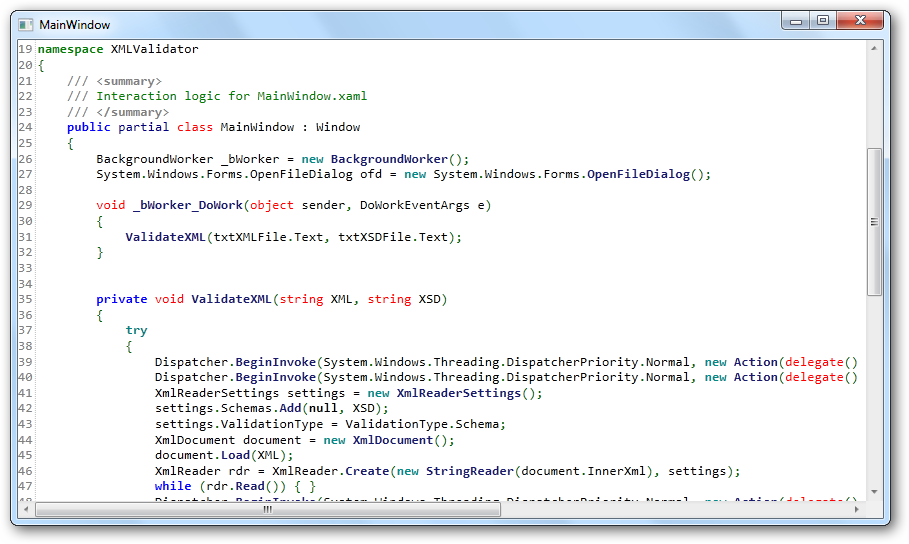
The first line of code will Load the file and the second file will first get the extension of the file loaded, set the instance of the HighlightingManager class and in the end set the syntax highlighting. This is what I got in the end (I am using the second way to load the file).
Note: To make sure that the second method work, you need to make sure that the file should have a language extension like .cs for C#, cpp for C++, xml for XML files etc. AvalonEdit is an open source code, so you can play around with it and can have your own customizations. There are lots of in-built configurations that you can do to set up your syntax highlighting control. I strongly recommend you to download the below files and take a look at the sample application.
Download: AvalonEdit_Source.zip (861.02 kb)
Related Links:
Two methods to remove Duplicates from ArrayList.
Method 1:
private static ArrayList RemoveDuplicates(ArrayList arrList)
{
        ArrayList list = new ArrayList();
        foreach (string item in arrList)
        {
             if (!list.Contains(item))
            {
                list.Add(item);
            }
        }
        return list;
}
Method 2:
private static string[] RemoveDuplicates(ArrayList arrList)
{
        HashSet<string> Hset = new HashSet<string>((string[])arrList.ToArray(typeof(string)));
        string[] Result = new string[Hset.Count];
        Hset.CopyTo(Result);
        return Result;
}
Note: I found this method on the net and therefore I am sharing it as it is. Use any of the above which suites your requirement.