© 2026 Pashant Khandelwal

© 2026 Pashant Khandelwal
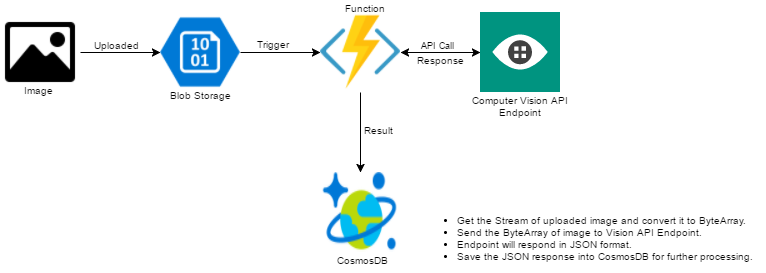
I started to work on a project which is a combination of lot of intelligent APIs and Machine Learning stuff. One of the things I have to accomplish is to extract the text from the images that are being uploaded to the storage. To accomplish this part of the project I planned to use Microsoft Cognitive Service Computer Vision API. Here is the extract of it from my architecture diagram.
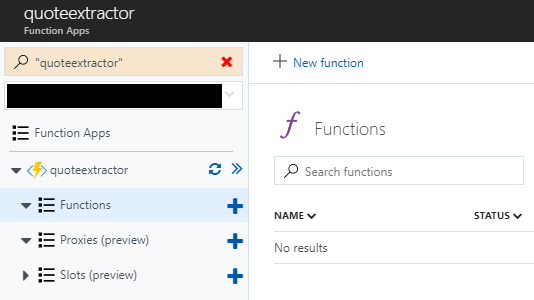
Let’s get started by provisioning a new Azure Function.
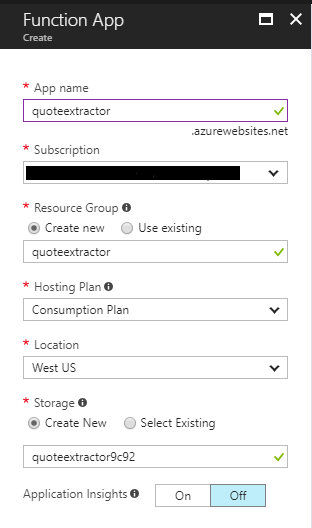
I named my Function App as quoteextractor and selected the Hosting Plan as Consumption Plan instead of App Service Plan. If you choose Consumption Plan you will be billed only what you use or whenever your function executes. On the other hand, if you choose App Service Plan you will be billed monthly based on the Service Plan you choose even if your function executes only few times a month or not even executed at all. I have selected the Location as West US because the Cognitive Service subscription I have has the endpoint for the API from West US. I then also created a new Storage Account. Click on Create button to create the Function App.
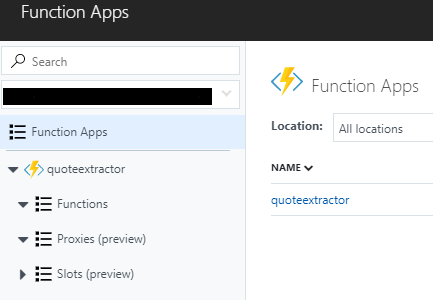
After the Function App is created successfully, create a new function in the Function App quoteextractor. Click on the Functions on the left hand side and then click New Function on the right side window to create a new function as shown in the below screenshot.
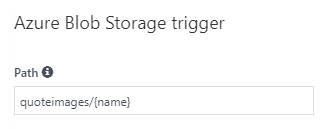
The idea is to trigger the function whenever a new image is added/uploaded to the blob storage. To filter down the list of templates, select C# as the Language and then select BlobTrigger - C# from the template list. I have also change the name of the function to QuoteExtractor. I have also changed the Path parameter of Azure Blob Storage trigger to have quoteimages. The quoteimages is the name of the container where the function will bind itself and whenever a new image or item is added to the storage it will get triggered.
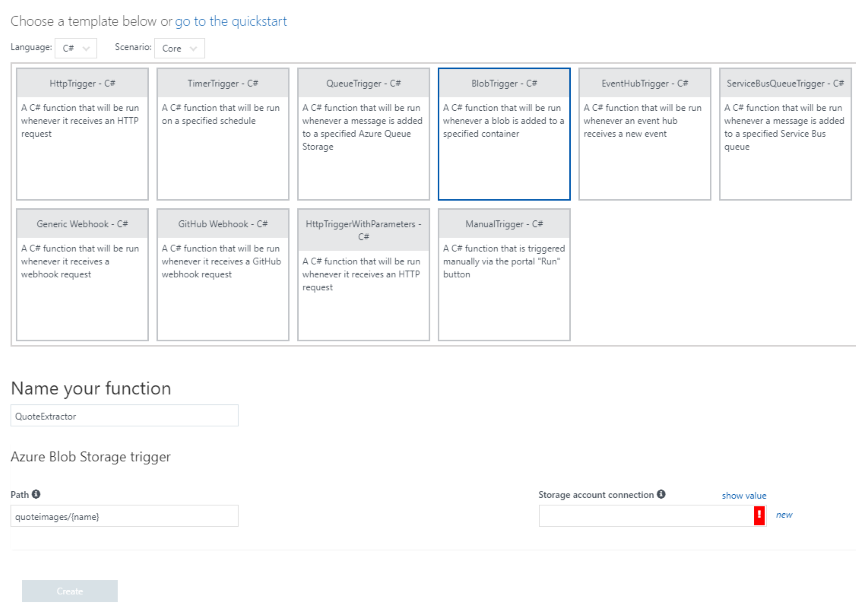

Now change the Storage account connection which is basically a connection string for your storage account. To create a new connection click on the new link and select the storage account you want your function to get associated with. The storage account I am selecting is the same one which got crated at the time of creating the Function App.

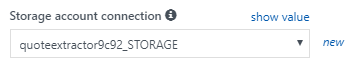
Once you select the storage account, you will be able to see the connection key in the Storage account connection dropdown. If you want to view the full connection string then click the show value link.
Click the Create button to create the function. You will now be able to see your function name under the Functions section. Expand your function and you will see three other segments named Integrate, Manage and Monitor.
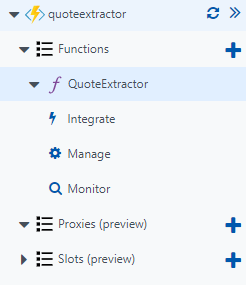
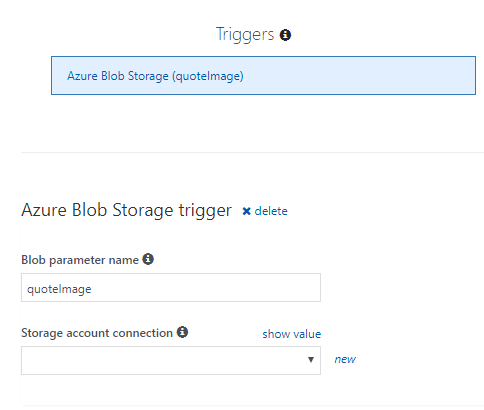
Click on Integrate and under Triggers update the Blob parameter name from myBlob to quoteImage or whatever the name you feel like having. This name is important as this is the same parameter I will be using in my function. Click Save to save the settings.
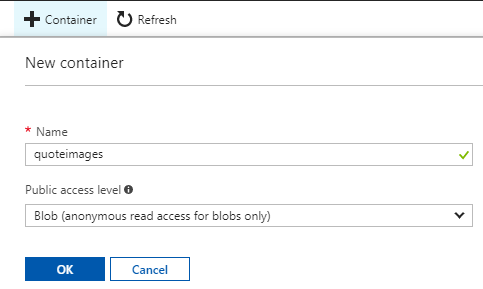
The storage account which is created at the time of creating the Function App, still does not have a container. Add a container with the name which is used in the path of the Azure Blob Storage trigger which is quotesimages.
Make sure you select the Public access level to Blob. Click OK to create a container in your storage account.
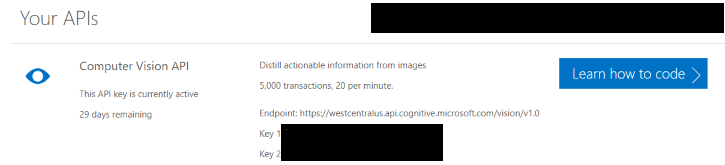
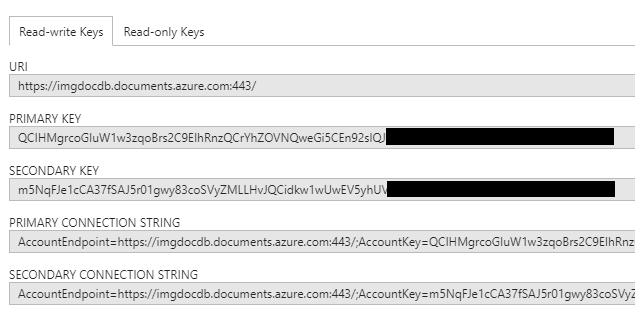
With this step, you should be done with all the configuration which are required for Azure Function to work properly. Now let’s get the Computer Vision API subscription. Go to https://azure.microsoft.com/en-in/try/cognitive-services/ and under Vision section click Get API Key which is next to Computer Vision API. Agree with all the terms and conditions and continue. Login with any of the preferred account to get the subscription ready. Once everything went well, you will see your subscription key and endpoint details.
The result which I am going to get as a response from the API is in JSON format. Either I can parse the JSON request in the function itself or I can save it directly in the CosmosDB or any other persistent storage. I am going to put all the response in CosmosDB in raw format. This is an optional step for you as the idea is to see how easy it is to use Cognitive Services Computer Vision API with Azure Functions. If you are skipping this step, the you have to tweak the code a bit so that you can see the response in the log window of your function.
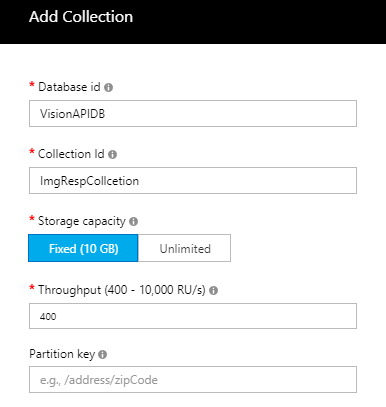
Provision a new CosmosDB and add a collection to it. By default there is a database named ToDoList and with a collection called Items that you can create soon after provisioning of the CosmosDB from the getting started page. If you want you can also create a new database and add a new collection which make more sense.
To create a new database and collection go to Data Explorer and click on New Collection. Enter the details and click OK to create a database and a collection.
Now we have everything ready. let’s get started with the CODE!!.
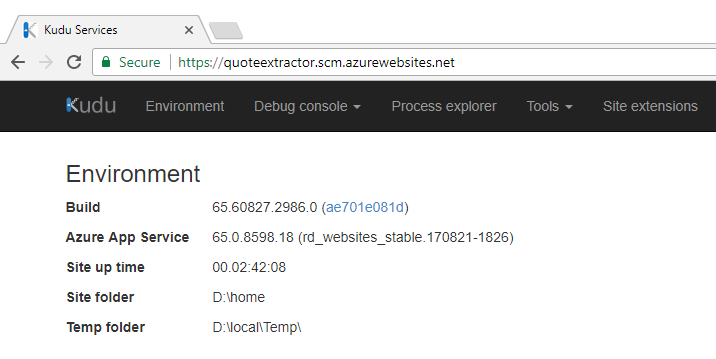
Let’s start by creating a new function called SaveResponse which takes the API response as one of the parameters and is of type string. In this method I am going to use the Azure DocumentDB library to communicate with CosmosDB. This means I have to add this library as a reference to my function. To add this library as a reference, navigate to the KUDU portal by adding scm in the URL of your function app like so: https://quoteextractor.scm.azurewebsites.net/. This will open up the KUDU portal.
Go to Debug console and click CMD. Navigate to site/wwwroot/<Function Name>. In the command window use the command mkdir to create a folder name bin.
mkdir bin
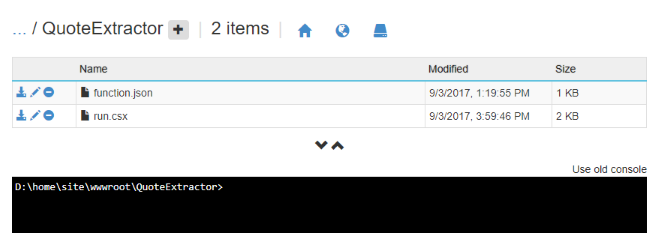
You can now see the bin folder in the function app directory. Click the bin folder and upload the lib(s).
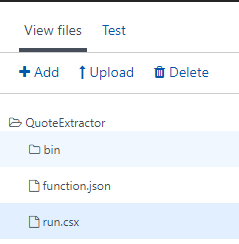
In the very first line of the function use #r directive to add the reference of external libraries or assemblies. Now you can use this library in the function with the help of using directive.
#r "D:\home\site\wwwroot\QuoteExtractor\bin\Microsoft.Azure.Documents.Client.dll"
Right after adding the reference of the DocumentDB assembly, add namespaces with the help of using directive. In the later stage of the function, you will also need to make HTTP POST calls to the API endpoint and therefore make use of the System.Net.Http namespace as well.
using Microsoft.Azure.Documents;
using Microsoft.Azure.Documents.Client;
using System.Net.Http;
using System.Net.Http.Headers;
The code for the SaveResponse function is very simple and just make use of the DocumentClient class to create a new document for the response we receive from the Vision API. Here is the complete code.
private static async Task<bool> SaveResponse(string APIResponse)
{
bool isSaved = false;
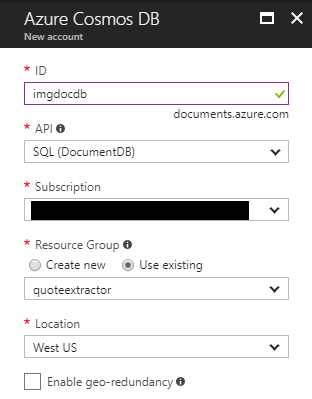
const string EndpointUrl = "https://imgdocdb.documents.azure.com:443/";
const string PrimaryKey = "QCIHMgrcoGIuW1w3zqoBrs2C9EIhRnxQCrYhZOVNQweGi5CEn94sIQJOHK3NleFYDoFclB7DwhYATRJwEiUPag==";
try
{
DocumentClient client = new DocumentClient(new Uri(EndpointUrl), PrimaryKey);
await client.CreateDocumentAsync(UriFactory.CreateDocumentCollectionUri("VisionAPIDB", "ImgRespCollcetion"), new {APIResponse});
isSaved = true;
}
catch(Exception)
{
//Do something useful here.
}
return isSaved;
}
Notice the database and collection name in the function CreateDocumentAsync where the CreateDocumentCollectionUri will return the endpoint uri based of the database and collection name. The last parameter new {ApiResponse} is the response that is received from the Vision API.
Create a new function and call it ExtractText. This function will take Stream object of the image that we can easily get from the Run function. This method is responsible to get the stream object and convert it into byte array with the help of another method ConvertStreamToByteArray and then send the byte array to Vision API endpoint to get the response. Once the response is successful from the API, I will save the response in CosmosDB. Here is the complete code for the function ExtractText.
private static async Task<string> ExtractText(Stream quoteImage, TraceWriter log)
{
    string APIResponse = string.Empty;
    string APIKEY = "b33f562505bd7cc4b37b5e44cb2d2a2b";
    string Endpoint = "https://westcentralus.api.cognitive.microsoft.com/vision/v1.0/ocr";

    HttpClient client = new HttpClient();

    client.DefaultRequestHeaders.Add("Ocp-Apim-Subscription-Key", APIKEY);

    Endpoint = Endpoint + "?language=unk&detectOrientation=true";

    byte[] imgArray = ConvertStreamToByteArray(quoteImage);

    HttpResponseMessage response;

    try
    {
        using(ByteArrayContent content = new ByteArrayContent(imgArray))
        {
            content.Headers.ContentType = new MediaTypeHeaderValue("application/octet-stream");

            response = await client.PostAsync(Endpoint, content);

            APIResponse = await response.Content.ReadAsStringAsync();
            log.Info(APIResponse);
            //TODO: Perform check on the response and act accordingly.
        }
    }
    catch(Exception)
    {
        log.Error("Error occured");
    }

    return APIResponse;
}
There are few things in the above function which need out attention. You will get the subscription key and the endpoint when you register for the the Cognitive Services Computer Vision API. Notice the endpoint I am using also had ocr in the end which is important as I want to read the text from the images I am uploading to the storage. The other parameters I am passing is the language and detectOrientation. Language has the value as unk which stands for unknown which in turn tells the API to auto-detect the language and detectOrientation checks text orientation in the image. The API respond in JSON format which this method returns back in the Run function and this output becomes the input for SaveResponse method. Here is the code for ConvertStreamtoByteArray metod.
private static byte[] ConvertStreamToByteArray(Stream input)
{
    byte[] buffer = new byte[16*1024];
    using (MemoryStream ms = new MemoryStream())
    {
        int read;
        while ((read = input.Read(buffer, 0, buffer.Length)) > 0)
        {
            ms.Write(buffer, 0, read);
        }
        return ms.ToArray();
    }
}
Now comes the method where all the things will go into, the Run method. Here is how the `Run` method looks like.
public static async Task<bool> Run(Stream quoteImage, string name, TraceWriter log)
{
    string response = await ExtractText(quoteImage, log);
    bool isSaved = await SaveResponse(response);
    return isSaved;
}
I don’t think this method needs any kind of explanation. Let’s execute the function by adding a new image to the storage and see if we are able to see the log in the Logs window and a new document in the CosmosDB. Here is the screenshot of the Logs window after the function gets triggered when I uploaded a new image to the storage.

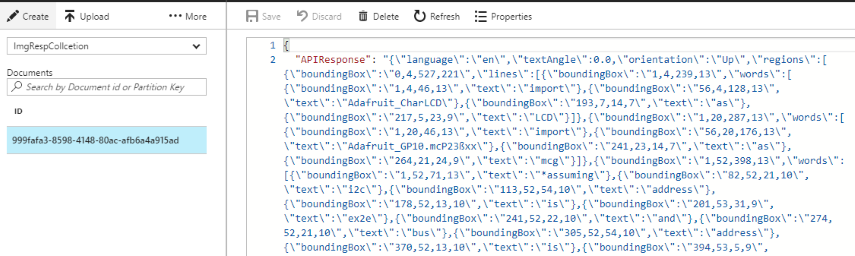
In CosmosDB, I can see a new document added to the collection. To view the complete document navigate to Document Explorer and check the results. This is how my view looks like:
To save you all a little time, here is the complete code.
#r "D:\home\site\wwwroot\QuoteExtractor\bin\Microsoft.Azure.Documents.Client.dll"

using System.Net.Http.Headers;
using System.Net.Http;
using Microsoft.Azure.Documents;
using Microsoft.Azure.Documents.Client;


public static async Task<bool> Run(Stream quoteImage, string name, TraceWriter log)
{
    string response = await ExtractText(quoteImage, log);
    bool isSaved = await SaveResponse(response);
    return isSaved;
}

private static async Task<string> ExtractText(Stream quoteImage, TraceWriter log)
{
    string APIResponse = string.Empty;
    string APIKEY = "b33f562505bd7cc4b37b5e44cb2d2a2b";
    string Endpoint = "https://westcentralus.api.cognitive.microsoft.com/vision/v1.0/ocr";

    HttpClient client = new HttpClient();

    client.DefaultRequestHeaders.Add("Ocp-Apim-Subscription-Key", APIKEY);

    Endpoint = Endpoint + "?language=unk&detectOrientation=true";

    byte[] imgArray = ConvertStreamToByteArray(quoteImage);

    HttpResponseMessage response;

    try
    {
        using(ByteArrayContent content = new ByteArrayContent(imgArray))
        {
            content.Headers.ContentType = new MediaTypeHeaderValue("application/octet-stream");

            response = await client.PostAsync(Endpoint, content);

            APIResponse = await response.Content.ReadAsStringAsync();
            //TODO: Perform check on the response and act accordingly.
        }
    }
    catch(Exception)
    {
        log.Error("Error occured");
    }

    return APIResponse;
}

private static async Task<bool> SaveResponse(string APIResponse)
{
    bool isSaved = false;
    const string EndpointUrl = "https://imgdocdb.documents.azure.com:443/";
    const string PrimaryKey = "QCIHMgrcoGIuW1w3zqoBrs2C9EIhRnzZCrYhZOVNQweIi5CEn94sIQJOHK2NkeFYDoFcpB7DwhYATRJwEiUPbg==";

    try
    {
        DocumentClient client = new DocumentClient(new Uri(EndpointUrl), PrimaryKey);
        await client.CreateDocumentAsync(UriFactory.CreateDocumentCollectionUri("VisionAPIDB", "ImgRespCollcetion"), new {APIResponse});
        isSaved = true;
    }
    catch(Exception)
    {
        //Do something useful here.
    }
    return isSaved;
}

private static byte[] ConvertStreamToByteArray(Stream input)
{
    byte[] buffer = new byte[16*1024];
    using (MemoryStream ms = new MemoryStream())
    {
        int read;
        while ((read = input.Read(buffer, 0, buffer.Length)) > 0)
        {
            ms.Write(buffer, 0, read);
        }
        return ms.ToArray();
    }
}
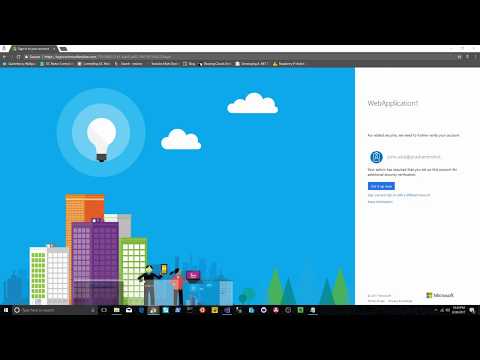
A video tutorial on how you can enable Multi Factor Authentication or MFA as it is called, for the users in the Azure Active Directory.
I run this blog on Azure as a Web App. I was planning to host it using a VM just for fun but I dropped the idea and choose Web Apps for my blog as a simple medium with less deployment effort and no server management at all. This blog post is mostly me documenting the steps to deploy or host the application on an Azure Linux Virtual Machine.
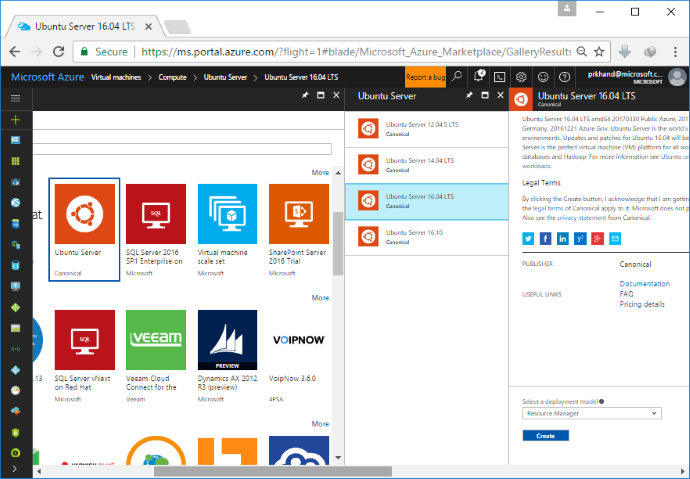
As this is just a demo, I will provisioned a small VM. You can use Azure-CLI to do that or you can just do it from the Azure Portal. I am using Azure Portal to do that. My choice of selection is an Ubuntu 16.04 LTS machine where LTS stands for Long Term Support which means that I am going to get the support for this version for a long time. To Create a new VM in Azure, click the Virtual Machines icon on the left hand side navigation pane and then click Create Virtual machines link in the center of the page. It will open up another pane where you can select the type of OS or type of select a VM from predefined VM templates. In my case I am selecting Ubuntu Server and then the version as 16.04 LTS. To create a VM click Create button as shown in the screen shot below.
In the next pane, provide some basic details to create a VM. You can choose whatever you want as per your business needs. This is what my basic details looks like.
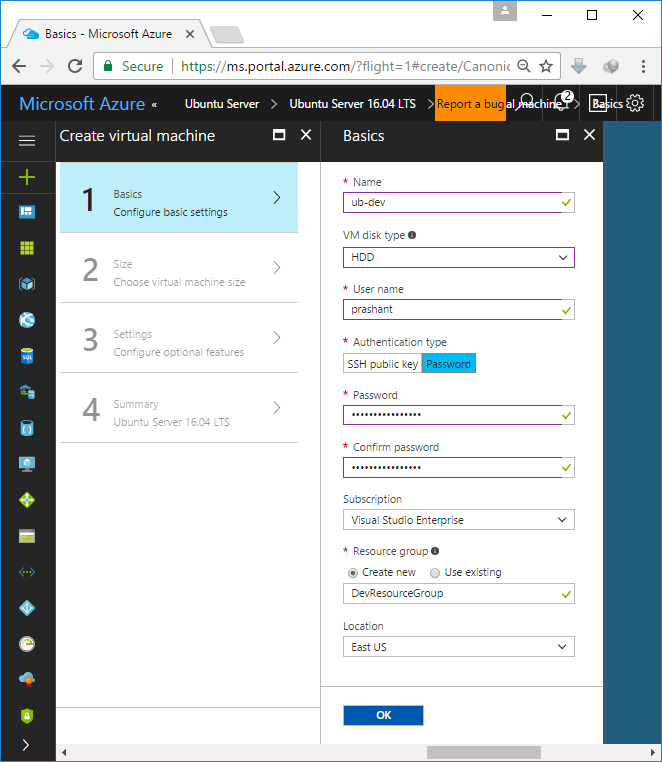
Please note that by default Super User or SU is disabled in Azure linux VM. If I want to execute any command as a root, all I have to do is to add
sudoand use the same password for my user name on that VM.
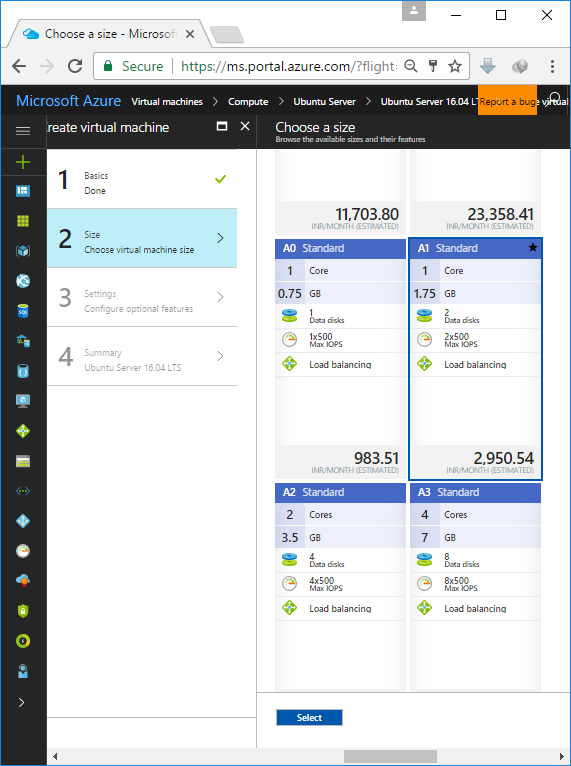
Click OK and proceed to select the VM size. By default, it will present you with some recommendations from the Azure itself. Click on View All to view all VM size offerings available. I am selecting A1 for this example. When in production, you should choose very wisely based on your requirements.
I will leave the Settings as it is.

Hit OK to run the final validation. In the final pane, click OK again to submit the deployment request to Azure to provision a new VM. It will take a while to create a VM and once it is done it will open up a VM home page where you can see the stats for the VM and do other administrative tasks on your newly created VM. It is a server distribution of Ubuntu and hence there will be no GUI for us to work with. SSH will be our only way in to the VM here. In the VM home page click the Connect button and it will prompt you with the SSH command which you will be using to connect to this VM. Here is what I get after executing the VM command for the first time.
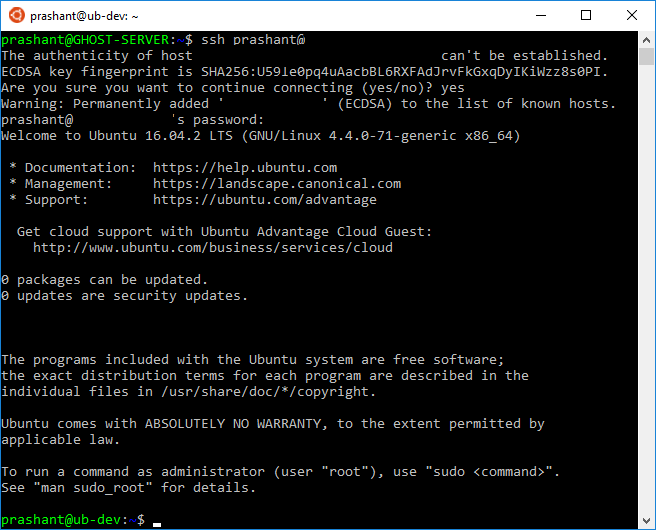
And this is it, we have an Ubuntu Server 16.04 LTS running the cloud. The next step is to install .NET Core on this VM.
Install .NET Core on Ubuntu or on any other Linux distribution is dead easy. The documentation itself is enough to get you started. Head over to this link where you can find the latest release of .NET Core for all Linux distributions. Select the right version of Ubuntu from the documentation before running the command. i have installed Ubuntu Server 16.04 and so the commands I will be executing are:
$ sudo sh -c 'echo "deb [arch=amd64] https://apt-mo.trafficmanager.net/repos/dotnet-release/ xenial main" > /etc/apt/sources.list.d/dotnetdev.list'
$ sudo apt-key adv --keyserver hkp://keyserver.ubuntu.com:80 --recv-keys 417A0893
$ sudo apt-get update
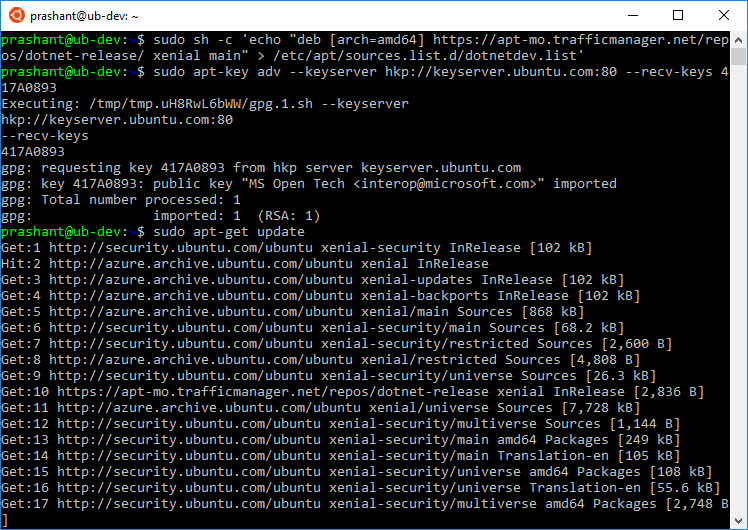
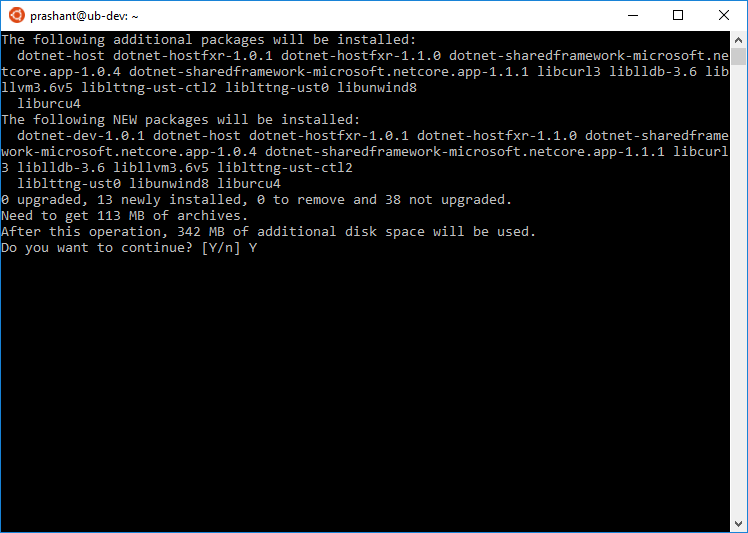
After the update is completed, you are good to install the latest version of .NET with this simple command.
$ sudo apt-get install dotnet-dev-1.0.1
Once the installation is completed, create a new directory with any name of your choice. I give it a name testApp and cd into the new directory like so.
$ mkdir testApp && cd testApp
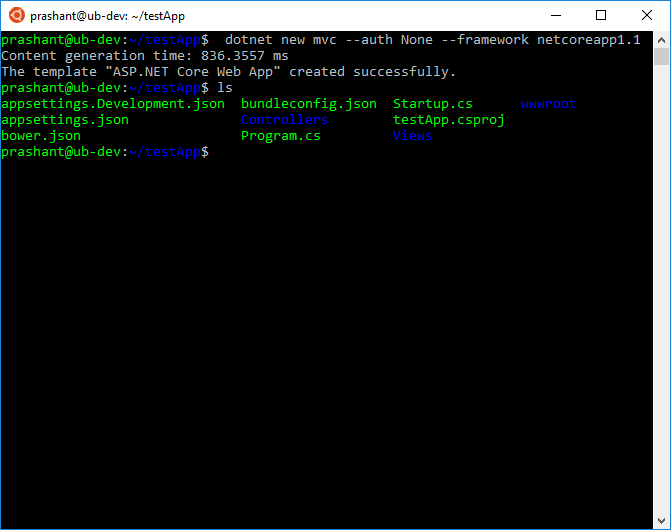
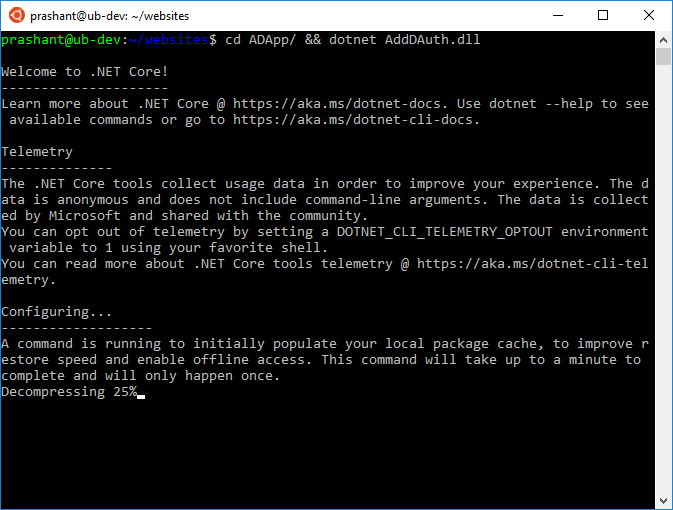
Because I am going to execute the dotnet command for the first time, dotnet CLI utility will populate the local package cache to improve restore speed of the packages and to enable offline access. Inside the testApp directory create a new web app by executing the below command.
$ dotnet new mvc --auth None --framework netcoreapp1.1
Here I am telling the dotnet command utility to create a new application by using the mvc as a template with no authentication of any kind and targeted framework version is 1.1. Now if I do ls in the directory I will see the following contents.
Next thing to do is to restore the packages with restore command.
$ dotnet restore
After the restore is complete, let’s run the application and check if it runs properly or not. To check this we can run the command
$ dotnet run
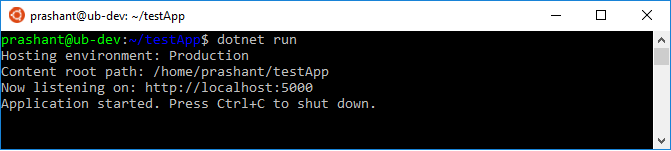
Our web application is now running on the VM. Now let’s try to access it from the local browser with the web address like this.
http://<ip-address-of-the-vm>:5000
You will notice that you cannot reach the site you have it running on the VM. This is because of many reasons when working with VM. First the port 5000 is not accessible from outside. I have to create a firewall exception to make it accessible from outside. Even if I want to do that, it still not a good idea to have your site visitors to use 5000 as a port address along with the domain name. To overcome this issue and to have a more control over the web server, I now need to install a web server which acts as a reverse proxy for my .NET core application running on VM. One more thing I would like to highlight here is that when I execute the above command you can notice that the terminal window is now hanged up with the dotnet server running. If I terminate the command, it will also terminate my application. I will show you how to overcome this issue in the section where I am going to configure the Nginx server to serve as a reverse proxy for my application.
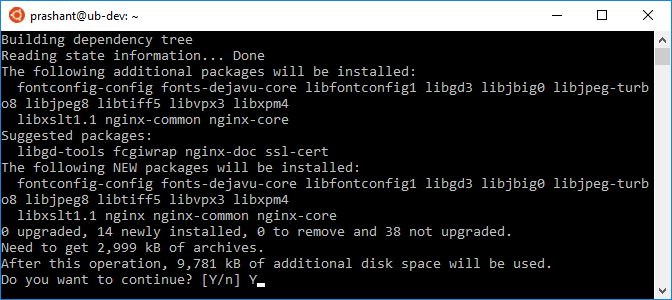
Internally .NET Core used Kestrel Server and is installed by default with the project. I cannot use it as a production ready server to host my application and therefore I am going to install Nginx web server and then configure it as a reverse proxy. To install Nginx I am just going to use a simple apt-get command to install it and then start the service.
$ sudo apt-get install nginx
$ sudo service nginx start
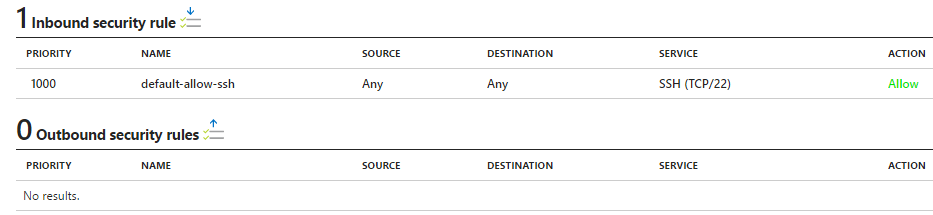
After the installation is done, I should be able to access the default web page delivered by Nginx server by typing the IP address of the VM. If you try this now, it will not work because of the VM Network Security Group in Azure will not let you access it. By default only SSH connections are allowed to the VM. I want to have the HTTP as web applications work on HTTP. Under Network Interfaces of the VM, click on Network Security Groups. Here you can see the Inbound and Outbound security rules. Under Inbound Security Rules, you can see that there is only one rule which is allowing you to have a SSH connection with the VM.
Under Settings, click Inbound security rules and then click Add to add a new inbound rule.
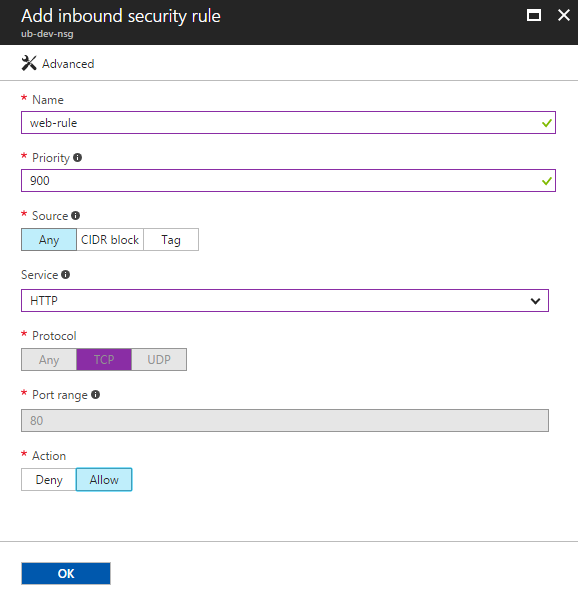
I have selected the HTTP from the Service dropdown. This will automatically set the Protocol, Port range and Action. Click OK to set the rule.

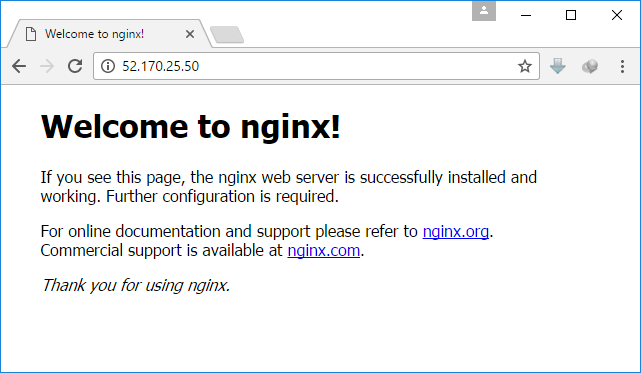
Let’s try accessing the web page again and this time I should be able to see the default Nginx web page.
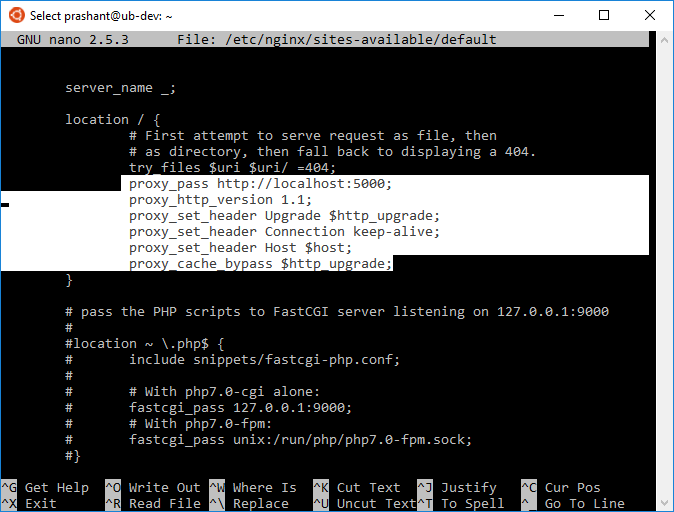
Time to configure the web server as a reverse proxy for my web application. Open the config file from the below location.
$ sudo nano /etc/nginx/sites-available/default
Add the below lines in the config file. The configurations I added are pretty self-explanatory. I recommend reading the complete configuration of Nginx here.
If you made the changes when the server was running then either restart the server to reload the settings or execute the below command to reload the settings without restarting the server.
$ sudo nginx -s reload
To publish the website, you also have to publish it with release configuration. With .NET Core, there are 2 ways of doing it. The .NET Core Guide states 2 methods of deploying the web application.
As per the documentation FDD and SCD are described as follows:
For an FDD, you deploy only your app and any third-party dependencies. You don’t have to deploy .NET Core, since your app will use the version of .NET Core that’s present on the target system. This is the default deployment model for .NET Core apps.
For a self-contained deployment, you deploy your app and any required third-party dependencies along with the version of .NET Core that you used to build the app. Creating an SCD doesn’t include the native dependencies of .NET Core on various platforms (for example, OpenSSL on macOS), so these must be present before the app runs.
Based on the documentation and as I have already installed .NET Core on the VM, I am going with FDD approach. As said, this is the default deployment model and therefore, I am going to zip the publish content and FTP to the VM.
In my last post, I have build the application where I have integrated the Azure AD authentication in .NET Core web application. I will use the same application and publish it with Release configuration on my Windows machine and zip it. Here are the content of the release publish folder.
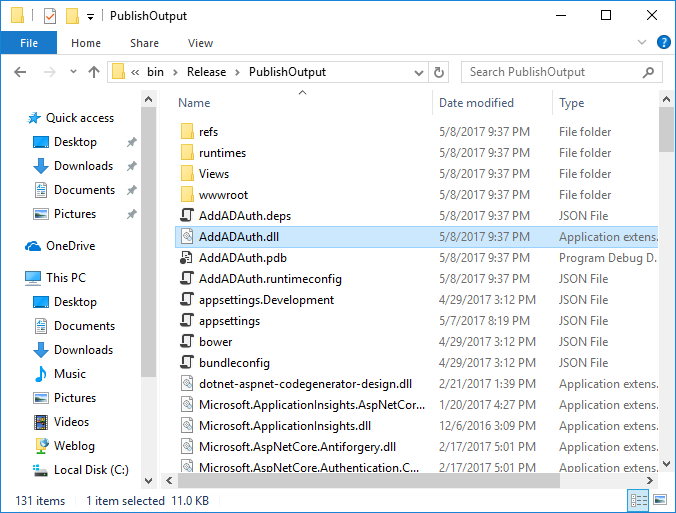
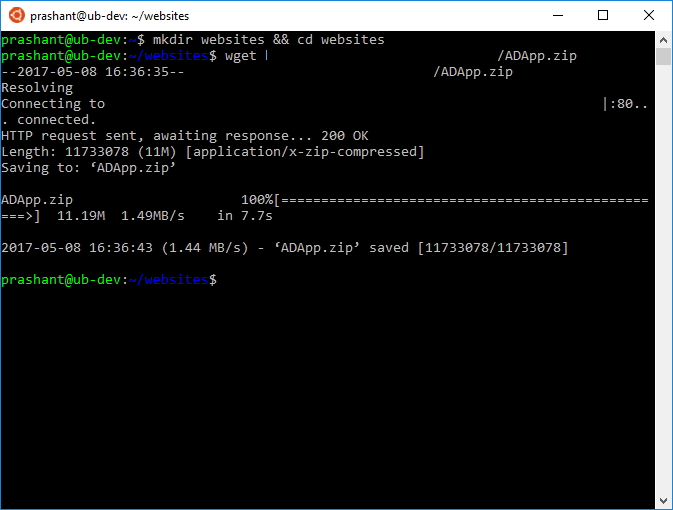
Now I can upload this to the VM. I have FTP already with me and therefore I am not configuring it on the VM. If you want to have a FTP server look no further than FileZilla Server. Execute the wget command to download the zip file.
$ wget/ADApp.zip
By default, unzip command is not installed on the VM, install it by using the below command.
$ sudo apt-get install unzip
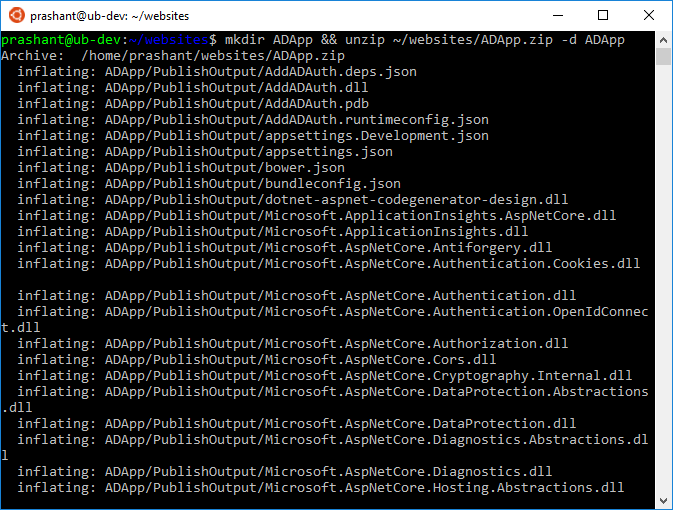
Extract the zip file in a directory name ADApp by executing the below command.
$ mkdir ADApp && unzip ~/websites/ADApp.zip -d ADApp
Change the working directory and try to run the application so ensure that the publish was successful.
$ cd ADApp && dotnet AddADAuth.dll
Note that the directory structure is bit different in the screen shot and the below screen shot. This is because I have copied all the files and folders from the PublishOuput folder into the ADApp folder root.
When you run the application for the first time, you will notice the application will not start just like that. .NET Core CLI utility will first configure the environment and then the application is being executed.
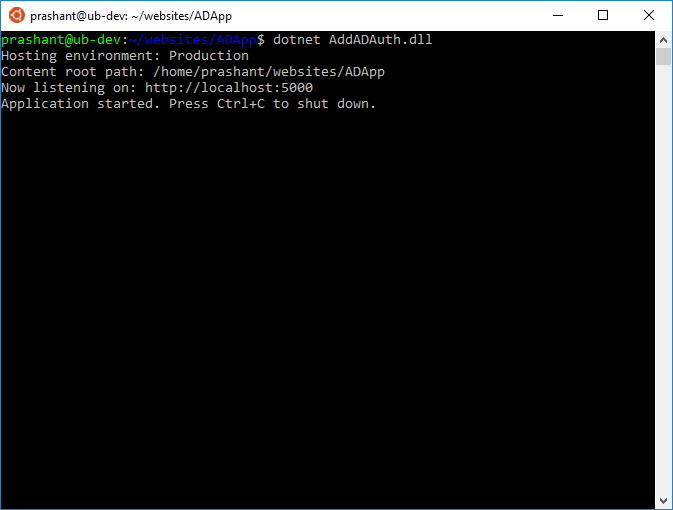
To execute the web application, run the below command. The dll file is the one which is being executed by the .NET Core runtime environment.
$ dotnet AddADAuth.dll
The application started successfully on local server on port 5000.
But there are problems when I run the application like this. One problem is that the command line is now occupied and I cannot do anything. If I terminate the process than the web application will also stop and I will not be able to browse the site. The second problem is that i have configured Nginx web server to power my web application. The internal .NET web server is not something I can use in the production environment. In short, I need this application to be running by .NET Core web server on port 5000 like so but it should not hang up or limit me to use the command line. To overcome these two problems, I can either use nohup command or I can use something more powerful like supervisor. For now I am sticking with nohup as this is just a sample application. When I want to have more control I will switch to supervisor. Here is the nohup command in action. Giving me the terminal control back after I execute the dotnet command.
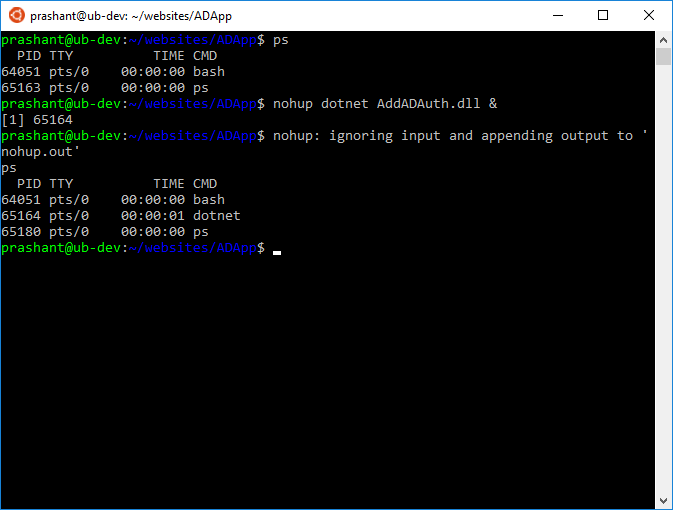
You can notice that first I execute the ps command to list down the processes running in the background. Then I execute the dotnet command with nohup and after that I execute the ps command one more time to check the running processes. You can see that I have the dotnet process running with process ID as 65164.
Just like at the time of configuring Nginx, I have checked whether I was able to access the default page of Nginx from my browser or not, I will now enter the IP address of my VM and this time I should be able to see my AD authentication application running.
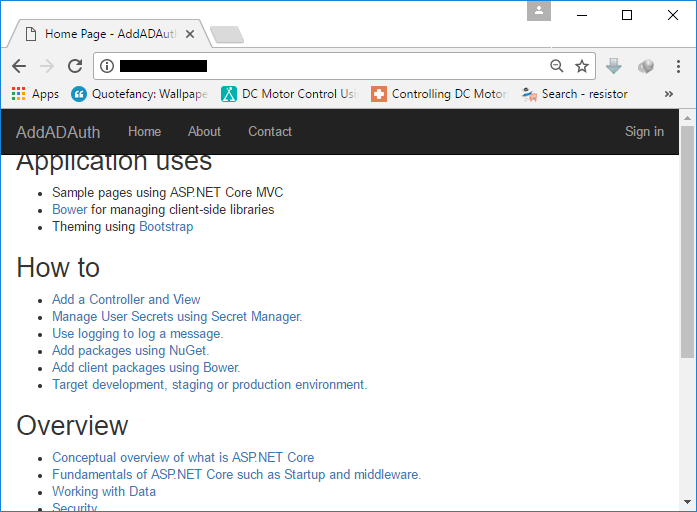
The CSS is bit off in the web application and that is because of the inner URLs need to be configured with the different host name.
Now I have hosted a ASP.NET Core web application in a Linux VM in Azure. The web server I am using is Nginx. Currently I am accessing the web application by IP address of the VM but now I want to access it with a recognizable name. I have a parked domain with GoDaddy called theevilprogrammer.com. I want to associate this domain name to my web application and to do that I just need access to my VM and GoDaddy account.
Go to your domain registrar from where you can access the DNS settings of your parked domain. In my case it is GoDaddy. Select your domain and click on Manage DNS.

I have an A record in the DNS management of my domain. All I have to do here is to change the Value to point to the IP address of the VM. Once this is done, click the Save button.
Restart the Nginx server by running the below command. This will reload the configuration and apply those configurations which we have changed. Now I can check whether I am able to access my site with the domain name I have configured or not.
$ sudo service nginx restart
Open browser and type in the domain name which in my case is theevilprogrammer.com.
So this is how you can also run your .NET Core applications from the VM. Do keep this in mind that there are lot of Nginx configuration and Azure VM configurations you have to set before you go to production. This post is something which can get you started with your own application hosted on a Linux VM in the cloud but there are still lot of little and important things that you have to perform before going to production.
Visual Studio has made integrating of Azure Active Directory authentication in web applications very simple. If you are creating the application and want to integrate the AD authentication then it is a pretty easy task given that you have an Active Directory in Azure. But what if you have an application and it is out there running and now you want to change the authentication medium of your application so you can have better control and security of your web application. I already have an application and I want to integrate Azure AD authentication, hence I will not be able to change the authentication just like that. I have to manually make the changes to do so. So here it is what I have done to integrate Azure Active Directory in my ASP.NET Core web application.
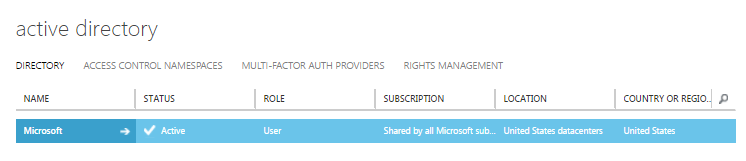
When provisioning a new Azure Active Directory you have to go to the old portal manage.windowsazure.com. At the time of writing this blog post, the product team is still in a process of migrating the complete AD feature sets from the old portal to the new portal. Therefore, to create a new AD in Azure, click the Active Directory in the left pane and you will be able to see all the active directories. In the below screen shot you can see that I am a part of Microsoft Active Directory as a User.
If you are planning to use any of the current Active Directory out of the one listed, you can click on it and register your application and users. Note that you have to be a Global Administrator to do that. If you want to create a new Active Directory, then click the NEW button at the bottom left corner to create a new Active Directory.
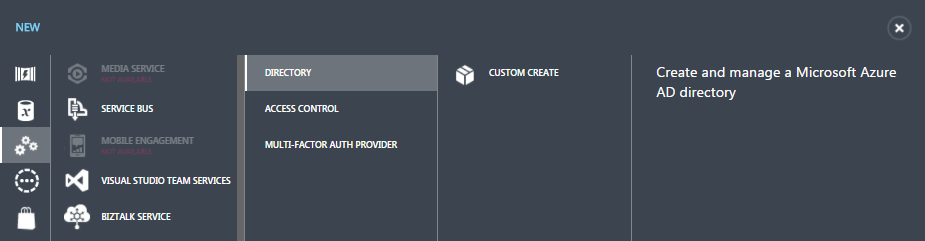
Click on CUSTOM CREATE and a new dialog box will appear in front of you to enter the name of your Active Directory.
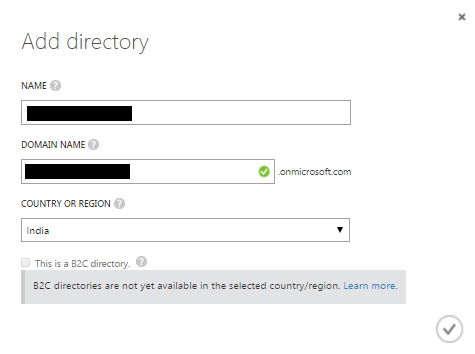
The green check box in the DOMAIN NAME denotes that the name you have chosen for your active directory is available. When done click the tick button or icon at the bottom right corner of the dialog box to create a new active directory.
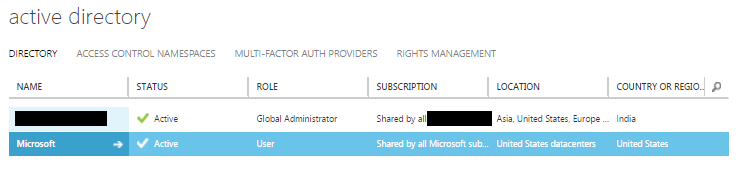
After the creation of active directory is successfully completed, you can see the new created active directory in the list. Notice the ROLE as Global Administrator. Click on the active directory name to view the details. First, I am going to add a new user to the directory. When inside the active directory, click the USERS which in the top of the page.

I can see a default user added to my new created active directory here which is my official Microsoft user. I cannot delete this user neither I can change much of the roles and other information of this user because it something which is being managed by Microsoft. So to add a new user, click the ADD USER button at the bottom of the page. This will open up a dialog box which allows you to add or create a new user to the active directory. In my case I am going to add a normal user not an administrator, I will keep the the default prompts. The whole process of adding a new user will take 3 steps to complete.
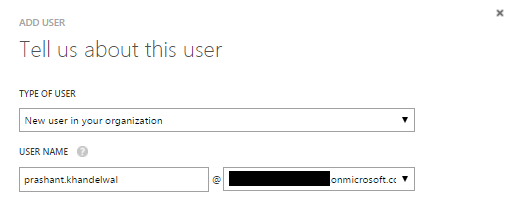
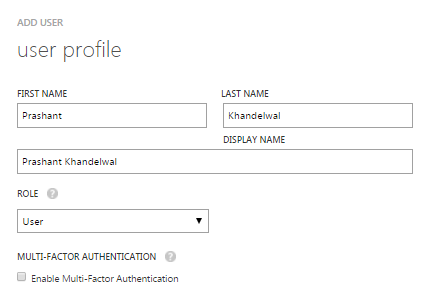
In the next screen enter the details about the user. I want to add this user as a normal user hence I am selecting User as a ROLE.
In the last step, click the create button to add a new user and generate a temporary password for the new user.
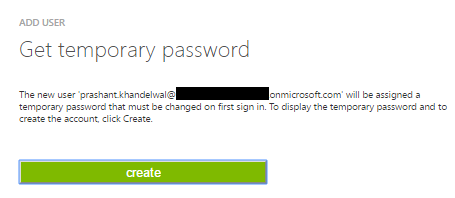
Make a note of this password somewhere as you will need it to log in to the account. After the first login, user is prompt to change the password.
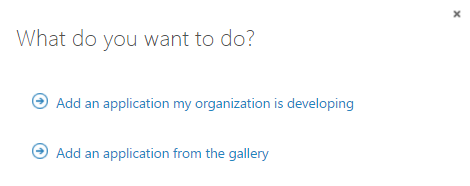
To add a new application, click on the APPLICATION link. Click the ADD button at the bottom of the page to add a new application and then click Add an application my organization is developing.
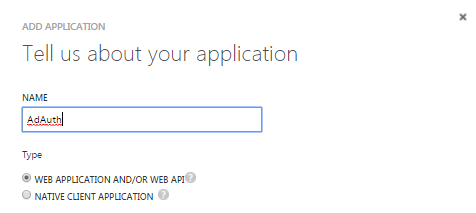
In the next step enter the name of the application and select the type of application you are building. In my case, it is a web application.
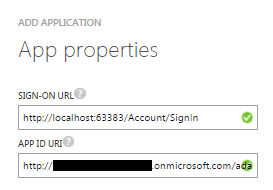
In the next step, you add a sign-in URL and app ID URI. The app ID URI I have added is in this format: http://<directoryname>.onmicrosoft.com/adauth. Replace the directoryname with your directory name. The adauth is the name of my application.
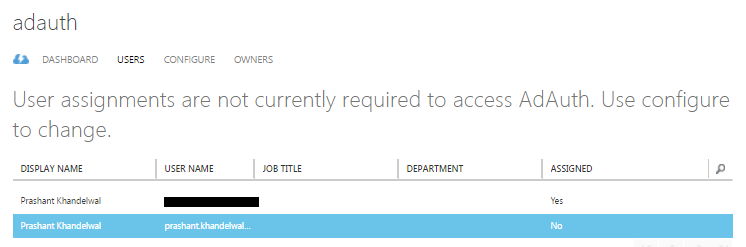
Once the adding of application is successful, click the USERS link. I can see the new user I have created in the user lists but it is not being assigned to the application yet. To do that, click the ASSIGN button at the bottom of the page and click YES. The ASSIGNED status will be changed from No to Yes.
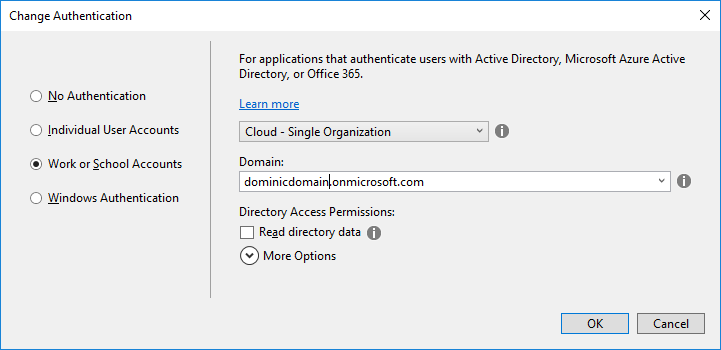
The easy way to set the application up for AD authentication is to create a new “demo” application and select Change Authentication from the new project dialog box. Select Work or School Accounts and enter the domain name. This will create a new application with all the things set up for your domain. The reason I said “demo” application because I want to just get the changes that Visual Studio does it for me when I select the AD authentication. This application will now act like a sample application from where I can take the implementation and add it to my existing application.
Here are the changes I have made to my existing application. As of now my existing application does not have user authentication and now as I want to implement, I will add the account controller and two views which will handle the authentication. In my case this is the account controller, you can name the controller as per your choice. Add two new views in the Views directory for your controller. Call them AccessDenied.cshtml and SignedOut.cshtml respectively.
Note that all the changes I am making to my existing application are exactly the same as the sample application.
Code for AccessDenied.cshtml view.
@{
   ViewData["Title"] = "Access Denied";
}

<header>
    <h1 class="text-danger">Access Denied.</h1>
    <p class="text-danger">You do not have access to this resource.</p>
</header>
Code for SignedOut.cshtml view.
@{
   ViewData["Title"] = "Sign Out";
}
<h2>@ViewData["Title"].</h2>
<p class="text-success">You have successfully signed out.</p>
Add below NuGet packages for AD authentication support in the application.
Install-Package Microsoft.AspNetCore.Authentication
Install-Package Microsoft.AspNetCore.Authentication.Cookies
Install-Package Microsoft.AspNetCore.Authentication.OpenIdConnect
In the .NET Core project, you will also see a new file called appsettings.json. Add the below configuration to it. Your configuration will than mine.
"Authentication": {
  "AzureAd": {
    "ClientId": "0d9h56ba-ccfd-42f2-9a75-64d8e96756e6",
    "AadInstance": "https://login.microsoftonline.com/",
    "CallbackPath": "/signin-oidc",
    "Domain": "dominicdomain.onmicrosoft.com",
    "TenantId": "d58e5363-f09c-4d65-9808-cd88396529f0"
  }
}
In the Startup.cs file, configure the request pipeline by adding the below code in the Configure method. I have added this code just after the UseStaticFiles() functions. This enables the application to use the cookie authentication and OpenId authentication.
app.UseCookieAuthentication();

app.UseOpenIdConnectAuthentication(new OpenIdConnectOptions
{
    ClientId = Configuration["Authentication:AzureAd:ClientId"],
    Authority = Configuration["Authentication:AzureAd:AADInstance"] + Configuration["Authentication:AzureAd:TenantId"],
    CallbackPath = Configuration["Authentication:AzureAd:CallbackPath"]
});
In the ConfigureServices method, add the below code.
services.AddAuthentication(options => options.SignInScheme = CookieAuthenticationDefaults.AuthenticationScheme);
In the AccountController.cs, add the below code.
[HttpGet]
public IActionResult SignIn()
{
    return Challenge(
        new AuthenticationProperties { RedirectUri = "/" }, OpenIdConnectDefaults.AuthenticationScheme);
}

[HttpGet]
public IActionResult SignOut()
{
    var callbackUrl = Url.Action(nameof(SignedOut), "Account", values: null, protocol: Request.Scheme);
    return SignOut(new AuthenticationProperties { RedirectUri = callbackUrl },
        CookieAuthenticationDefaults.AuthenticationScheme, OpenIdConnectDefaults.AuthenticationScheme);
}

[HttpGet]
public IActionResult SignedOut()
{
    if (HttpContext.User.Identity.IsAuthenticated)
    {
        return RedirectToAction(nameof(HomeController.Index), "Home");
    }

    return View();
}

[HttpGet]
public IActionResult AccessDenied()
{
    return View();
}
Add a new partial view in the Shared folder and name it _LoginPartial.cshtml just like we have in new default scaffold project.
@using System.Security.Principal
@using System.Security.Claims

@if (User.Identity.IsAuthenticated)
{
    var claims = ((ClaimsIdentity)User.Identity).Claims;
    var username = claims.FirstOrDefault(c => c.Type == "name")?.Value;

    //Uncomment the below code to see the complete email address of the user.
    @*<li class="navbar-text">Hello @User.Identity.Name!</li>*@
    <ul class="nav navbar-nav navbar-right">
        <li class="navbar-text">Hello @username!</li>
        <li><a asp-area="" asp-controller="Account" asp-action="SignOut">Sign Out</a></li>
    </ul>
}
else
{
    <ul class="nav navbar-nav navbar-right">
        <li><a asp-area="" asp-controller="Account" asp-action="Signin">Sign in</a></li>
    </ul>
}
Open _Layout.cshtml page, add the below line of code to render this partial view so users can sign in and sign out.
@await Html.PartialAsync("_LoginPartial")
And we are done! This is a minimalistic implementation that you can get start with. Azure Active Directory also provides groups and roles which you need to work with if you are working with the enterprise scale application where security is a major concern. You also have to tweak the code for that. Let’s try executing the application and see what happens when I try to authenticate the user for the first time.
When you land on the home page you can see the Sign in link at the top right of the web page.

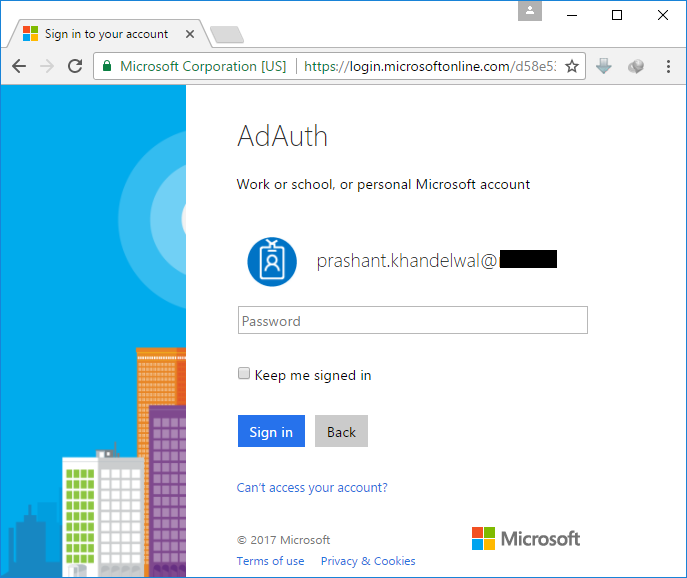
When you click on the sign in link, you will be redirected to the login.microsoftonline.com where you will be prompted for the user name and password. After the first successful login, you will be prompted to change the current password.
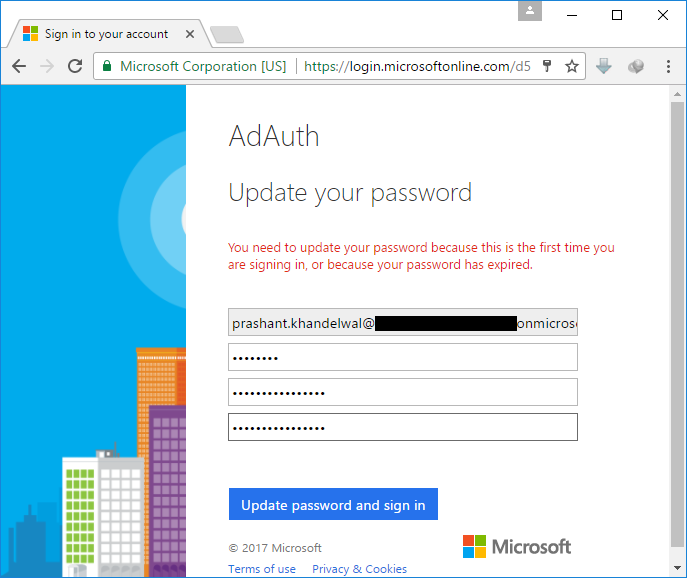
After the successful change of the password, you will be re-directed to the application with your user name as displayed at the top right corner.

I was planning to build a web based temperature/humidity monitoring app with Raspberry PI 3 and Windows 10 IoT Core. I have playing around with Raspbian for a while now and this time I wanted to try something different. I have been using Python to write application for Raspberry PI, Windows IoT Core with C# will be something new for me and therefore, this time I choose to go with Windows 10 IoT Core.

Here is the list of things to get started:
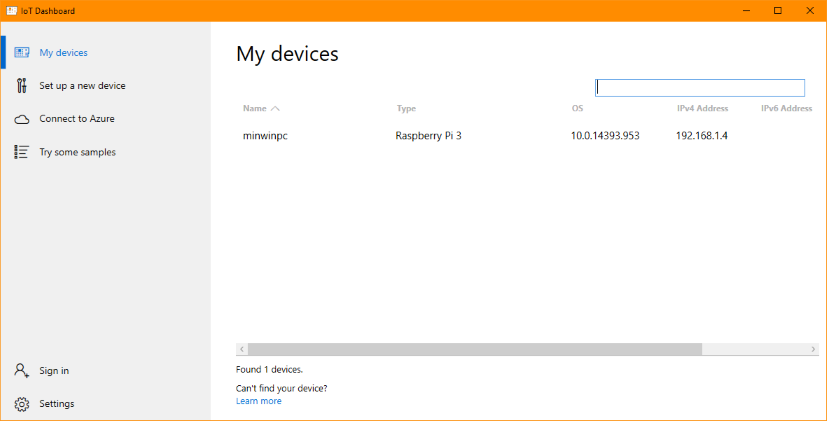
Setting up the PI with Windows 10 IoT Core is a very straight forward process. You can read about it more here. I recommend to connect the device to your Wi-Fi network. This will give you a benefit to move your device around. The problem for the first time users will be that the device will not auto-connect to the Wi-Fi network. To solve this problem, you need to use a wired LAN connection from the network or from the local computer. Once plugged in you will be able to see the device in the IoT dashboard from where you can go to Device Portal and connect to the Wi-Fi network. After the connection is successful, you can then remove the LAN cable. To follow the exact steps, head over to this documentation. This is how your device will get displayed in the IoT dashboard.
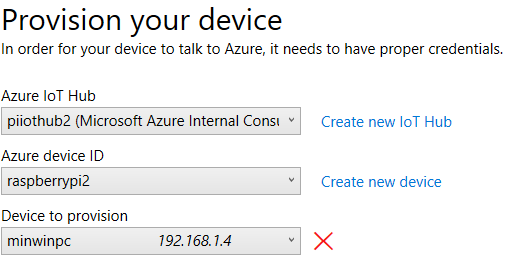
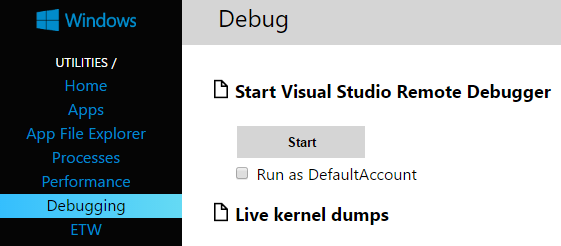
You can set up things in the cloud from the Azure Portal as well as from the IoT Dashboard itself. From dashboard you can create and provisioned a new IoT Hub and register the device in that Hub. Here is how you can do that. First sign-in to your Azure account by clicking the Sign-In option in the left hand side bar. After the sign-in is successful, you will be prompted with the below screen where you can provision a new IoT Hub and add your current device in the hub.
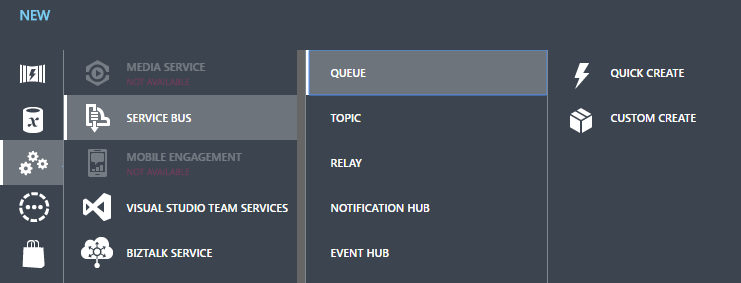
I am skipping the step for setting the IoT Hub from the Azure Portal as there is a good documentation available at Azure Docs. Pushing data to the IoT Hub with the SDK is easy but you can’t make use of the IoT Hub alone to read that data and do your work. Therefore, you also need to set up a Queue to read that data. As of now, you cannot create a Queue from the new Azure Portal instead you have to head towards the old portal at manage.windowsazure.com and create a queue from there. To create a queue, click the New>App Services>Service Bus>Queue>Quick Create. Fill in the details to create a new queue.
Make sure that the region you are selecting here for the queue, it should be the same as your IoT Hub region. If you select a different region than that of your IoT Hub, you will not be able to associate this queue with the hub endpoint.
In the Azure Portal, to associate this queue with the IoT Hub endpoint, click the Endpoints and then click Add to add the queue to the endpoint.
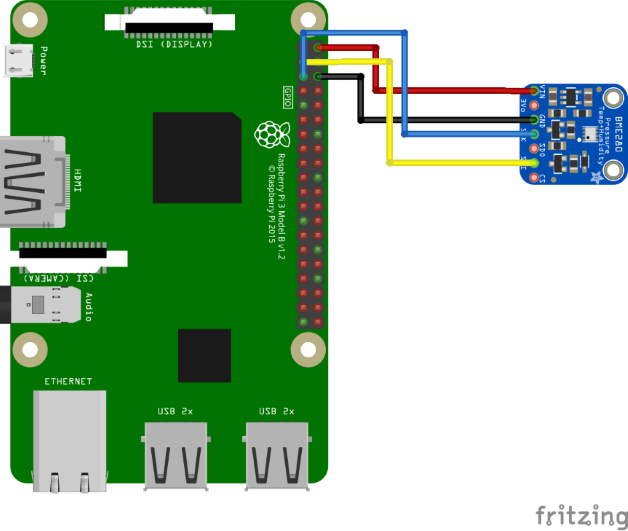
Now as you have the device and the OS ready, you can now build the circuit. The BME280 sensor can be used with both I2C and SPI. For the project, I am using I2C. Below is the Fritzing diagram for your reference. You can download the Fritzing sketch file on Github repo.
I am using Visual Studio 2017 Enterprise Edition to build the device application and the web monitor application which I will be hosting in the cloud. For creating the device application, start with selection the Windows Universal project templates and then select Blank App (Universal) template.
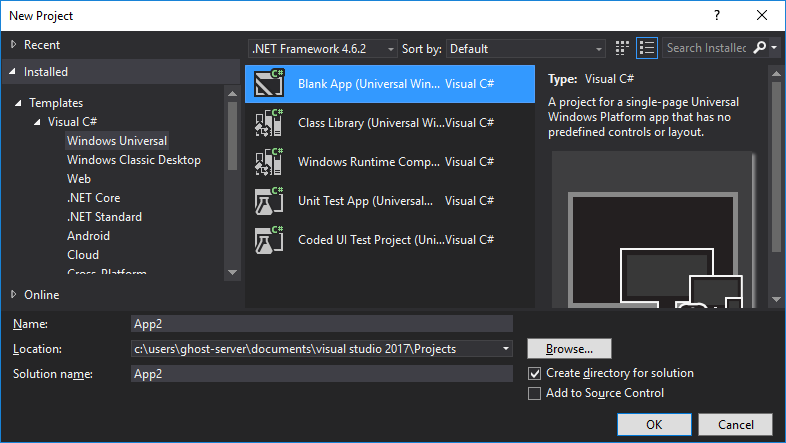
There is a project template available for Visual Studio which will let you build applications for Raspberry PI. The problem with that project type is that you will not be able to make use of the libraries or the SDK available for .NET yet. You can still build applications with this project type but you have to make use of REST API and using REST API is not as straight-forward as SDKs.
After the project creation is successful, you need to add below dependencies which will let you connect to IoT Hub and have a device to cloud communication. Below are the NuGet packages you need to install.
This package will enable you to have a device to cloud communication.
Install-Package BuildAzure.IoT.Adafruit.BME280
This package is the wrapper for the BME280 sensor.
Install-Package Microsoft.Azure.Devices.Client
Add the below namespaces in the Main.xaml.cs file.
using Newtonsoft.Json;
using Microsoft.Azure.Devices.Client;
using BuildAzure.IoT.Adafruit.BME280;
Declare the variables.
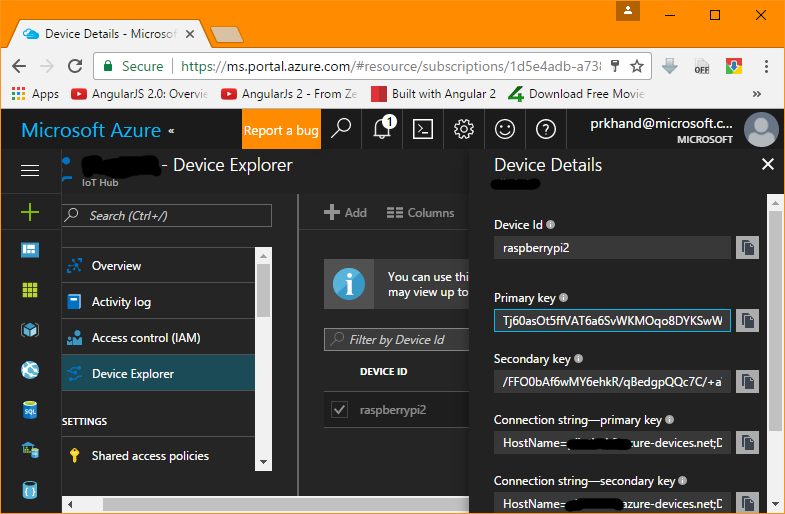
private DeviceClient _deviceClient;
private BME280Sensor _sensor;
private string iotHubUri = "piiothub.azure-devices.net";
private string deviceKey = "Tj60asOk5ffVAT6a6SvZKMOqo8DYKSwWV7eQ2pLf0/k=";
The iothuburi is the URL for the IoT Hub created in the Azure portal or from the IoT dashboard. You can get the device key from the Device Explorer section in the IoT Hub. You can see how to get the Key from the Device Explorer from the below screen shot. I am using the Primary Key as a devicekey in my code.
In the constructor, initialize the DeviceClient and BME280Sensor objects. I have commented out the InitializeComponent(), but if you want you can keep it as it is.
public MainPage()
{
    //this.InitializeComponent();
    deviceClient = DeviceClient.Create(iotHubUri, new DeviceAuthenticationWithRegistrySymmetricKey("raspberrypi", deviceKey), TransportType.Mqtt);
    _sensor = new BME280Sensor();
    DeviceToCloudMessage();
}
Now add a function named DeviceToCloudMessage which will connect to the IoT Hub using the device key, read the sensor data, serialize the data in JSON format and send it to the IoT Hub. Add this at the very bottom of the constructor.
private async void DeviceToCloudMessage()
{
    await _sensor.Initialize();
    float temperature = 0.00f;
    float humidity = 0.00f;
    while (true)
    {
        temperature = await _sensor.ReadTemperature();
        humidity = await _sensor.ReadHumidity();
        var sensorData = new
        {
            date = String.Format("{0}, {1}, {2}",
                                 DateTime.Now.ToLocalTime().TimeOfDay.Hours,
                                 DateTime.Now.ToLocalTime().TimeOfDay.Minutes,
                                 DateTime.Now.ToLocalTime().TimeOfDay.Seconds),
            temp = Math.Round(temperature, 2),
            humid = Math.Round(humidity, 2)
        };
        var messageString = JsonConvert.SerializeObject(sensorData);
        var message = new Message(Encoding.ASCII.GetBytes(messageString));
        await deviceClient.SendEventAsync(message);
        //Debug.WriteLine("{0} > Sending message: {1}", DateTime.Now, messageString);
        Task.Delay(5000).Wait();
    }
}
The date property in the sensorData type is being set in this specific way because we want to see the graph continuously moving. I can also read Pressure from the sensor but as I am not interested in showing this data, I am skipping it out. If you want you can use it but you also have to change the web app to show this reading. Before I can send this data to the IoT Hub, I am serializing the sensorData object and use ASCII encoding to get the byte[] and pass it to the Message class constructor. The last step is to send the message to the hub by using the DeviceClient class SendEventAsync method. In the last line I am adding a delay of 5 seconds between each reading. You can increase the time and see how the chart renders. I recommend not to go below this time delay as this might give you some false readings from the sensor.
I took this code from the documentation here and tweaked it to have the real data from the sensor connected to the device. Press Ctrl+Shift+B to build the solution. Navigate to Project and then click <project> Properties. Under Debug section, set the Start Options as shown below. Notice that the Platform is set to ARM and Configuration is Active (Debug). When you are done with debugging the code and ready to deploy the code to the device you need to change it to Release.
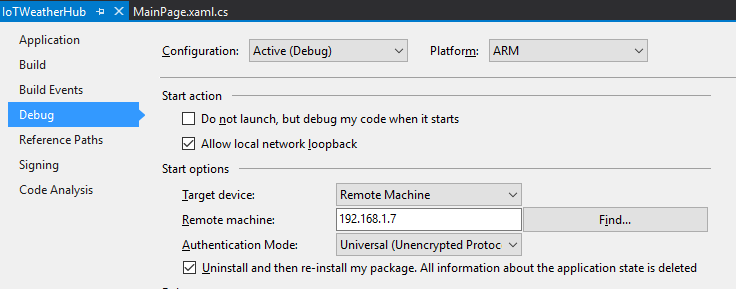
Unlike Raspbian, where we ssh or RDP into the device and compile or build the code, Windows 10 IoT works in a different way. You need to remote deploy the application from Visual Studio. Also, if you have enabled the remote debugging on the device, you also have to add the port number to the Remote Machine value and set the Authentication Mode to None.
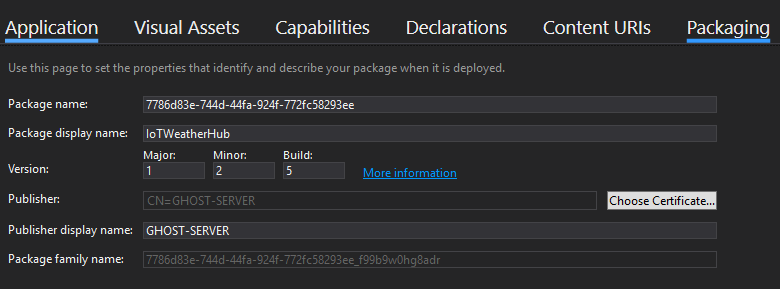
NOTE: When you make changes to device application, you also need to change/increment the version of the application in the Package.appxmanifest file. If you miss this step then the application deployment will fail.
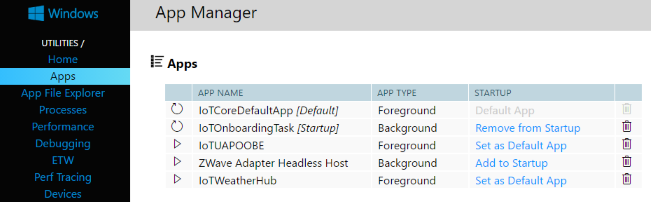
To deploy the app to the device, click the Build menu and select Deploy <Project Name>. If you are deploying the application for the first time, it will take some time to get deployed. After the deployment is successful, you will see the application under the App section. At this moment, the application is stopped. To start the application in the, click the Play button in the list to start the application. The App Type show the type of application or you can say the mode it is running on. When I created the application, I selected the UWP application and therefore, it will always run in the Foreground type. The reason I choose this application type (UWP) is because I can then use the SDK to communicate with the IoT Hub. If you want to create a Background application type then you can download this Visual Studio Extension for 2017 and this for Visual Studio 2015 which will let you build the background application. Keep in mind that you cannot use any SDK library with this project type. All you have now is the power of REST API which is not very easy to use.
You can build any kind of app to visualize the data, but because the SDK support for .NET is good I am going to set up a simple MVC application using .NET Framework. As of now, you cannot use Azure SDK with .NET Core application and also it looks like the team does not have any plans to shift their focus for releasing the SDK for .NET Core anytime soon.
Start with installing NuGet packages. First with the package that will let you read the data from the Queue.
Install-Package WindowsAzure.ServiceBus
Because this is a real-time application you also need to install SignalR
Install-Package Microsoft.AspNet.SignalR
After these packages are installed, You need a way to visualize the temperature and humidity received from the queue. To do this you can use any jquery chart plugin or any other library of your choice. I will be using Google Charts in my app, Line Charts to be precise. Installation is straight forward for the charts and you can play around with different options to tweak the look and feel of the chart. I am going to add the chart code in the Index.cshtml file. Below is the complete code for the chart to render.
<script type="text/javascript" src="https://www.gstatic.com/charts/loader.js"></script>
<div id="chart_div"></div>
<script>
    var data = [];
    var chart;
    google.charts.load('current', { packages: ['corechart', 'line'] });
    google.charts.setOnLoadCallback(loadChart);
    var hub = $.connection.ioTHub;
    $.connection.hub.start();
    hub.client.iotHubNotification = function (d) {
        console.log(d);
        var pi = JSON.parse(d);
        var time = pi.date.split(',');
        var temp = pi.temp;
        var humid = pi.humid;
        data.addRows([[[parseInt(time[0]), parseInt(time[1]), parseInt(time[2])], temp, humid]]);
        var options = {
            height: 250,
            hAxis: {
                title: 'Time'
            },
            vAxis: {
                title: 'Temperature / Humidity',
                gridlines: { count: 22 }
            }
        };
        chart.draw(data, options);
    };
    function loadChart() {
        data = new google.visualization.DataTable();
        data.addColumn('timeofday', 'Time');
        data.addColumn('number', 'Temperature');
        data.addColumn('number', 'Humidity');
        var options = {
            height: 250,
            hAxis: {
                title: 'Time'
            },
            vAxis: {
                title: 'Temperarture / Humidity',
                gridlines: { count: 22 }
            }
        };
        chart = new google.visualization.LineChart(document.getElementById('chart_div'));
        chart.draw(data, options);
    }
</script>
I make use of the sample code from the examples at Google Charts and used it along with some minor tweaks to suite my needs. loadChart() function is called for the first time when the page is loaded and then I have a SignalR hub which updates the chart with the same option sets that I have in the loadChart() function. I add 3 data columns to display the data in the chart. There are few things that I would like to talk about in the above code. First is the timeofday is displayed on a X-Axis because time is continuous and I want to update the chart with time. Second, the gridlines property of the vAxis let you set how many horizontal rows you want to see in the graph. I have increased it to quite a significant number because I want to see the graph in more detail. You can play around with these settings and see what looks better for you. Third, the response I receive in the hub is in string format and therefore, I have parsed that string to JSON in order to read it and set to the rows. Also note that I have leave the console.log in the above code so that when you run the web app you can see the raw data in the console.
In the HomeController.cs, first I will set the connection string to the queue which I have associated with the IoT Hub endpoint in Azure and set the queue name along with the IHubContext for SignalR communication.
private string connectionString = "Endpoint=sb://iothubqueue-ns.servicebus.windows.net/;SharedAccessKeyName=RootManageSharedAccessKey;SharedAccessKey=88kJcD1mvJnO1jtiiY+AcUtIoinW//V/lF2WicOJ50s=";
private string queueName = "iothubqueue";
private IHubContext _hubContext;
In the constructor, initialize the IHubContext object.
_hubContext = GlobalHost.ConnectionManager.GetHubContext<IoTHub>();
Here is the code for the IoTHub class:
using Microsoft.AspNet.SignalR;
namespace IoTHubTempWebApp.Hubs
{
    public class IoTHub : Hub
    {
        public void IoTHubNotification(string value)
        {
            Clients.All.iotHubNotification(value);
        }
    }
}
And the code for Startup class (Startup.cs)
using Microsoft.Owin;
using Owin;
[assembly: OwinStartup(typeof(IoTHubTempWebApp.Startup))]
namespace IoTHubTempWebApp
{
    public class Startup
    {
        public void Configuration(IAppBuilder app)
        {
            app.MapSignalR();
        }
    }
}
In the Index ActionResult, I will start a task which will read the messages from the queue and then SignalR will broadcast it to the client side which in turn update the chart with the latest data or temperature/humidity readings.
public ActionResult Index()
{
    Task task = Task.Run(() =>
    {
        QueueClient client = QueueClient.CreateFromConnectionString(connectionString, queueName, ReceiveMode.ReceiveAndDelete);
        client.OnMessage(message =>
        {
            Stream stream = message.GetBody<Stream>();
            StreamReader reader = new StreamReader(stream, Encoding.ASCII);
            string s = reader.ReadToEnd();
            _hubContext.Clients.All.ioTHubNotification(s);
        });
    });
    task.Wait();
    return View();
}
First I create a QueueClient object with the connection string and queue name along with the ReceiveMode. I have set ReceiveMode to ReceiveAndDelete as I want to delete the data from the queue once it has been read. Though you have an option to have the data in the queue for the maximum of 7 days in Azure. The QueueClient has an OnMessage event which process a message in an event-driven message pump, which means that as soon as the something is being added to the queue, this event is fired. I get the message body in the form of Stream, read the message to the end and pass the message to SignalR hub which in turn updates my chart in real-time. Here is the final output I have now.
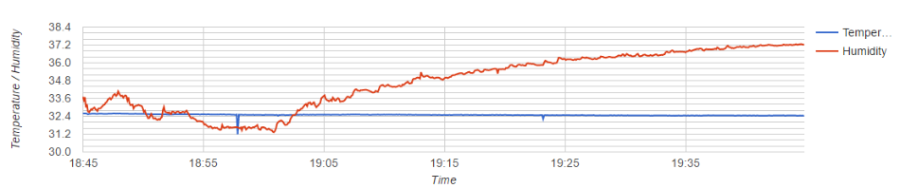
If you look closely, you will notice that the temperature line is not as smooth as you thought it would be. This is because every time when Raspberry PI read the data from the sensor there is a slight change in the temperature only with a few decimal places. If you don’t like this then you can change the gridlines property of the vAxis in the chart. Also you can try changing the time delay on the device to see if that impacts the lines on the chart. try changing both time delay in the device application and the gridlines in the web application to see how the chart renders.